• Steel Soldiers now has a few new forums, read more about it at: New Munitions Forums!

  • Microsoft MSN, Live, Hotmail, Outlook email users may not be receiving emails. We are working to resolve this issue. Please add support@steelsoldiers.com to your trusted contacts.

Advice needed - new guy with MEP004A

Back-in-Black

Well-known member
296
277
63
Location
Louisiana
Notified 5 minutes ago - valve is removed and parts are on the way back to me. Guessing I'll get them next Wed or Thurs. Yahoo!

He charged me $65 with shipping! Couldn't have bought the extractor tool with shipping for that price!

I think he told me that he charges around $350 to rebuild one of these pumps.
 

Back-in-Black

Well-known member
296
277
63
Location
Louisiana
Parts arrived yesterday. Last night I put the rotor back in the chem dip and let it soak overnight without the delivery valve in it. I was afraid to put the valve back in w/o cleaning it as good as I could first so it wouldn't get stuck again. Pulled it back out of the dip this morning and washed and air dried it. Think I'm going to try cleaning the bore with gun cleaning kit (if I have something close to the right size) before I start reassembly. On a job site for the next few hours but should be back at the house early this afternoon-ish.
 

Back-in-Black

Well-known member
296
277
63
Location
Louisiana
Back at the house- have a question on the new weight basket. There was no paperwork or destructions with it. I think I have it positioned correctly in the picture below - does the small cut-out in the basket align with the stamped mark on the rotor (like I have it in the picture)? Or does it even matter?

I think I'm pretty much ready to put this thing back together. May do it tonight. Any tips? I think Ray70 mentioned a couple of tricks on how not to bust the large O-ring that goes around the head (between the head and the case?) and a way to keep from cutting the cup seals when putting it back on the motor?

20211111_135413.jpg
 
Last edited:

Guyfang

Moderator
Staff member
Moderator
16,777
24,103
113
Location
Burgkunstadt, Germany
For the cup seals, I always used some grease, and tried to push it onto the shaft easy, without forcing it. Try to get it on straight. Its rarely a matter of cutting the seals, its a matter of folding the outside cup seal over. Your first clue will be when the oil dip stick starts to pump diesel out! Ray will I am sure also have a tip for that also.
 

Back-in-Black

Well-known member
296
277
63
Location
Louisiana
Is it normal to leave the drive shaft in the motor? Following the steps in the TM, this is the way I ended up. Maybe I missed something or is this the way it's done? Seems like it would be easier to reassemble with the shaft out? I guess I can still pull it out if I should...

I got a lot of it put back together last night. At the point where I am putting the governor arm back in the body now. Guessing I will finish it today sometime.
 
Last edited:

Back-in-Black

Well-known member
296
277
63
Location
Louisiana
Well, it's reassembled and ready to reinstall except for the input shaft cup seals and whether or not to pull the shaft from the motor first...
 

Ray70

Well-known member
2,595
5,914
113
Location
West greenwich/RI
Don't pull the shaft out, just put the 2 new seals on the shaft. make sure they are oriented correctly. Then grease them up good like Guy mentioned. Then slowly slide the pump over the shaft. You will probably need to use a small pick or screwdriver to get the first seal started into the pump bore without it folding over or something.
Did your weight basket come already marked with the timing mark?
And also take a look at the orientation of the 2 notches inside the pump compared to the orientation of the flat tab on the shaft, just to be sure everything is aligned correctly.
 

Ray70

Well-known member
2,595
5,914
113
Location
West greenwich/RI
Once you have it installed, I would hook up the fuel line and leave the returns disconnected for now.
fill the day tank and let it drain into the pump housing to push out most of the air and fill up the pump.
With the returns connected it can be had to get fuel to drain into the pump body because the check ball in the t-fitting tends to block off the air from escaping.
 

Back-in-Black

Well-known member
296
277
63
Location
Louisiana
Don't pull the shaft out, just put the 2 new seals on the shaft. make sure they are oriented correctly. Then grease them up good like Guy mentioned. Then slowly slide the pump over the shaft. You will probably need to use a small pick or screwdriver to get the first seal started into the pump bore without it folding over or something.
Did your weight basket come already marked with the timing mark?
And also take a look at the orientation of the 2 notches inside the pump compared to the orientation of the flat tab on the shaft, just to be sure everything is aligned correctly.

I had to make a timing mark on the new basket. Made it with a chisel - worked pretty well.

Thank you for all your help with this!!!
 

Back-in-Black

Well-known member
296
277
63
Location
Louisiana
Once you have it installed, I would hook up the fuel line and leave the returns disconnected for now.
fill the day tank and let it drain into the pump housing to push out most of the air and fill up the pump.
With the returns connected it can be had to get fuel to drain into the pump body because the check ball in the t-fitting tends to block off the air from escaping.

Will do - although I'm just using a 5 gallon diesel can for now LOL. Hoping to pull everything off the skid platform so I can get all that sandblasted. It's in pretty bad shape and I'm at a place where only 5 bolts remain left to remove to get the engine and the main alternator assembles pulled out. Plan to pull it all as one unit and set it on some 2x4's or such while the skids are being blasted.
 

Back-in-Black

Well-known member
296
277
63
Location
Louisiana
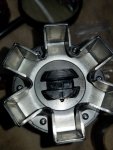
Timing marks, drive shaft position and rotor positions all lined up beautifully.

Was a little tough getting the pump over the first oil seal without folding it over - especially in the back between the pump and the motor where you can't see. But I was able to feel the start of a potential fold over with my fingers and get it tucked in before going any farther.

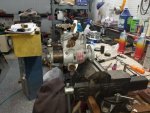
The pump is on, the timing inspection plate and alternator mount are on. Working on getting the injector lines back on now. I pulled them all (even though I REALLY didn't want to) so I'd have more room to work while re-installing the pump.

20211112_152227.jpg

Timing marks in the vise:

20211112_151254.jpg

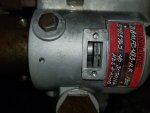
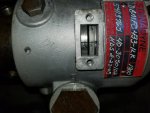
timing marks installed on the motor:

20211112_154928.jpg


I'll look better in the TM but so far I haven't found the part on how to adjust the speed- droop thing. I know it's gotta be off because I had to unscrew the whole thing to get it out. Any tips there?
 

Back-in-Black

Well-known member
296
277
63
Location
Louisiana
It is ALIVE!!!!!


Link to video on youtube:


Got everything put back together, hooked up fuel and batteries. Turned the fuel pump on to fill the IP. It really surprised me. I was watching the loose return lines for fuel indicating that the pump was full and the electric pump wasn't doing it. So I started turning it over with my hand held switch and was still watching the return lines. I only turned it over for a minute or so and still no fuel at the return lines.... but I had fuel at the injectors! (I had left all 4 lines connected but loose at the injectors to bleed air). Anyway, tightened up all 4 injector lines, hit the starter again and in about 5 seconds, it was running! Loping / hunting a good bit but I figure it still had a good bit of air here and there and the throttle was set to dead idle too. Shut it off after a few seconds (shut off solenoid works too!), filled the radiator back up - I have LOTS of leaks - and restarted it. Started instantly. Jacked up the RPM a little and let it run for maybe a minute, probably less, and it smoothed right out. Haven't let it run more than 2 minutes total but I'll do that tomorrow when I have some light. You can see at the end of the video I posted that the IP filled up and the return port started spewing fuel - that's when I shut it off. Ran it that one more time after this video and after I hoked the return lines up and bump the throttle a little.

Tomorrow I'll get my meter and look to see if I'm making any power.

It only took a month and a half but it runs, thanks to you guys!! I seriously doubt I would have tried to tackle that IP without all of your help!!

Got a long way to go but I feel like I will get there now.... eventually LOL! Heck, I'm not even finished taking crap apart yet!

Thanks again for all the help! I will keep posting progress on this thread and probably still be asking lots of dumb questions.

Oh, and so far, the dip stick hasn't blown out... so far.
 
Last edited:

Ray70

Well-known member
2,595
5,914
113
Location
West greenwich/RI
Excellent news! Keep making progress. Check your oil level now, then check it again after you have run it a little bit.
Keeping an eye out for an increase in oil level and the smell of diesel in the oil.
If the level stays constant then your umbrella seals are good. If the level starts to rise, you are leaking diesel into the crankcase.
I screw up my first one and had to re-do the umbrellas because the first one had flipped over.
 

Back-in-Black

Well-known member
296
277
63
Location
Louisiana
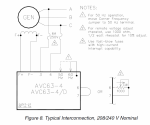
Filled the radiator back up (yes, it leaks that bad - mainly from the thermostat housing gasket) and hooked my meter to L0 and L1. No A/C voltage at all. Came back in to look at the connection schematic for the Analog Voltage Controller that's on there. This is the thing that they added that's supposed to excite the field. I gotta go check terminals 6 & 7 and see how they have that wired but I'm pretty sure this thing is also fried - or I have other problems.

See diagram below: I have no knowledge at all on how generators actually work and don't really understand how this AVC works. I'm confused about the exciter part. So does just spinning the armature make some voltage and then the AVC takes that voltage to excite the field to make more power. That's what I'm getting out of looking at the schematic below. There is no other source of power to the AVC other from the main alternator itself so I'm guessing it has to make a little power without being excited to run the AVC and give it something to use to excite the field???? If that's so, then where would I start looking for a problem? My meter, hooked to the L0 and L1 legs is reading dead 0 A/C volts. I'm confused as to how the AVC is supposed to get juice to excite the field if the alternator makes no power at all w/o being excited??? I'm about to walk back out there and check the 2 fuses they have on the legs (marked A & C below. I've seen the fuse holders but haven't opened them up yet.

AVC schematic.PNG
 

Back-in-Black

Well-known member
296
277
63
Location
Louisiana
Checked the fuses and terminals 6 & 7. One of the fuses is definitely blown. Old AGC, glass type fuses. Local auto parts store web site says they gave 7.5 amp in stock. The blown one was 10 amp which I'm guessing someone threw in there at some point. I figure if there's a blown 10A fuse in there, any damage from over-current is already done so a 7.5A should be fine. Think I'll put some circuit breakers in there when I start that phase of the project....

Terminals 6 & 7 appear to wired to the voltage rheostat on the control panel so that voltage can be adjusted from there.
 

Back-in-Black

Well-known member
296
277
63
Location
Louisiana
Excellent news! Keep making progress. Check your oil level now, then check it again after you have run it a little bit.
Keeping an eye out for an increase in oil level and the smell of diesel in the oil.
If the level stays constant then your umbrella seals are good. If the level starts to rise, you are leaking diesel into the crankcase.
I screw up my first one and had to re-do the umbrellas because the first one had flipped over.

Took a picture of the oil level on the dipstick. The motor still hasn't run more than a few minutes total as I try to figure out the generator part but I'll try to run it for 15 - 20 minutes at some point today. I need a way to check oil pressure before I let it run that long. Not sure I trust the gauges on the control panel yet.
 

Back-in-Black

Well-known member
296
277
63
Location
Louisiana
Got some fuses, got an oil press gauge. Oil pressure looks great at about 60 psi - which kind of seems high but I'll look it up in the TM. Also, as mentioned earlier, got quite a water leak!

Still no power at all. Got some reading to do. I still don't understand how you can energize a magnetic coil with power that doesn't exist until you energize the coil.... Kind of a chicken and egg thing in my brain right now. Time to start reading I guess.

Ran it for about 10 full minutes. Seems to run fine.


Top
AdBlock Detected

We get it, advertisements are annoying!

Sure, ad-blocking software does a great job at blocking ads, but it also blocks useful features of our website like our supporting vendors. Their ads help keep Steel Soldiers going. Please consider disabling your ad blockers for the site. Thanks!

I've Disabled AdBlock
No Thanks