• Steel Soldiers now has a few new forums, read more about it at: New Munitions Forums!

  • Microsoft MSN, Live, Hotmail, Outlook email users may not be receiving emails. We are working to resolve this issue. Please add support@steelsoldiers.com to your trusted contacts.

Advice Please: Planning 4L80 Conversion

FlameRed

Well-known member
Steel Soldiers Supporter
345
527
93
Location
Florida
Making more slow progress. Fuel tank is replaced without a lot of drama. Well except for a neighbor that posted the below. And the neighborhood Gestapo that sited me for working on my truck MY driveway.

pity.jpg

With no transmission sitting in there, I was able to remove to the two bolts for the exhaust flange on the drinker's side. I could get a wrench from the bottom along each side of the frame rail, feeling with my finger to get in seated, and the impact whirled them off.

But I am not confident I will be able to get the back of the new bolts to tighten them when I install the cross pipe with the tranny in place. Any mechanics tricks I can use and hold in place the new bolt on so I can tighten them later? I am thinking maybe put a dab of JB weld under the bolt now so maybe I can tighten the two nuts later? Any better ideas?
 

FlameRed

Well-known member
Steel Soldiers Supporter
345
527
93
Location
Florida
Just an update in case my experience is helpful to anyone else in the future.

Lesson 1: Don't try to use a cheap Chinese tranny jack that is powered by a manually operated 1/2" ratchet to lift one of these beasts! While lowering the old TH400 with the gearbox attached is no problem for one of these, getting the 4L80 up into position it is useless! Perhaps if I would have had a 36" 1/2" ratchet it would have been possible for this weakling! Next time, I will rent a hydraulic tranny jack to start with.

I just could not lift it manually using any ratchet or electric driver I had. using the cheap Chinese tranny jack So instead, I got to use 2 floor jacks that would not reach high enough, and then I would have to switch them out to to floor jacks with wooden blocks to get me the lift needed. 3 hours later, I did persevere and get it into position. So don't cheap out, or be lazy and go rent the proper jack to get-r-done!

Lesson 2: If you plan on changing out the tranny filter, and you want to remove the pan, make sure you do this before you install the cross member! The pan bolts are much easier to access without the cross member in the way! Of course there was one pan bolt that had its head rounded off just to keep me amused.

Lesson 3: I thought I would use the entire two-piece drive shaft from the 4L80 I got. The front part with carrier bearing, is the same size, but the rear part it about an 1 1/2" longer. What I did not notice was that the U-Joint on the front half that connects to the front axle is larger on the 4L80, so I could not mount it. Too bad as I installed a new carrier bearing on it before I noticed. So I am trying to use the original half shaft. But it won't be balanced to the 4L80 rear half! I guess it if bounces around I will have to take it to drive line place and have them balance it for me and press on a new carrier bearing while it is there.

The good news in breaking open the pan I did not see any shavings, grit or other garbage that would lead me to believe it might have problems.

I had to take breaks due to family commitments and the holidays so I figure another couple weeks and I should be ready to test it. Remaining tasks:

  • Install the wiring harness/tranny controller
  • Connect up the throttle position sensor
  • Dip Stick install
  • Fill it with fuild
  • Drive shaft install
  • Shifter install

I am just debating if I should attempt to install the exhaust crossover pipe, and remainder of the exhaust, before testing the 4L80, or run it without a crossover pipe just to make sure it spins? Yeah, it is going to be incredibly loud and the fumes will be aweful. But having to remove the two bolts on the pass side again would really suck if I later discover I need to pull it out for some reason?

And if anyone should need a working TH400, here is a good deal for ya: M998 3 speed 3L80 (TH400) and Gearbox – FREE! Pay-it-Forward
 
Last edited:

FlameRed

Well-known member
Steel Soldiers Supporter
345
527
93
Location
Florida
A minor set back that I can use some advice on please.

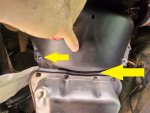
Looks like the flywheel dust cover for the TH400 is different than the 4L80? Now that I tried to mount the original TH400 dust cover the bolt holes seem to be off and it leaves a gap near the bottom of the 4L80.

Aside from rummaging around a local junk yard, can someone point me to a cover that might work? The ones I see on-line don't appear to match up either.
 

springer1981

Well-known member
844
1,150
93
Location
Maine
A minor set back that I can use some advice on please.

Looks like the flywheel dust cover for the TH400 is different than the 4L80? Now that I tried to mount the original TH400 dust cover the bolt holes seem to be off and it leaves a gap near the bottom of the 4L80.

Aside from rummaging around a local junk yard, can someone point me to a cover that might work? The ones I see on-line don't appear to match up either.
Is yours 1 piece or 2 piece?
 

springer1981

Well-known member
844
1,150
93
Location
Maine
Two piece
I bought the "right" ones for mine when I did the upgrade and when I had them side by side there was very little difference and I realized I could have just used my old ones. If I remember correctly there was 1 bolt hole that was different, I think it was one of the middle bolts on the small cover.

Do you have pictures of the fitment issues?
 

FlameRed

Well-known member
Steel Soldiers Supporter
345
527
93
Location
Florida
I bought the "right" ones for mine when I did the upgrade and when I had them side by side there was very little difference and I realized I could have just used my old ones. If I remember correctly there was 1 bolt hole that was different, I think it was one of the middle bolts on the small cover.

Do you have pictures of the fitment issues?
20221218_122657.jpg

Notice gap at right arrow, and missing bolt hole on left. The holes on the right side of the picture appear to be ok. I guess if I had good fab skills I could make it fit. But I don't!
 

springer1981

Well-known member
844
1,150
93
Location
Maine
4l80e takes a different cover, only early TH400’s were single piece, later on they went with 2 piece.
The 4L80e version can be had at HPG

I followed your link and was surprised at the cost, $303 on sale from $397. I know I didn't pay anywhere near that for mine so I started searching for my old order ....

receipt.JPG
 

Retiredwarhorses

Well-known member
Steel Soldiers Supporter
4,400
4,182
113
Location
Brentwood, Calif
I followed your link and was surprised at the cost, $303 on sale from $397. I know I didn't pay anywhere near that for mine so I started searching for my old order ....

View attachment 886592
Like everything else now, prices are all over the place, stuff that used to cost very Little has sky rocketed.
The only mfg of the 4L80e is GTP, I’m sure it’s something to do with AMG parts availability.
 

FlameRed

Well-known member
Steel Soldiers Supporter
345
527
93
Location
Florida
You can take a hot knife (I used an old knife heated with a torch) to "cut" the old kickdown cam down to the exposed pin, then simply insert a screwdriver and twist, the cam will split on the other side where the non exposed pin is leaving the pin in place and it being not necessary to try and beat the pin out of the shaft.
I wanted to post another question regarding installing the TPS so I don't make an expensive mistake.

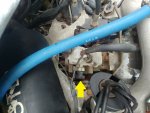
I got off the Fan CutOff Switch. There is a black cam for the Fan CutOff switch left on the shaft as shown below. I assume this black plastic cam needs to be removed. Sounds like I need to remove the cam, and I should not just take a screw driver and pry it off the end of the shaft. So I can basically melt off the black cam as described above to expose the shaft and I will be good to go?

I don't want to break anything!

20221221_101131_HDR.jpg


fan cutoff switch moved to the throttle bracket as done on the turbo trucks or moved to the rear left head as done on A2 trucks
I am a novice and I do not understand? So if I relocate the old fan cut-off switch to another location that does not on the shaft, the fan cut-off switch won't ever get activated? Is that ok? I guess I am not understanding if everything will be ok with the fans proper function with the switch effectively disabled?
 
Last edited:

Mogman

Moderator
Staff member
Moderator
Steel Soldiers Supporter
6,931
9,587
113
Location
Papalote, TX
This can be a chore, what I did was take an old (thin) butter knife, heated the end and "cut" that plastic piece where the pin comes through down to the shaft, then I simply put a screwdriver in that "cut" and twisted, the plastic piece split on the opposite side where the pin is and it just fell away, easy peasy!!
Otherwise you have to beat that pin out and then re-install it without that black plastic piece and that pin can be in there pretty tight (looks like yours has been in there a while)
There is a remote fan switch kit available. but IMHO anyone that intentionally goes deep water fording is a fool.
 
Last edited:

FlameRed

Well-known member
Steel Soldiers Supporter
345
527
93
Location
Florida
This can be a chore, what I did was took an old (thin) butter knife, heated the end and "cut" that plastic piece where the pin comes through down to the shaft, then I simply put a screwdriver in that "cut" and twisted, the plastic piece split on the opposite side where the pin is and it just fell away, easy pleasy!!
Otherwise you have to beat that pin out and then re-install it without that black plastic piece and that pin can be in there pretty tight (looks like yours has been in there a while)
There is a remote fan switch kit available. but IMHO anyone that intentionally goes deep water fording is a fool.
Thank you! I have a good soldering iron with a tip that is in bad shape so I used that it you are indeed correct - Easy Peeasy!

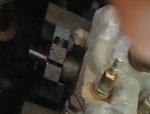
In case this helps someone in the future, here is what the shaft without the cam, with the pin remaining on the shaft. Problems just melt away with the knowledgeable people here!

20221221_110711_HDR.jpg

So I am once again on the right path :)
 

AAVP7

Well-known member
217
262
63
Location
Dortmund, Germany
The original Humvee 4L80 Throttle Position Sensor (TPS) won´t fit into this shaft end. But there are aftermarket TPS available that fit this setup.

The IP shafts on original 4L80 vehicles end with kind of blade end, like a screwdriver. If you want to use an original TPS, you´d need to change the IP shaft.

I did this on mine, but you´d have to open the IP for this. Special bits needed. Also, when reassembling the IP make 100 % sure to go exactly accoding to TM, otherwise the IP could cause a runaway diesel engine.

When I started my engine the first time after the swap, I had the tube to the air filter off, and a helper with a plate ready to plug the air intake in case of a runaway.
 

Mogman

Moderator
Staff member
Moderator
Steel Soldiers Supporter
6,931
9,587
113
Location
Papalote, TX
The TPS I used was the civilian application, There is a very common one that does not fit, I think this is the part, I will look back and see if I can find when I purchased it.
The wrong one is of course cheaper.
EDIT, yep, but was only $61 in mid 2021
 
Last edited:

FlameRed

Well-known member
Steel Soldiers Supporter
345
527
93
Location
Florida
The TPS I used was the civilian application, There is a very common one that does not fit, I think this is the part, I will look back and see if I can find when I purchased it.
The wrong one is of course cheaper.
EDIT, yep, but was only $61 in mid 2021
Looks very muck like the one I just used. The part number @springer1981 kindly provided me was GM TH160 which is now a lot more than when I bought it months ago.

I figured out the pinouts based on instructions provided by US Shift.com.

The US-Shift.com controller wants .22V minimum to auto detect idle voltage. I had the sensor cam just touching the key and it read 0V at "idle", so it appears I might have to adjust the sensor a bit to engage it a bit more to get the minimum .22v idle voltage so the Quick-4 can auto learn.

No big deal. Here is the procedure US-Shift provided: https://www.usshift.com/downloads/tps.pdf

Identifying the Terminals of an Unknown TPS

This is a procedure for identifying the correct terminal connections of any potentiometer-style throttle position sensor (almost all three-terminal TP sensors). A DVOM or analog Ohmmeter is required.

  1. Set the meter to resistance mode and set it to a scale that can read up to 10K or 20K Ohms (if it is not auto-ranging). Please keep in mind when setting up and reading the meter that "K" means thousands of Ohms. In other words, 15K Ohms is the same as 15,000 Ohms.
  2. Connect the meter to two pins at a time while operating the lever or cam of the TPS. Watch the meter while rotating the sensor. Check all three pairs of pins until you find a pair that does not change resistance when you rotate the sensor. The two pins that do not change resistance are the fixed ends of the resistance element (+5V and ground). The remaining pin that did change is known as the "wiper". It is the moving contact that slides along the resistance element to give the varying voltage. This is the output terminal of the sensor and should be connected to our green wire (Vehicle pin 3).
  3. Next, with the sensor at the idle or closed throttle position, measure the resistance between the wiper (output) and each of the end terminals (the two whose resistance did not change in step 2) of the sensor. The end terminal with the lowest resistance to the wiper (at idle) is the ground terminal, and should connect to the black main ground wire of the TCS (Vehicle pin 16). The terminal with the higher resistance to the wiper is the 5 volt reference input to the sensor and should connect to the orange wire (Vehicle pin 11) in our harness.
 

osteo16

Well-known member
Steel Soldiers Supporter
585
585
93
Location
Evansville, IN
Just an update in case my experience is helpful to anyone else in the future.

Lesson 1: Don't try to use a cheap Chinese tranny jack that is powered by a manually operated 1/2" ratchet to lift one of these beasts! While lowering the old TH400 with the gearbox attached is no problem for one of these, getting the 4L80 up into position it is useless! Perhaps if I would have had a 36" 1/2" ratchet it would have been possible for this weakling! Next time, I will rent a hydraulic tranny jack to start with.

I just could not lift it manually using any ratchet or electric driver I had. using the cheap Chinese tranny jack So instead, I got to use 2 floor jacks that would not reach high enough, and then I would have to switch them out to to floor jacks with wooden blocks to get me the lift needed. 3 hours later, I did persevere and get it into position. So don't cheap out, or be lazy and go rent the proper jack to get-r-done!

Lesson 2: If you plan on changing out the tranny filter, and you want to remove the pan, make sure you do this before you install the cross member! The pan bolts are much easier to access without the cross member in the way! Of course there was one pan bolt that had its head rounded off just to keep me amused.

Lesson 3: I thought I would use the entire two-piece drive shaft from the 4L80 I got. The front part with carrier bearing, is the same size, but the rear part it about an 1 1/2" longer. What I did not notice was that the U-Joint on the front half that connects to the front axle is larger on the 4L80, so I could not mount it. Too bad as I installed a new carrier bearing on it before I noticed. So I am trying to use the original half shaft. But it won't be balanced to the 4L80 rear half! I guess it if bounces around I will have to take it to drive line place and have them balance it for me and press on a new carrier bearing while it is there.

The good news in breaking open the pan I did not see any shavings, grit or other garbage that would lead me to believe it might have problems.

I had to take breaks due to family commitments and the holidays so I figure another couple weeks and I should be ready to test it. Remaining tasks:

  • Install the wiring harness/tranny controller
  • Connect up the throttle position sensor
  • Dip Stick install
  • Fill it with fuild
  • Drive shaft install
  • Shifter install

I am just debating if I should attempt to install the exhaust crossover pipe, and remainder of the exhaust, before testing the 4L80, or run it without a crossover pipe just to make sure it spins? Yeah, it is going to be incredibly loud and the fumes will be aweful. But having to remove the two bolts on the pass side again would really suck if I later discover I need to pull it out for some reason?

And if anyone should need a working TH400, here is a good deal for ya: M998 3 speed 3L80 (TH400) and Gearbox – FREE! Pay-it-Forward
Leave the exhaust off till tested.. Plus it will piss off the GESTAPO !!! 🤣
 

FlameRed

Well-known member
Steel Soldiers Supporter
345
527
93
Location
Florida
Sucess!

Thanks for all the help from the forum members, especially @springer1981 @Mogman @Retiredwarhorses @Mullaney

I seem to have two minor problems I found on my short test drive. Seems there is a knocking noise that changes with vehicle speed. I thought it might be something on the front drive shaft since it goes away totally while turning, but the rear drive shaft was really, really close to the new gas tank protection plate I installed. I tried adjusting the plate, but perhaps I need to try again. I expect to see a nice rub mark from my test drive to it should not be hard to find at all.

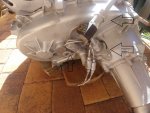
The manual speedometer does not move at all. I installed the existing cable at the arrow marked "just Swap Cable" on the picture below on the 4L80. The electronic speedometer on the US Shift controller works.

20221203_102023 - 2.jpg

And the final thing I need to do is relocate the fan cut-off switch eventually.

So all minor things that I should be able to cure fairly easily!

Thanks for everyone's patience with me and for making this a successful upgrade!
 

osteo16

Well-known member
Steel Soldiers Supporter
585
585
93
Location
Evansville, IN
Speedo gear may be stripped.. Need to pull that screw holding 90degree adapter on tcase and check gear teeth.. Id start there.. If the grear looks fine, it could be issue with the internals in the 90degree adapter.. Only other thing possible is a sticky speedo cable or bad connection behind speedometer... 😎

And those will be fun with Tcase installed.. But doable... Little lights and a mirror or two ..
 

Ranchtruck

New member
19
12
3
Location
Texas
We do these conversions in the shop, we stock all the parts required to do the conversion, feel free to reach out.
Would you happen to have a list of exactly whats needed to replace the 3L80 with the 4L80E? I currenty have a M1097R1 with the 6.5, 3L80 and the 242 transfer case. Any info would be much appreciated.
 
Top
AdBlock Detected

We get it, advertisements are annoying!

Sure, ad-blocking software does a great job at blocking ads, but it also blocks useful features of our website like our supporting vendors. Their ads help keep Steel Soldiers going. Please consider disabling your ad blockers for the site. Thanks!

I've Disabled AdBlock
No Thanks