• Steel Soldiers now has a few new forums, read more about it at: New Munitions Forums!

  • Microsoft MSN, Live, Hotmail, Outlook email users may not be receiving emails. We are working to resolve this issue. Please add support@steelsoldiers.com to your trusted contacts.

Airbornebandsman's M109 Conversion

silverstate55

Unemployable
2,075
872
113
Location
UT
Dang it man! Yall are on yalls way to producing a CLASS A MOTORCOACH!
LOL! He wants to make it into his workshop and storage unit, I keep trying to convince him to make it into a camper....maybe he should hear it from someone other than me! :mrgreen:
 

silverstate55

Unemployable
2,075
872
113
Location
UT
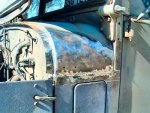
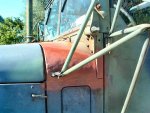
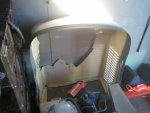
Of course, while moving the Band Wagon from behind my fence several weeks ago, I was in a rush and didn't notice that the driver's side mirror bracket got caught on my metal fence...it ripped the fence out of the block wall mooring and tore it up pretty good, but what really bothered me was that it pulled the cowling sheet metal out of its spot welds under the hood lip and bent it up pretty badly.

I felt like a total a$$ (still do), but since I'm objective I have to show my screwups as well. I cut out the damaged part of the cowling, hammered it as back to normal as I could, welded in a sheet metal "lip" under the cut for additional strength when rewelding it back into place, and then welded it back into place. It's not as nice as I had hoped for, but the intense summer heat didn't help with keeping the workpiece cool and it warped in places.

I had to straighten out a bracket and a couple of support arms, but after rewelding into place & priming, everything went back together OK. I'll sand the primer in a couple of days to eliminate the intentional runs; the runs are actually covering some surface imperfections and once sanded will look better than just a simple coating.

Sorry Mik, I still can't believe I did this... I'm a total A$$.

So hopefully my carelessness and terrible welds will scare anyone else off from asking me for help on their projects. :wink:
 

Attachments

814
16
18
Location
Universal City, TX
Wow, looks great Warren. I am not at all worried about the mirror. I know that it is 10 times stronger now than before so I think I got the better end of the deal. And the work you did on the roof, especially in that heat, is amazing. Thanks, for all your hard work, and have a great 4th of July.
 

silverstate55

Unemployable
2,075
872
113
Location
UT
Looks like we'll have to paint on Friday morning, due to the chance of stray thunderstorms Thursday afternoon.
 

silverstate55

Unemployable
2,075
872
113
Location
UT
Started to paint Friday, but ran out...one gallon of Behr only covered the roofline & about half of the sides. Restocked late Friday, and today went back at it with 2 gallons of Behr at the ready and a full gallon of Floetrol.

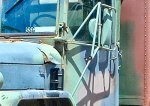
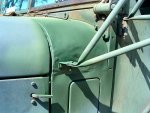
My repaired screw-up looks OK now; 3 coats of Behr and lots of sanding in between helped. I noticed a big difference in coats with the Floetrol and coats without it...simply thinning with water & shooting the Behr through my HVLP gun resulted in very thin coats, even after 3 coats I could still see the primer bleeding through. BUT, with a good dose of Floetrol and just a little water for thinning, one coat easily covered the primer. I applied a minimum of 2 coats overall, 3 coats in some areas to even the finish out. It came out really really good; the Floetrol allowed the paint to level itself.

I also stripped all 4 splashguards and primed/painted them to match. Mik installed these today as I was finishing the paint job. The triple-digit temperatures and 0% humidity really helped for a quick drying time on the paint!

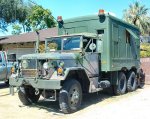
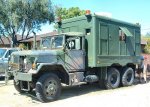
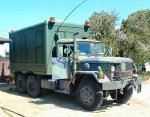
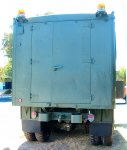
It looks really really good, these photos don't do it justice...it's all ready for San Antonio, TX now. The rotating beacon lights really set it off.

I can't believe that it's actually done, and in time for Airbornebandsman's PCS to FSH.

Now it's time to refinish that cab & hood!!! :mrgreen:
 

Attachments

Last edited:

Welder Sam

New member
1,430
6
0
Location
Glendale, Arizona
LOL! He wants to make it into his workshop and storage unit, I keep trying to convince him to make it into a camper....maybe he should hear it from someone other than me! :mrgreen:
if ya want a workshop, look into lengthening an m200 and dropping a cargo bed onto it! these were made for camping. not modern camping but thats "fixable"
 
814
16
18
Location
Universal City, TX
Well, time to continue this thread.

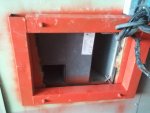
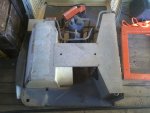
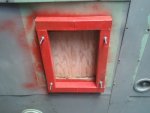
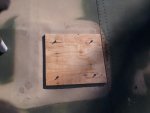
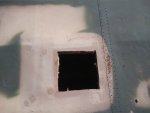
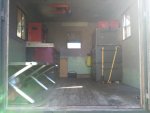
Got the back cleared out of all the household goods from the move. Moved in a work bench and some storage chests for part and tool storage. Took the AC unit off the truck this morning and put some 1" plywood in its place until I can get the AC fixed. It will be slow going until next year but hope that I can get the inside remotely close to as good looking as Warren (silverstate55) got the outside.
 

Attachments

silverstate55

Unemployable
2,075
872
113
Location
UT
Just do it one step at a time Mik, and she'll be done before you know it! It looks good all cleaned out, I'm happy that you finally got your house.

Now that the weather is cooler, you should load up your family & take them out in your M109 camping somewhere for a weekend.

Keep up the good work!
 
814
16
18
Location
Universal City, TX
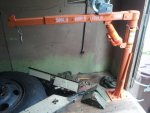
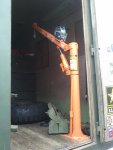
Hey Warren, Happy New Year!! The only thing I have done since taking off the AC unit (other than changing flats) is install a pick-up bed crane I got from HF. It is great not having to lift tires into the truck anymore. And I am giving into peer pressure and plan on making the van into a camper/workshop over the next few months. I actually just got a second job to help pay for parts/wiring/AC repair and insulation. So hopefully I can get this thing looking good by summer.:driver:Crane 2.jpgView attachment 404182
 

Attachments

Last edited:

caliber1

New member
995
8
0
Location
Elcho, Wisconsin
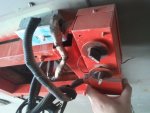
Mik, I don't see any damage to the actual AC unit. Am I missing something? I see the broken cover, which is a common occurence. Just wondering. Most RV shops don't repair those units, closed system. I have only worked on a few of the units like yours, I usually use Dometic low profiles on the coaches. PM me if you have any questions regarding the camper part of your build, be glad to help out. Been doing this for a few years now. :beer:

Well, time to continue this thread.

Got the back cleared out of all the household goods from the move. Moved in a work bench and some storage chests for part and tool storage. Took the AC unit off the truck this morning and put some 1" plywood in its place until I can get the AC fixed. It will be slow going until next year but hope that I can get the inside remotely close to as good looking as Warren (silverstate55) got the outside.
 
814
16
18
Location
Universal City, TX
Mik, I don't see any damage to the actual AC unit. Am I missing something? I see the broken cover, which is a common occurence. Just wondering. Most RV shops don't repair those units, closed system. I have only worked on a few of the units like yours, I usually use Dometic low profiles on the coaches. PM me if you have any questions regarding the camper part of your build, be glad to help out. Been doing this for a few years now. :beer:

I actually have no idea if it works or not, as all the wiring was either gone or destroyed. So I need to have new(?) controls attached and wiring so I can have it run to the electrical panel insid the truck as well as having someone test and flush it as I have no idea when it was last used.
 

caliber1

New member
995
8
0
Location
Elcho, Wisconsin
Send me a make and model number, I'll get a schematic for ya and show you how to check it out.

There is a camping world in New Braunfels, north of San Antonio. They should have replacement shrouds.

I actually have no idea if it works or not, as all the wiring was either gone or destroyed. So I need to have new(?) controls attached and wiring so I can have it run to the electrical panel insid the truck as well as having someone test and flush it as I have no idea when it was last used.
 
Last edited:
Top