• Steel Soldiers now has a few new forums, read more about it at: New Munitions Forums!

  • Microsoft MSN, Live, Hotmail, Outlook email users may not be receiving emails. We are working to resolve this issue. Please add support@steelsoldiers.com to your trusted contacts.

All the stuff I did to my deuce, right here

sewerzuk

Member
524
10
18
Location
Seaside, OR
Lockers!

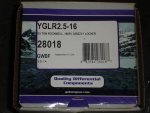
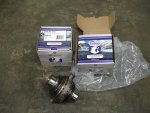
Big brown truck dropped off my grizzly lockers this evening. No time to put them in tonight...but I hope to get a chance to pull my front 3rd member on Friday or Saturday. I'll be sure to take pics of and report back on the install.
Time to dig out my lockwire pliers and brush up on my lockwire skills! It's been around 15 years since my Navy ETMS instructor had me lockwire some bolts...and I could count the number of items I lockwired since then on one hand!
 

Attachments

spicergear

New member
2,307
27
0
Location
Millerstown, PA
They're easy to put in, just make sure to keep the big round side nuts in the chunk when you pop the caps off. Back them off only a couple of turns, just enough to get the differential out. When you go back together don't be surprised if you end up one of short of where the factory setting was. You can knock the rest apart with an impact gun quick and easy. Lockwiring stuff can be fun sometimes. We have a couple old Pratt & Whitney R2800's at work I keep up with and get to relockwire items from time to time. Very much helps when you have the correct pliers that twist them as you pull! ALSO as you go to unbolt the ring of nuts hold the chunk to the housing, where the pinion side overhangs the bolts and you have to use a wrench on them...get the nuts loose, then stack nickels inbetween the top of the stud and the overhand of the chunk. As you back the nut off it will force the chunk to seperate from the housing so you won't have to beat screwdrivers into the gasket to get it apart. Works like a charm! :mrgreen: [thumbzup]
 

sewerzuk

Member
524
10
18
Location
Seaside, OR
OK; locker is fully installed in the front axle!

I have installed lockers on quite a few different vehicles, so I do have a bit of experience with this procedure. I would rate the rockwell as being easier than most, as far as technical difficulty. Lockwire pliers and some lockwire were the only special tools needed (I did use my dial indicator as a "double check", but it isn't necessary). However, the weight of the 3rd member makes this a bit more difficult than your average gear/locker swap.
I had a pair of "donor" axles, so my plan was to pull the 3rd member out of one of the donors, install the locker into that 3rd, and then swap it into my truck. This would minimize the time my deuce was up on jackstands in my shop.
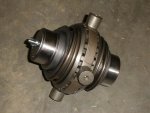
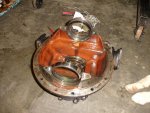
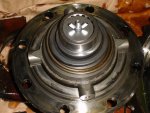
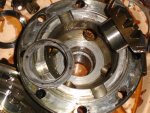
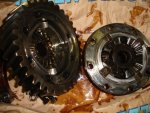
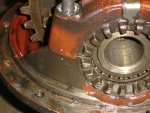
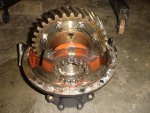
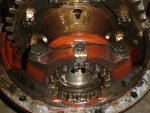
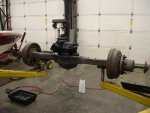
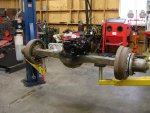
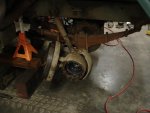
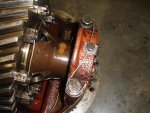
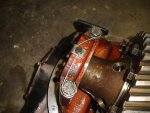
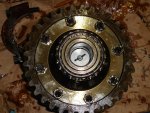
I used my shop crane to pull the 3rd out of the donor axle, so that wasn't too bad. The tip that spicergear provided was excellent; I stacked 2 washers on top of the nuts that were under the driveshaft flanges and it easily lifted the 3rd out of the axle housing as I backed the nuts off. The factory lockwire job wasn't very good; it certainly got the job done, but it wasn't the quality work I am used to seeing (see pics). I used a punch to mark the location of the bearing caps and the setting of the bearing adjusters (see pics). I also counted the number of threads showing on the adjuster nuts, and checked gear free play with a dial indicator (to make sure everything matched after I re-installed everything). Then, I cut the lockwire and removed it from the bearing caps and the bull gear. I pulled the carrier out of the 3rd member, being careful to keep the races with their respective bearings. I removed the bolts that held the 2 case halves together, and separated the case. I removed the spider gears and side gears. I made sure to also remove the thrust washers with the side gears; they cannot be left in place with the new locker. Then, I dropped the locker into place and left the bolt/wing nut/washers in place that held it together. I bolted the 2 case halves back together, and then removed the bolt/wing nut/washers. I ran lockwire through all of the bull gear bolts the same way it was from the factory; conventional lockwiring isn't needed here since the nuts are castle nuts. I'm fairly certain that cotter pins would work fine here too. I dropped the carrier back into the 3rd member, and put the bearing caps back in place finger-tight. Then, I moved the bearing adjusters back to their original positions (based on number of threads showing and the punch marks I made). I verified that free play matched with my dial indicator, and then torqued the bearing cap bolts down. Then I lockwired the cap bolts together (see pics). The donor 3rd member was now ready to go into my deuce.
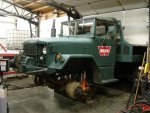
Once I had the locker installed in the donor 3rd, I pulled the deuce into the shop and put it up on jackstands and began the process of pulling its front 3rd member.
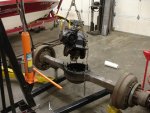
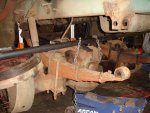
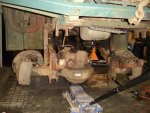
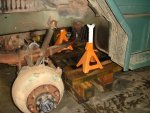
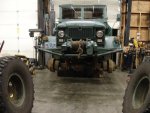
I chose to leave the front axle installed in the truck during the swap. I don't think I'll ever do that again! The idea was to avoid having to disassemble my hydraulic steering setup, but I don't think that the time saved was worth the effort it took to swap the 3rd members out with the limited clearance. I pulled the hubs/spindles/backing plates/front axleshafts, and then removed the pins from the front of the springs and swung the axle down to give me some more space to lift the 3rd member up. I ended up chaining the 3rd to a piece of DOM tubing so that we could lift it up from outside the truck; it turned out to be too difficult to try to handle it from underneath the deuce. After it was out, I cleaned out the inside of the axle housing and put about 6 quarts of fresh gear oil in (easier to dump it in now and top it off with 1 or 2 quarts through the filler hole later). I chained the donor 3rd member to the piece of DOM, and we lifted/jockeyed/shimmied/swore it into place. Then I reassembled the front axle.

Initial impressions are great; it doesn't seem to lock up unnecessarily. I can hear it clicking during tight turns, and it locks up as soon as it is under power. I have hydraulic steering, so I can't "feel" when it locks up in the steering wheel, so I can't comment on extra steering effort. Overall I'm pleased! Hoping it will serve me well during Mudfest next month.

One more locker is going in one of the rear tandems next weekend...I expect that one to be easier because of the additional clearance under the bed.

I have several pics of the project; they go in order as the work progressed
 

Attachments

Last edited:

sewerzuk

Member
524
10
18
Location
Seaside, OR
Working on getting the 3rd member ready to go in the front tandem...
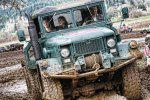
In the meantime, thought I would post this video of a very short wheelin' trip we took on Christmas Eve. My family was all at my house and we needed a break from the indoor activities. Long story short, I got my Samurai buried in a small muddy ravine and used the deuce to recover it. Nothing too spectacular, but still a fun video to watch!
[media]http://www.youtube.com/watch?v=ZfRHpWz1fcg&feature=channel[/media]
 

sewerzuk

Member
524
10
18
Location
Seaside, OR
The second locker is installed in the 3rd member and ready to go in the front tandem. If I can get an extra pair of hands over here, I plan to put it in tonight.
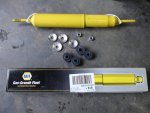
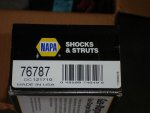
And, on another note, when I dropped the front axle down last week to install the front locker I had to pull the old shocks. I discovered that somebody had simply double-nutted both studs, and used a small flat washer (instead of the large dome-shaped washer that SHOULD be used) for the rubber bushings. The bushings were destroyed, and the studs on the bottoms of both shocks were nearly broken. So, I picked up a set of Monroe 76787 shocks from my local Napa. They bolted right in...no surprises.
 

Attachments

srodocker

Well-known member
6,549
69
48
Location
Lacey, Washington
nice! man i want to see your truck in person one day.

i'll be at winchester this summer from aug 21-27. i'll have my deuce down there. not going to climb any hills or anything going to be riding the 450
 

HanksDeuce

Well-known member
1,081
242
63
Location
Prairieville, LA
Don't forget to dampen the winch cable when you use it to extract yourself or others. A floormat, jacket or something else placed on top of the winch cable mid point along the cable will protect you and others from a whiplash effect if the cable were to snap. You had plenty of cute little soldiers (and a few big ugly ones) running around that could have got hurt if it would have snapped. :mrgreen:

Fine truck you have there. The Samurai too. :D
 

sewerzuk

Member
524
10
18
Location
Seaside, OR
Don't forget to dampen the winch cable when you use it to extract yourself or others. A floormat, jacket or something else placed on top of the winch cable mid point along the cable will protect you and others from a whiplash effect if the cable were to snap.

Thanks for the reminder! I actually own a winch cable weight. Was I using it? No. :roll:

The pulls were EXTREMELY easy, so I intentionally skipped it. But...you never know when a vehicle could shift and shock load a cable. Probably should have weighted the cables...


On another note, I bribed a friend with a few bottles of homebrew beer (2 bottles of pilsner, 1 hefeweizen, 1 oatmeal stout, and 1 pale ale, to be exact) and we got the locker installed in the front tandem. It was much easier than the front; I rigged up a pulley on the underside of my flatbed and used a Warn Pullzall to lift up the 3rd member and swing it out of the way. This took weight out of the equation, making the entire job easier.
 

sewerzuk

Member
524
10
18
Location
Seaside, OR
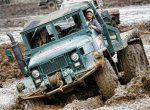
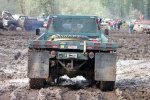
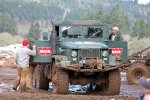
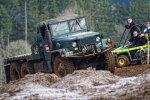
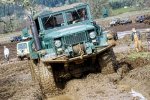
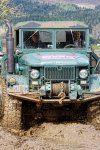
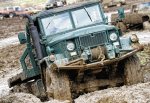
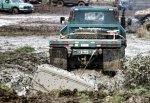
Got back from mudfest early this morning...I was in the driver seat of my Deuce from about 5:00AM until about midnight, with a few hours of short breaks. The deuce worked great! About 400 road miles and 8 hours of off-road driving over 2 days and zero problems! The new lockers worked wonders; there were some pretty good off-camber ravines that I climbed up easily, that would not have been possible without lockers (or scary momentum). I had the tires aired down (8psi rears, 15psi front), which also helped a great deal. I did manage to bury the truck once in a bottomless mudhole...a few people tried to yank me out unsuccessfully. It took a dozer to get my deuce out of there! I pulled out about 20 vehicles throughout the day. A photographer from Warn was there...so my truck may end up on their blog or one of the social media sites...
This morning I spent around 5-6 hours with the pressure washer, a grease gun, gear oil, axle grease, etc. but she's all cleaned up and ready to go on the next trip!

Here's a short video from the event. It's just a few minutes long; I'm working on a longer one with more footage, but this one has a few cool military rigs in it.

[media]http://www.youtube.com/watch?v=ibZYu9_HRrM[/media]

edit: pic of the mudhole I got stuck in
edit again: more pics
 

Attachments

Last edited:

DeucesWild11

Active member
1,265
12
38
Location
Putnam County, NY
That was cool! Looks like you had a boatload of fun. I finally got my Deuce roadworthy so starting to have fun driving mine instead of just fixin. Looks like you helped allot of people out.. Glad to hear she ran well without any issues.
 

sewerzuk

Member
524
10
18
Location
Seaside, OR
the last pic is that jeep past its hood in mud?
Yep; that was a massive hole. Nobody made it through there. The mud was probably about 5' deep. The pic is a little deceiving though; the angle of the camera makes it look look like 90% of the jeep is buried, but really it wasn't THAT bad...
 

crazywelder72

New member
701
2
0
Location
Winchester Ma
wow.... I read this entire thread tonight. wow.... you possess a lot of engineering type knowledge. methanol injection, bumping fuel pressure, axle's, gear ratios, incline grades, battery system draws, winches, etc....... wow, thats all i can say.[thumbzup]
 
Top