• Steel Soldiers now has a few new forums, read more about it at: New Munitions Forums!

  • Microsoft MSN, Live, Hotmail, Outlook email users may not be receiving emails. We are working to resolve this issue. Please add support@steelsoldiers.com to your trusted contacts.

Another M1010 owner

Mad Texan

Well-known member
Steel Soldiers Supporter
657
1,150
93
Location
Chester County, PA
A few things done this week... Box isn't looking so good?!?!? But everything was in there. Old mufflers were spent... pipes were in better shape than expected. A total of four cuts and release the hangers and was able to get the system out. I had wire brushed and soaked the manifold studs and had no issues with them. Before installing the new exhaust I wire brushed and cleaned the inside of the frame then sprayed it all with rust encapsulator. Playing with the pipe layout as the instructions aren't super clear. I cut off the OEM hangers and reused the three that fit the pipe tightly only using a few brackets and one of the hangers from the kit. Everything is mounted up quite snug without any rattles. I can get more pics of how I mounted everything if anyone wants them. Total $215 with speedperks and coupon codes

Dynomax 89003
Thrush welded mufflers 17655
Felpro manifold gaskets 60556
8 HD Exhaust clamps

Notes: I removed and reused the flanges at the manifold as they were much thicker, where the pipes flare to meet the manifold is too large, it needs to be ground down to properly seal on the manifold gasket. As me how I know?!?!? The clamps with the kit are junk! Either order the HD ones or get lap joint clamps. The mufflers... undecided at the moment. At idle they sound great, but on the road with a load they have some serious bark! Granted, this was the first time I have driven the truck since I purchased it so maybe it was me. But I admit the clamps at the muffles are not super tight just in case I want to change the mufflers for something else... YMMV
 

Attachments

Last edited:

Mad Texan

Well-known member
Steel Soldiers Supporter
657
1,150
93
Location
Chester County, PA
Weather hasn't cooperated with my times but I have been working on a few things... I got a fuse block for my switches in the ashtray area... Cleaned up in the back and removed the forward rack on the left side. Took care of the harmonic balancer with a new one which took two tries from rockauto... The second one was correct and got a coat of paint. I installed the balancer today and got the pulley installed but it got dark before I could get all the belts tightened again. Tomorrow...
 

Attachments

Keith_J

Well-known member
3,657
1,323
113
Location
Schertz TX
So the Dynomax 89003 fits? Interesting option. Need to put that on order as the pipes in my 1031 are nearly gone. Not to mention ugly. Going to go with quieter mufflers.
 

Mad Texan

Well-known member
Steel Soldiers Supporter
657
1,150
93
Location
Chester County, PA
So the Dynomax 89003 fits? Interesting option. Need to put that on order as the pipes in my 1031 are nearly gone. Not to mention ugly. Going to go with quieter mufflers.
It fits... like I said it needs a little massaging at the exhaust manifold flange. It's too big to fit inside the studs of the manifold to seat properly. I added a picture to show better what I mean by that. Use the old flare as a guide. My passenger side pipe exit is a few inches short from coming even with the body. I think it's due to working around the load proportioning valve. I'll just add some tips to make it up or many have just removed it. Then I could move it over some. As far as the mufflers, they are always a personal choice. I have driven it once more to the gas station and found it wasn't as bad as my initial assessment. It has some bark for sure but once I had it at 45-55 it wasn't bad. I held a conversation with my passenger without issue.
 

TechnoWeenie

Well-known member
Steel Soldiers Supporter
1,657
1,676
113
Location
Nova Laboratories, WA
FYI, as far as noise reduction goes.... I used peal and seal as a base, then added foam and indoor/outdoor carpet.... Cost was around $100 IIRC.... I could talk normally, at 60...

20130307_162758_zpsfc5aae05.jpg20130308_162507_zpse7cc0376.jpg20130311_175716_zps5b7c6b25.jpg
 

Mad Texan

Well-known member
Steel Soldiers Supporter
657
1,150
93
Location
Chester County, PA
I have had a loose belt on my upper alternator and the adjustment was maxed out. While apart I figured I would install the smaller belt I had picked up. I found that when I changed to the 12v alternators they are slightly different shape which doesn't allow movement to smallest adjustment. Not a big deal on the lower alternator because it has been ok. But it made the upper belt impossible to get on. I notched the stamped steel bracket to gain some more clearance and was able to muscle the new belt on. Barely could move the alt while snugging it up and plenty of adjustment left. Fired her up for the first time in probably 10 days with no issues. The placebo effect of the new harmonic balancer is trying to tell me that the idle is now smoother. Maybe... YMMV
 

Mad Texan

Well-known member
Steel Soldiers Supporter
657
1,150
93
Location
Chester County, PA
FYI, as far as noise reduction goes.... I used peal and seal as a base, then added foam and indoor/outdoor carpet.... Cost was around $100 IIRC.... I could talk normally, at 60...
That looks like a good plan for quieting down the cab. I haven't got that far so far. I did remove the jute from under the rubber mat which exposed some small issues... but nothing to bad. It might be spring before I get back to working inside the cab. Need to do the door and window seals as well. I would like to dig into the cowl area but haven't gotten to it yet...

How has the peel and seal held up?
 

TechnoWeenie

Well-known member
Steel Soldiers Supporter
1,657
1,676
113
Location
Nova Laboratories, WA
That looks like a good plan for quieting down the cab. I haven't got that far so far. I did remove the jute from under the rubber mat which exposed some small issues... but nothing to bad. It might be spring before I get back to working inside the cab. Need to do the door and window seals as well. I would like to dig into the cowl area but haven't gotten to it yet...

How has the peel and seal held up?
I sold the truck, but it's butyl rubber, so, lasts forever... :p..

It also reduced the heat during the summer substantially...
 

Keith_J

Well-known member
3,657
1,323
113
Location
Schertz TX
You guys are going to make me broke! I have to wait until next year to use my employee discount so I am making a list..exhaust, Dynamat or Peel and Seal, window seals/tracks..

I have the illumination lights for the inside of the box coming next week. Plus a Milton 501 inflator and Autometer pyro. Got the gasket set to do the port and polish intake job. Going to turn the fuel up, then water injection to dial back the temperature.
 

Mad Texan

Well-known member
Steel Soldiers Supporter
657
1,150
93
Location
Chester County, PA
You guys are going to make me broke! I have to wait until next year to use my employee discount so I am making a list..exhaust, Dynamat or Peel and Seal, window seals/tracks..

I have the illumination lights for the inside of the box coming next week. Plus a Milton 501 inflator and Autometer pyro. Got the gasket set to do the port and polish intake job. Going to turn the fuel up, then water injection to dial back the temperature.
Don't worry! With us all at different points with our trucks, we are all making each other broke! If you think I don't have a laundry list of things to do... well. It grows faster that I get things done. My main focus when I started was getting her reliable, especially since she died on the road test when I was 5-6 hours from home. And was towed home as a non running vehicle. It did however help with negotiations...
 

Mad Texan

Well-known member
Steel Soldiers Supporter
657
1,150
93
Location
Chester County, PA
Well, gremlins have shown up and done things in the truck... in a positive way?!?! The overhead fluorescent light is gone out my truck and has been replaced with a small RV light. This was not a problem, if it worked. Well it hadn't! I checked bulbs, flipped switches, checked for power and finally felt there may be issues with the wires that I have cut behind the dash where the black out switches should be. Last I looked at is was Saturday afternoon. Monday evening my friends where the truck is, call and say there is a light on in the truck! What? Do you want us to try to shut it off? Nope, I'm on my way! Sure enough the overhead light works! Don't know how long it was on but the battery wasn't dead. If it was on when I was there Saturday I don't know how I missed it because it's pretty bright! I ordered some LED's for it now that it's working... and was still working yesterday.
 

Attachments

Last edited:

Mad Texan

Well-known member
Steel Soldiers Supporter
657
1,150
93
Location
Chester County, PA
NICE JOB! I'm really digging your extra fuel tank install. Thats on my list. First a 20 gallon side tank and a 50 gallon rear tank. 90 gallons total. Cant wait to see her done.
Thanks! I like that it's easy to add the tank but I didn't want all the wiring issues for the OE valve. So I took a different route. I still need a few things to finish up the other side but getting her running reliable has been the priority. Trying to get back to the pieces needed soon.

90 gallons should get you a fair distance... and a good dent in the wallet when you fill. But look forward to seeing how you do it. I admit when I removed the spare tire hanger I was looking at that space and wondering about a installing a blazer tank back there... maybe someday.
 
Last edited:

WARWAG

Active member
90 gallons should get you a fair distance... and a good dent in the wallet when you fill. But look forward to seeing how you do it. I admit when I removed the spare tire hanger I was looking at that space and wondering about a installing a blazer tank back there... maybe someday.
Well you just doubled your mileage. Thats a pretty good start. I installed a second tank on my M1028. My plan was to wire in a switch to change my fuel gauge from one tank to the other. That way I didn't need to add a second fuel gauge. I had planned to use manual valves like you did. Mine were pretty simple. I would of had multiple valves. I like the one you picked out.

I have seen many 40 plus gallon tanks and very few 50 gallon tanks. I could also add a custom built stainless water tank next to it. Theres plenty of room under there.
 

Mad Texan

Well-known member
Steel Soldiers Supporter
657
1,150
93
Location
Chester County, PA
OK M1010'ers... Looking for a little help. I had a little time to play around with the truck today. I started looking at the heater in the back. I cracked the drain in the back and took whiff... certainly not fresh and a varnish smell. The start/ run switch was not working but some WD40 and a little manipulation and I got it moving again. Placing the switch in the start position I verified that the fuel pump on the drivers fender was clicking. Placing the switch in the run position and the blower worked. I drained the varnish from the lines then closed the valve to the heater. I verified the fuel pump works letting it run till clean fuel was flowing from the drain. I opened the valve to the heater and tried the start position. It ran... no light... no heat. After further diagnosis I found two things at issue. First... I don't have an indicator bulb in the holder on control panel. And further reading told me about the bleeding procedure. At this point it was getting dark, and my hands wet with some old smelly diesel were cold. I'll bleed it in the daylight.

What I could really use help with is there is anything else in the holder when it is assembled. I believe it says push to test so I wonder if there is a spring in there as well. Any help would be appreciated!!!

***Further digging... a lot... It looks like the bulb is a T3 1/4 miniature bayonet base
 
Last edited:

joshuak

Active member
747
215
43
Location
Slower shore, DE
Yes, I believe there should be a spring. The TM-34P shows that piece as a sealed assembly, NSN MS25331-4-313S. Googling calls it an Aircraft Push to Test Indicator Light.

Indicatorlight.m1010.jpg

Edit: Will add pic. and dimensions of the spring.
 
Last edited:

Mad Texan

Well-known member
Steel Soldiers Supporter
657
1,150
93
Location
Chester County, PA
Yes, I believe there should be a spring. The TM-34P shows that piece as a sealed assembly, NSN MS25331-4-313S. Googling calls it an Aircraft Push to Test Indicator Light.

View attachment 750175

Edit: Will add pic. and dimensions of the spring.
Thank You Joshuak!

I found that part number as well and was able to find the assembly which led me to the datasheet with the bulb info. This morning on Ebay I found some images of the holder. Looking at them I starting to believe the spring is in the body of the bulb holder itself. I'll have to test that theory out later today. The assembly is available and I found the price to vary wildly ($30 to $100).
 

Attachments

joshuak

Active member
747
215
43
Location
Slower shore, DE
I found that part number as well and was able to find the assembly which led me to the datasheet with the bulb info. This morning on Ebay I found some images of the holder. Looking at them I'm starting to believe the spring is in the body of the bulb holder itself...
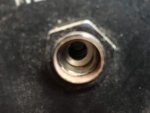
You're right, the washer is holding it in place.

IMG_0920.jpgIMG_0921.jpg
 
Top
AdBlock Detected

We get it, advertisements are annoying!

Sure, ad-blocking software does a great job at blocking ads, but it also blocks useful features of our website like our supporting vendors. Their ads help keep Steel Soldiers going. Please consider disabling your ad blockers for the site. Thanks!

I've Disabled AdBlock
No Thanks