• Steel Soldiers now has a few new forums, read more about it at: New Munitions Forums!

  • Microsoft MSN, Live, Hotmail, Outlook email users may not be receiving emails. We are working to resolve this issue. Please add support@steelsoldiers.com to your trusted contacts.

Brake Bleeding w/ Remote Master Cylender

Dasgog

Active member
177
148
43
Location
Tucson, AZ
Hello!
So I got my ‘72 over a year ago and have had no issues with the brakes. Prior owner had replaced the air pack, master cylinder and so forth and also had installed the remote MC. He also mentioned using DOT3.
I want to drain the whole system and place DOT5 but have never bled brakes before.
I guess I am confused over process. Being I am not necessarily “bleeding” but am draining, do I just open all the nipples and keep pushing till all lines are empty and then close all but one and fill up until new DOT5 comes out then close and work my way back?
I really have looked it up but get lost on the whole remote master cylinder and the fact I’ve never bled brakes (thanks dad).

many help would be appreciated
 

cattlerepairman

Well-known member
Steel Soldiers Supporter
3,263
3,387
113
Location
NORTH (Canada)
It is probably a remote master cylinder reservoir, rather than a remote mc per se.

If the brakes work fine and have been filled with DOT3 the first question is, why change? DOT3 works fine in the system.
Bleed them every 2-3 years with a quart of new DOT3 to take care of any moisture. Golden.

If you want to change to DOT5 you need to push all (all!) DOT3 out of the system. As you probably know, the two brake fluids do not mix.

There are good instructions on the site on how to do it...it has been a while for me.

If plumbed "right", the line from the reservoir to the mc has a shutoff and a port for the pressure bleeder. You can use a Turkey baster to empty the reservoir itself (come up with a cover story for the wife if the baster comes from the kitchen).

If there is no shutoff disconnect the hose at the mc cap and let gravity drain into a can.

Now you need to get the fluid out of the mc itself (baster), fill with denatured alcohol and bleed the brakes and keep refilling the mc until only alcohol comes out at the bleeders.

Guys have used shop air with the pressure turned way down to then blow the lines dry, connecting the air hose to a modified mc cap where you screw the air adapter into the cap instead of the hose barb or vent mushroom, however your cap is set up.

Once all is clean and dry, then you get to refill with DOT5 and re-bleed, hook up the remote master cylinder reservoir and fill that up. Any air from the mc itself will percolate up to the remote reservoir and its vented cap.

Yup, others have poured DOT5 right in, on top of the DOT3, bled it right through, called it a day and claim everything is fine.

I guess many ways lead to Rome.

Only question....really worth it? For you to decide.


Sent from my SM-G950W using Tapatalk
 

cattlerepairman

Well-known member
Steel Soldiers Supporter
3,263
3,387
113
Location
NORTH (Canada)
Good point. Read up on brake bleeding. For the Deuce, you really want a pressure bleeder. "Conventional " brake bleeding pumping the brake pedal simply doesn't work well. It has inconsistent results on the air assisted hydraulic brakes.

Sent from my SM-G950W using Tapatalk
 

V8srfun

Well-known member
423
538
93
Location
Altoona pa
If you have a bottle preferably transparent like a mouthwash bottle and a couple feet of vacuum line you don’t mind throwing away you can easily bleed any brake system on your own. Leave enough fluid in the bottle to cover the end of the hose and connect the other hose end to the bleeder. Then open the bleeder and pump the pedal until your heart is content. With the end of the hose being submerged in fluid it will not draw any air in when you release the pedal. Tighten your bleeder and move to the next wheel.
 

Mullaney

Well-known member
Steel Soldiers Supporter
Supporting Vendor
7,769
19,877
113
Location
Charlotte NC
Hello!
So I got my ‘72 over a year ago and have had no issues with the brakes. Prior owner had replaced the air pack, master cylinder and so forth and also had installed the remote MC. He also mentioned using DOT3.
I want to drain the whole system and place DOT5 but have never bled brakes before.
I guess I am confused over process. Being I am not necessarily “bleeding” but am draining, do I just open all the nipples and keep pushing till all lines are empty and then close all but one and fill up until new DOT5 comes out then close and work my way back?
I really have looked it up but get lost on the whole remote master cylinder and the fact I’ve never bled brakes (thanks dad).

many help would be appreciated
Hi Dasgog,

I agree with cattlerepairman about completely draining the DOT 3 before adding DOT 5. Lots of other folks here have made the same recommendation as well. The real thing you have GOT to have before trying to make the change is a way to bleed the brakes without trying to pump the brake peddle.

Bleeding fluid brakes like a Deuce or your car or pickup truck in its simplest form requires two people. Somebody (Soldier2) at the furtherest point in the system with a wrench on the bleeder. Somebody (Soldier1) in the drivers seat pumps the brakes up, and holds pressure on the peddle. Soldier2 opens the bleeder and in a perfect world closes the bleeder screw before the peddle gets to the floor... A lot of repetitions of that action will eventually chase the air out of a brake system . If Soldier1 lifts his foot off the peddle before the bleeder screw is closed - you will suck air into the brake lines. (not good!)

To do the job more easily, a brake bleeding device of some sort is (almost) required. I have seen on this site a pressure bleeder created with a "weed sprayer" and several other assorted ways of adding fluid with low pressure air above it to force it through the brake lines. You may need several cans of fluid because if your homemade brake bleeder runs out of fluid - you have to start the process over again. One bleeder screw on each axel. Starting (generally) on the passenger side back axle, the drivers back, passengers front, passengers back, passengers front, then finishing under the front fender on the drivers side. Without a "power bleeder" Soldier1 is going to be tired when the job is done...
 

Dasgog

Active member
177
148
43
Location
Tucson, AZ
Thank you all for the responses and I apologize for the delay.
I want to first mention that it is indeed just a reservoir for the fluid to easily check and that there is indeed a connector for a power bleeding system like the ones mentioned/shown which can be hooked up to a canister or such with the air hose style fitting.
As far as the DOT5 vs DOT3, I have no reason to change other than I assumed long term DOT5 would be better. I am fine with the DOT3 as I’ve had 0 issues.
I seem to be understanding the method/procedure to bleeding. But let me add this; I want to replace the 5(?) rubber hoses for the brake lines as well so I assume I should do a simple drain on all the brake lines and then replace hoses.
Then I would start in the order farthest to closest as far as bleeding, using the pressure from the power bleeder (soldier 2) and just open the nozzle at each wheel until a nice stream flows.
I also read that I should bleed the Master Cylinder first before each brake line?
Again I appreciate all the feedback
 

Mullaney

Well-known member
Steel Soldiers Supporter
Supporting Vendor
7,769
19,877
113
Location
Charlotte NC
Thank you all for the responses and I apologize for the delay.
I want to first mention that it is indeed just a reservoir for the fluid to easily check and that there is indeed a connector for a power bleeding system like the ones mentioned/shown which can be hooked up to a canister or such with the air hose style fitting.
As far as the DOT5 vs DOT3, I have no reason to change other than I assumed long term DOT5 would be better. I am fine with the DOT3 as I’ve had 0 issues.
I seem to be understanding the method/procedure to bleeding. But let me add this; I want to replace the 5(?) rubber hoses for the brake lines as well so I assume I should do a simple drain on all the brake lines and then replace hoses.
Then I would start in the order farthest to closest as far as bleeding, using the pressure from the power bleeder (soldier 2) and just open the nozzle at each wheel until a nice stream flows.
I also read that I should bleed the Master Cylinder first before each brake line?
Again I appreciate all the feedback
So long as you aren't replacing the master cylinder - and don't pump the brakes before you connect the rubber hoses - there is no need to bleed the master cylinder.

When the time comes to replace the master cylinder, it is a good idea to bleed it before you attach the steel brake lines to it. Saves chasing a lot of air through the brake system...

You definitely have the bleed order correct. A power bleeder makes that less important - but doing it in that order is a good plan.

REMEMBER: that brake fluid EATS PAINT. Water is the best thing to clean your bleeder wrench when the job is done.
 

Dasgog

Active member
177
148
43
Location
Tucson, AZ
So long as you aren't replacing the master cylinder - and don't pump the brakes before you connect the rubber hoses - there is no need to bleed the master cylinder.

When the time comes to replace the master cylinder, it is a good idea to bleed it before you attach the steel brake lines to it. Saves chasing a lot of air through the brake system...

You definitely have the bleed order correct. A power bleeder makes that less important - but doing it in that order is a good plan.

REMEMBER: that brake fluid EATS PAINT. Water is the best thing to clean your bleeder wrench when the job is done.
I apologize for the redundant questions but brakes can be my life so I wanna go into this 100%.
When replacing the brake lines do I do them one at a time or can I just straight up take them all off then replace them then bleed one at a time in the previously mentioned order.
I assume then that when removing the hoses, the MC will still maintain its pressure and no air which is why I don’t pump them during the changing.
When I do replace the hoses, do I just release each wheels fluid then remove them then install new hoses and resume the bleeding?
 

Mullaney

Well-known member
Steel Soldiers Supporter
Supporting Vendor
7,769
19,877
113
Location
Charlotte NC
No biggie, that is why ALL of us are here. A chance to share - and a chance to learn... Don't hesitate to ask questions!

I would remove and replace every rubber hose, then bleed the entire system. The connections to the wheel cylinders are through a "banjo" looking fitting. A fluid bolt holds them into the wheel cylinder. They have thin compressible brass-like washers. Need to pay special attention to where they are as you go to reassemble.

Me personally, I would remove one hose and replace it with a new one. That way if you need something to look at - and see how it was put together - you can walk to the other side of the truck for a visual. There are 3 rubber hoses on each axle on a Deuce.

Page 35 in the attached PDF gives instructions on bleeding brakes so you have the best possible information available. (Thanks to frank8003 )
 

Attachments

Dasgog

Active member
177
148
43
Location
Tucson, AZ
No biggie, that is why ALL of us are here. A chance to share - and a chance to learn... Don't hesitate to ask questions!

I would remove and replace every rubber hose, then bleed the entire system. The connections to the wheel cylinders are through a "banjo" looking fitting. A fluid bolt holds them into the wheel cylinder. They have thin compressible brass-like washers. Need to pay special attention to where they are as you go to reassemble.

Me personally, I would remove one hose and replace it with a new one. That way if you need something to look at - and see how it was put together - you can walk to the other side of the truck for a visual. There are 3 rubber hoses on each axle on a Deuce.

Page 35 in the attached PDF gives instructions on bleeding brakes so you have the best possible information available. (Thanks to frank8003 )
Awesome information. I will indeed do one at a time.. Would it be best to drain the whole system from the wheel cylinders before removing the fluid? when I pump the canister with pressure and release at the cylinder , is it safe to say that when a stream comes out it’s good?
also thank you for that link. I’m really feeling eager to do this and am excited
 

Mullaney

Well-known member
Steel Soldiers Supporter
Supporting Vendor
7,769
19,877
113
Location
Charlotte NC
Awesome information. I will indeed do one at a time.. Would it be best to drain the whole system from the wheel cylinders before removing the fluid? when I pump the canister with pressure and release at the cylinder , is it safe to say that when a stream comes out it’s good?
also thank you for that link. I’m really feeling eager to do this and am excited
I may just be a slob, but in the past I have just removed the rubber hoses and let the fluid drain into a coffee can or something similar. When it stops dripping I connect the new hose and move on to the next wheel. Keep plenty of rags handy to wipe things as you go.

It will be very obvious when you start bleeding. Might even be worth wearing safety glasses because the first few "burps" of air will be surprisingly strong coming out of the bleeder screw. You might even want to get a small clear hose to push onto the bleeder screw and capture that brake fluid in your coffee can.

I would encourage you to dump the fluid you catch that way. You don't want to chance getting dirt or grit in the brake lines or into your master cylinder...
 

NY Tom

Well-known member
Steel Soldiers Supporter
559
845
93
Location
Riverhead, NY
Not sure how far you are willing to go on this project.
I just did my entire brake system front to back including rebuilding the Air Pack and putting in a new Master Cylinder.
Took everything apart one axle at a time. Ordered all the right hoses from Big Mikes Motorpool as a set. Also picked up 6 wheel cylinders and new banjo bolts and sealing washers to have them ready.
Used the cunifer line to do the job - easy to bend and to make the double flares in.
Put it all together dry and clean and didn't put fluid in until I was ready.

Search for the PEASHOOTER brake line schematic. Spot on with the sizes.
You will need a flare tool if you don't have one. I got a Ridgid 45 degree double flare kit for about $65. You might want to buy a spare 1/4 and 5/16 double flare insert as I cracked one not knowing how to do this correctly in the beginning. Also a countersink, file, and a digital caliper to check the dimensions after.
Got all the line and fittings here. Fedhill
You need a gallon of DOT 5 fluid.
Air Pack rebuild kit search Monkeyboyarmy you can get it from him on the big E site. Has basically everything you need for the short style.

It was a lot of work but the result was a perfect system. Not a single leak after it was all assembled and bled. Brand new front to back no worry of mixing fluids.
 

Attachments

Dasgog

Active member
177
148
43
Location
Tucson, AZ
Not sure how far you are willing to go on this project.
I just did my entire brake system front to back including rebuilding the Air Pack and putting in a new Master Cylinder.
Took everything apart one axle at a time. Ordered all the right hoses from Big Mikes Motorpool as a set. Also picked up 6 wheel cylinders and new banjo bolts and sealing washers to have them ready.
Used the cunifer line to do the job - easy to bend and to make the double flares in.
Put it all together dry and clean and didn't put fluid in until I was ready.

Search for the PEASHOOTER brake line schematic. Spot on with the sizes.
You will need a flare tool if you don't have one. I got a Ridgid 45 degree double flare kit for about $65. You might want to buy a spare 1/4 and 5/16 double flare insert as I cracked one not knowing how to do this correctly in the beginning. Also a countersink, file, and a digital caliper to check the dimensions after.
Got all the line and fittings here. Fedhill
You need a gallon of DOT 5 fluid.
Air Pack rebuild kit search Monkeyboyarmy you can get it from him on the big E site. Has basically everything you need for the short style.

It was a lot of work but the result was a perfect system. Not a single leak after it was all assembled and bled. Brand new front to back no worry of mixing fluids.
I appreciate those links and information. At this point both the air pack and master cylinder are indeed new (5 years old) and I have 0 issues with the system. My main concern was getting proactive with the maintenance and also, the 5 rubber hoses near the axels are looking rough so those are a definite change.
I think for now that will be all I need to do.. the truck is driven and stored in carport so not too bad in the elements. When they time does come, be it out of necessity or experience, I will indeed look at those schematics
 

NY Tom

Well-known member
Steel Soldiers Supporter
559
845
93
Location
Riverhead, NY
In that case probably best to stick to the DOT 3 and just change to hoses.
It's going to be a mess when you take each one off.
I see no reason to bleed between each hose you do unless you are not doing them all in one sitting and plan to drive the truck in between.
When the brake is not depressed there is no real pressure in the lines. They are just full from end to end.
 

Dasgog

Active member
177
148
43
Location
Tucson, AZ
When I used my motive pressure bleeder I used a "one man bleeder hose" with check valve in it. Mine was NAPA but they seem to be out of stock.
On/In on amazon these are great price for four but I only ever needed one.
Interesting. So you connect it to one of the wheel cylinder brake valves and leave it open and it doesn’t leak unless it’s under pressure?
When I used my motive pressure bleeder I used a "one man bleeder hose" with check valve in it. Mine was NAPA but they seem to be out of stock.
On/In on amazon these are great price for four but I only ever needed one.
Interesting. So you connect one to the valve on whichever brake cylinder your bleeding and then it only bleeds under pressure when using the Power Bleeder? So it really just eliminates the loosening and tightening each time ?
 

Mullaney

Well-known member
Steel Soldiers Supporter
Supporting Vendor
7,769
19,877
113
Location
Charlotte NC
I appreciate those links and information. At this point both the air pack and master cylinder are indeed new (5 years old) and I have 0 issues with the system. My main concern was getting proactive with the maintenance and also, the 5 rubber hoses near the axels are looking rough so those are a definite change.
I think for now that will be all I need to do.. the truck is driven and stored in carport so not too bad in the elements. When they time does come, be it out of necessity or experience, I will indeed look at those schematics
What NY Tom is proposing is a first class replacement of the entire brake system. Many moons ago, I worked for a company that used MV's to do the work in the field. We would buy a military vehicle, then gut it to the frame. Old wiring and plumbing was cut out and dumped unceremoniously into the trash (before recycling was a "thing"). In two weeks time, we would build that truck back to as good as new. Newly rebuilt axles, transfer case, engine, drive lines got all new joints and a new powerplant.

Frame would be painted, then new lines would be plumbed in and new wiring harness dropped in place. NONE of that was military. We used clamps every few feet to lock those wires and steel brake lines to the frame. In the end we have a 12 volt truck that would be sent to some of the harshest working environments. The goal was for that truck 5-Ton, Deuce or Weapons Carrier or M4 tractor (tank) to last for 7 years before it came back for rebuild. That plan worked amazingly well for our purposes and for that company using retired military trucks...

However, most of us have a goal of maintaining a military vehicle.

In my opinion - if your steel brake lines are securely fastened to the frame as they should be - and if you don't get a coffee can full of rust when you start removing the rubber hoses - and they look good (not bent or kinked) then what you are proposing to do should be adequate. Just consider what you mentioned earlier: Your life is on the line so don't go for cheap on the rubber hoses. Made here is a good thing.
 

frank8003

In Memorial
In Memorial
6,426
4,985
113
Location
Ft. Lauderdale, Florida
Interesting. So you connect it to one of the wheel cylinder brake valves and leave it open and it doesn’t leak unless it’s under pressure?


Interesting. So you connect one to the valve on whichever brake cylinder your bleeding and then it only bleeds under pressure when using the Power Bleeder? So it really just eliminates the loosening and tightening each time ?
No, the pressure bleeder I pumped up to 15, went to where I was to bleed line and attached the hose. Opened the valve until only fluid came out and closed the valve.
Went to the next one. Same thing. After usually three were done I would go pump up the pressure bleeder again. What the little hose check valve does is never let any air back in.
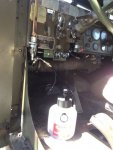
bleeder brake reservoir 1.JPG
 
Last edited:

Dasgog

Active member
177
148
43
Location
Tucson, AZ
No, the pressure bleeder I pumped up to 15, went to where I was to bleed line and attached the hose. Opened the valve until only fluid came out and closed the valve.
Went to the next one. Same thing. After usually three were done I would go pump up the pressure bleeder again. What the little hose check valve does is never let any air back in.
Ahhh thank you I understand.
 
Top
AdBlock Detected

We get it, advertisements are annoying!

Sure, ad-blocking software does a great job at blocking ads, but it also blocks useful features of our website like our supporting vendors. Their ads help keep Steel Soldiers going. Please consider disabling your ad blockers for the site. Thanks!

I've Disabled AdBlock
No Thanks