• Steel Soldiers now has a few new forums, read more about it at: New Munitions Forums!

  • Microsoft MSN, Live, Hotmail, Outlook email users may not be receiving emails. We are working to resolve this issue. Please add support@steelsoldiers.com to your trusted contacts.

Bringing back to life a 2009 HMMWV M1165A1 from GovPlanet - total newbie, please help...

Bill Nutting

Well-known member
Steel Soldiers Supporter
573
1,284
93
Location
Chesterfield, Mi.
CLEAN, CLEAN, CLEAN..... carefully tap into place with a plastic mallet(hammer). If I remember there is a lip on the seal that ends up flush when its seated. A block of wood will work BUT it has to be started evenly first. These are usually not real tight........... for whats it worth.
Do you think freezing the seal might make it seat easier?
 

TNDRIVER

Well-known member
Steel Soldiers Supporter
333
508
93
Location
Cleveland,TN
Do you think freezing the seal might make it seat easier?
Never had to...... we have "cooled " the input yoke though to get the speedy-sleeve on. Involved a 3000 gal. tank of CO2, a 8 ft. wand and a cardboard box. I thought it a little munch to try and explain here though. Worked for us though and did not have to wait all night.
 

T9000

Well-known member
Steel Soldiers Supporter
488
367
63
Location
California
There is an access panel on the tunnel to get to top of fuel tank. If it is the big rectangle seal under the metal plate, drop the tank to replace. I remember reading somewhere not to fill it up.
the access panel may be under your rear evaporator, near the RH rear seat.
I finally got around to remove the tunnel evaporator and found the small access panel under it…and another bucket of sand, which I vacuumed :)
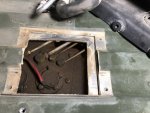
There is not a lot of room to work on the top of the fuel tank through that small opening:

F7A4CE90-F066-4DCD-98B1-9E776DB756F1.jpeg

Could the fuel tank be dropped without removing the rear drive shaft? It looks possible by rotating the tank a little so it can get around the drive shaft maybe?
 
Last edited:

Retiredwarhorses

Well-known member
Steel Soldiers Supporter
4,392
4,175
113
Location
Brentwood, Calif
I finally got around to remove the tunnel evaporator and found the small access panel under it…and another bucket of sand, which I vacuumed :)
There is not a lot of room to work on the top of the fuel tank through that small opening:

View attachment 858947

Could the fuel tank be dropped without removing the rear drive shaft? It looks possible by rotating the tank a little so it can get around the drive shaft maybe?

absolutely not, and why would you not want the DS removed, it’s 4 5/16 bolts and it’s a slip yoke.
you have way more work getting the tank out compared to that Task.
 

T9000

Well-known member
Steel Soldiers Supporter
488
367
63
Location
California
absolutely not, and why would you not want the DS removed, it’s 4 5/16 bolts and it’s a slip yoke.
you have way more work getting the tank out compared to that Task.
Maybe I am overcomplicating things in my mind thinking if there could be any alignment issues after removing and reinstalling the DS,?
Usually the less parts are being removed, there are less potential issues to have, but it doesn't sound like removing the DS is a big deal.

Thanks!
 

Mullaney

Well-known member
Steel Soldiers Supporter
Supporting Vendor
7,711
19,750
113
Location
Charlotte NC
Maybe I am overcomplicating things in my mind thinking if there could be any alignment issues after removing and reinstalling the DS,?
Usually the less parts are being removed, there are less potential issues to have, but it doesn't sound like removing the DS is a big deal.

Thanks!
.
Make it easy on yourself.
Removing the drive shaft and bolting it back in place is pretty easy. Should be low stress...
 

T9000

Well-known member
Steel Soldiers Supporter
488
367
63
Location
California
.
Make it easy on yourself.
Removing the drive shaft and bolting it back in place is pretty easy. Should be low stress...
LOL, I like your low stress comment...that's one of the reasons why I like working on the truck...it takes some stress away :)
 
Last edited:

TNDRIVER

Well-known member
Steel Soldiers Supporter
333
508
93
Location
Cleveland,TN
LOL, I like your low stress comment...that's one of the reasons why I like working on the truck...it takes some stress away :)
Your fuel leak from the top area of the tank may not be the gasket, might be the vent tube ....three or four of them. Clean and watch them closely.
Round thing with red wire is the fuel gauge sender, pull that and you can get a decent look into the tank. .....Drive shaft is easy, the sender jumper wire is whats fun!
 

T9000

Well-known member
Steel Soldiers Supporter
488
367
63
Location
California
Your fuel leak from the top area of the tank may not be the gasket, might be the vent tube ....three or four of them. Clean and watch them closely.
Round thing with red wire is the fuel gauge sender, pull that and you can get a decent look into the tank. .....Drive shaft is easy, the sender jumper wire is whats fun!
You are correct! There are two vents on the side towards the top that leak when the tank is filled up and it looks like there is also some activity at the top panel too.
I removed the tunnel evaporator not knowing how small the top access cover was, thought I could get replace the leaking components from the top, but the access is very limited.
My plan is to fix the fuel tank to not leak even when it's full and will see how doable it is once is out and I can get a closer look. Depending on its condition, getting a new tank it is also on the list as they are not that expensive.
Based on your comments it sounds like there could be some surprises dealing with the sender jumper wire :)

Thank you!
 

Action

Well-known member
3,576
1,557
113
Location
East Tennessee
If you drop the tank, i find it easier to disconnect the wiring at rear between fuel tank and muffler.
if you remove the sender, it only goes in one way. Thebolt holes are not evenly spaced.
there is a big vent line that runs through the body, above the driveshaft.
when putting tank back in, make sure the hanging straps are all the way towards the RH side of truck.
 

T9000

Well-known member
Steel Soldiers Supporter
488
367
63
Location
California
If you drop the tank, i find it easier to disconnect the wiring at rear between fuel tank and muffler.
if you remove the sender, it only goes in one way. Thebolt holes are not evenly spaced.
there is a big vent line that runs through the body, above the driveshaft.
when putting tank back in, make sure the hanging straps are all the way towards the RH side of truck.
That's great info, just like when you said that the nut behind the side panel was reachable and I was planning to remove the bracket instead...but then based on your info I did reach the nut...thank you!
 

T9000

Well-known member
Steel Soldiers Supporter
488
367
63
Location
California
Since the beginning I had this light vibration in the front end around 70mph and higher and I attributed it to the old tires.
The vibration is visible via the hood air lift hook, which moves side to side about 1/4" (about 1/8" or so on each side), while the hood appears static, so it looks like the chassis is slightly moving against the body, not sure if all HMMWVs have a similar chassis vs. body play?

The new tires are balanced, I saw the shop zeroing them out (on some they used a lot of weights, maybe about 18oz? they could barely fit it on the wheel) so I started to hunt down the vibration (which is smaller than with the old tires, bit still present) thinking maybe it is run-out since I built the tires myself and maybe I screwed something up. I called a few shops around and they said the tire is too aggressive to do a run-out test so I came up with a home made version.

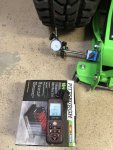
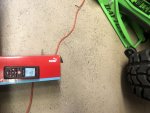
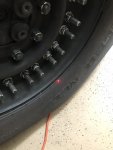
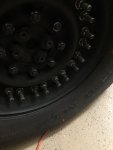
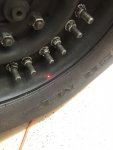
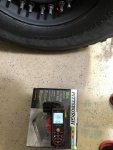
At first I tried to use the milling machine table calibration dial indicator which has a 0.0005" resolution, but it kept getting caught in the tire tread as I was rotating it (I lifted each wheel and rotated each wheel by hand with the transmission and TC in Neutral), so I switched to a Leica D330 laser meter with a 0.004" (0.1mm) resolution (its absolute accuracy is 0.039"/ 1mm, but in this case the resolution is important because this is a relative measurement to see the worst min/ max deviation) and measured both front tires tread run-out, run-out at the bead and even the side wall and the wheels at the bead lip and also at the base of the bolts:

IMG_1169.JPG

Tire Runout.JPGIMG_1270.JPG

Tire Runout4.JPG
Tire Runout3.JPG
IMG_1170.JPG

The largest deviation was on the tire tread and side wall (don't think that sidewall deviation is usually measured for run-out, but I did it just to get more datapoints since I could not find anything major) between 0.05" and 0.07" and the wheels were even less.
Also, front tires side wall worse deviation between front area and rear is also about 0.07" (checked to see if they are parallel with each other).
I also pushed the wheels while lifted to see if the whole wheel hub had any play and the movement was minimal, it felt like less than 1/8", more like 1/16".

Given these measurements, the front tires or wheels do not appear to be have any large run-outs or being out of round.
I started looking into this vibration thinking that maybe the front diff input seal started to leak because of the vibration as the truck has only 8,000 miles and don't believe that the seal just failed. The leak seems to started to occur in its earlier days, way before I got it as there was gunk accumulation that looked old when I cleaned it.
I did not get around to change the seal yet and the leak is very marginal, maybe a small drip if you wipe the finger around the drive shaft, nothing that would make it on the floor.

Is it normal for the air lift hood hook to have this type of side-to-side movement against the hood at 65=70+ mph? I would have thought that the 12k chassis being so stiff this should not occur?
Just trying to understand what else should I look for?
I am thinking to rebuild the tires without the run-flats as the static measurements look OK and this appears to be more of a dynamic issue as it manifests with the increased speed? But that's a lot of work and a lot of beers LOL, so I thought to run it by you first :)
 
Last edited:

Milcommoguy

Well-known member
Supporting Vendor
1,708
2,261
113
Location
Rosamond, CA
Since the beginning I had this light vibration in the front end around 70mph and higher and I attributed it to the old tires.
The vibration is visible via the hood air lift hook, which moves side to side about 1/4" (about 1/8" or so on each side), while the hood appears static, so it looks like the chassis is slightly moving against the body, not sure if all HMMWVs have a similar chassis vs. body play?

The new tires are balanced, I saw the shop zeroing them out (on some they used a lot of weights, maybe about 18oz? they could barely fit it on the wheel) so I started to hunt down the vibration (which is smaller than with the old tires, bit still present) thinking maybe it is run-out since I built the tires myself and maybe I screwed something up. I called a few shops around and they said the tire is too aggressive to do a run-out test so I came up with a home made version.

At first I tried to use the milling machine table calibration dial indicator which has a 0.0005" resolution, but it kept getting caught in the tire tread as I was rotating it (I lifted each wheel and rotated each wheel by hand with the transmission and TC in Neutral), so I switched to a Leica D330 laser meter with a 0.004" (0.1mm) resolution (its absolute accuracy is 0.039"/ 1mm, but in this case the resolution is important because this is a relative measurement to see the worst min/ max deviation) and measured both front tires tread run-out, run-out at the bead and even the side wall and the wheels at the bead lip and also at the base of the bolts:

View attachment 859060

View attachment 859061View attachment 859062

View attachment 859063
View attachment 859065
View attachment 859064

The largest deviation was on the tire tread and side wall (don't think that sidewall deviation is usually measured for run-out, but I did it just to get more datapoints since I could not find anything major) between 0.05" and 0.07" and the wheels were even less.
Also, front tires side wall worse deviation between front area and rear is also about 0.07" (checked to see if they are parallel with each other).
I also pushed the wheels while lifted to see if the whole wheel hub had any play and the movement was minimal, it felt like less than 1/8", more like 1/16".

Given these measurements, the front tires or wheels do not appear to be have any large run-outs or being out of round.
I started looking into this vibration thinking that maybe the front diff input seal started to leak because of the vibration as the truck has only 8,000 miles and don't believe that the seal just failed. The leak seems to started to occur in its earlier days, way before I got it as there was gunk accumulation that looked old when I cleaned it.
I did not get around to change the seal yet and the leak is very marginal, maybe a small drip if you wipe the finger around the drive shaft, nothing that would make it on the floor.

Is it normal for the air lift hood hook to have this type of side-to-side movement against the hood at 65=70+ mph? I would have thought that the 12k chassis being so stiff this should not occur?
Just trying to understand what else should I look for?
I am thinking to rebuild the tires without the run-flats as the static measurements look OK and this appears to be more of a dynamic issue as it manifests with the increased speed? But that's a lot of work and a lot of beers LOL, so I thought to run it by you first :)
 

Action

Well-known member
3,576
1,557
113
Location
East Tennessee
Incorrect caster can result in front end shaking at higher speeds. like a shopping cart. If you see an employee in the grocery lot looking at a cart funny, give him a hand full of washers, and he can have the easiest job.

Back to your truck... You can raise the tire you are checking and secure the truck. Start and putvin first (slowest). It wont go anywhere. You wont have to turn by hand. You can see the tire moving up and down. I saw mine moving almost 1/4” and still had a smooth ride on the street.
Also, if you notice one specific tire giving you a rough ride and you confirm via moving it around, you can unbolt the two rim halves (no air pressure!), and turn the outer half 90 or 180 degrees and put back together.
It would also pay to research the colored dots on the new tires. You can find the high spot on rim halves by turning just the rim.
 

Milcommoguy

Well-known member
Supporting Vendor
1,708
2,261
113
Location
Rosamond, CA
Nice write up to the investigation. Is the shaking - shimming felt back thru the steering system ie: steering wheel? Could the hood just be dancing around lol ??
There are the three hood bumpers. Left, right and center with adjustments and the dog bones that hold it in position. The center one can be adjusted to remove the left-right play a bit (snug them up?) with the "paws" at the hood. Could that be what your seeing? Mine was bouncing and squeaking like a the big pig it is🐗 LOL.

I read what you're saying... those air lifts hooks thru the hood walking around seems a little hard to grasp. With the hood nailed down to the front frame and hood floating on the body and the body floating on the body mount.... my guess at 70 MPH you are approaching terminal velocity. 🚀

Mine use to do it at 38 MPH. Not any more, CAMO
 
Last edited:

T9000

Well-known member
Steel Soldiers Supporter
488
367
63
Location
California
Incorrect caster can result in front end shaking at higher speeds. like a shopping cart. If you see an employee in the grocery lot looking at a cart funny, give him a hand full of washers, and he can have the easiest job.

Back to your truck... You can raise the tire you are checking and secure the truck. Start and putvin first (slowest). It wont go anywhere. You wont have to turn by hand. You can see the tire moving up and down. I saw mine moving almost 1/4” and still had a smooth ride on the street.
Also, if you notice one specific tire giving you a rough ride and you confirm via moving it around, you can unbolt the two rim halves (no air pressure!), and turn the outer half 90 or 180 degrees and put back together.
It would also pay to research the colored dots on the new tires. You can find the high spot on rim halves by turning just the rim.
Ok, I like the idea of having the engine turn the wheel. Just to make sure I get this right and don't have the truck run thru the wall lol...
so if I lift that wheel and block/ secure the other three wheels, and have the transmission in 1 (I presume the TC stays in H?), it will turn only the lifted tire?

How about if I put three wheels up, two on 6 ton stands, one on the 4 ton jack and block/ secure the remaining wheel?

I think there was an yellow dot but couldn't see it after you mentioned it, I will check the tires on the inside also in case it's there (I did research what you said and found the info about the red & yellow points which are used for balancing).

And thank you!
 
Last edited:

T9000

Well-known member
Steel Soldiers Supporter
488
367
63
Location
California
Nice write up to the investigation. Is the shaking - shimming felt back thru the steering system ie: steering wheel? Could the hood just be dancing around lol ??
There are the three hood bumpers. Left, right and center with adjustments and the dog bones that hold it in position. The center one can be adjusted to remove the left-right play a bit (snug them up?) with the "paws" at the hood. Could that be what your seeing? Mine was bouncing and squeaking like a the big pig it is🐗 LOL.

I read what you're saying... those air lifts hooks thru the hood walking around seems a little hard to grasp. With the hood nailed down to the front frame and hood floating on the body and the body floating on the body mount.... my guess at 70 MPH you are approaching terminal velocity. 🚀

Mine use to do it at 38 MPH. Not any more, CAMO
Thanks! It's not exactly shimming, which I am familiar with from other cars where the steering moves side to side when it's not held. It is more like a shacking that goes to the whole body, the doors are shacking, the windows, but those are somewhat loose also, and some of the shaking comes thru the steering column but it's not as strong as it looks on the amount of the hood hook movement.

You are 100% right about the hood, it was totally lose when I first got it, the front bolts were not tighten, but I tighten everything sometime ago and I checked it again, it is still very tight. There seems to be two conditions, which may point to multiple combined issues, which may mask eachother in terms of cause vs effect...when the hood moves vs the hooks, it appears to move with the whole truck body, not by itself.
The other case is even at slower speeds when I go over rougher terrain, sometimes it looks like the hooks are moving against the body (I know it's hard to tell, and I use the road as a static point of reference).
Another puzzling thing is that the driver side hook seems to have more movement than the passenger side, but that could also be because I can look straight at its cross section, where the other one is at an angle.

I will take some video, that would explain things better.
 

Action

Well-known member
3,576
1,557
113
Location
East Tennessee
Ok, I like the idea of having the engine turn the wheel. Just to make sure I get this right and don't have the truck run thru the wall lol...
so if I lift that wheel and block/ secure the other three wheels, and have the transmission in 1 (I presume the TC stays in H?), it will turn only the lifted tire?

How about if I put three wheels up, two on 6 ton stands, one on the 4 ton jack and block/ secure the remaining wheel?

I think there was an yellow dot but couldn't see it after you mentioned it, I will check the tires on the inside also in case it's there (I did research what you said and found the info about the red & yellow points which are used for balancing).

And thank you!
I have only done one wheel in the air at a time. I just put mine in OD like normal driving. The tires on the ground will not move. Leave the transfer case in H. If you do transfer case in HL or LL, the truck will move. You can just park it with a tree against the bumper if you feel uneasy about it. You can also have someone in the driver seat too.
 
Top
AdBlock Detected

We get it, advertisements are annoying!

Sure, ad-blocking software does a great job at blocking ads, but it also blocks useful features of our website like our supporting vendors. Their ads help keep Steel Soldiers going. Please consider disabling your ad blockers for the site. Thanks!

I've Disabled AdBlock
No Thanks