kerismo
New member
- 32
- 0
- 0
- Location
- Valley, CT
Star Date 7/19/2011, Mog blog log
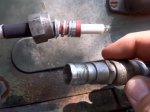
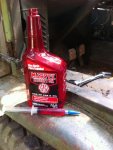
Today we removed the shielded spark plugs to inject a bit of Marvels Mystery oil to lubricate the cylinders. The sheilded plugs are quite a bit different from the civilian ones Im used too. This is a newer style champion plug that has a second hexnut a little higher to facilitate easier removal.

THe wire has a threaded cap that keeps the water and radio waves out. I'll add an extra layer of aluminium foil for those conspiracy theorists, ;D THe previous owner only changed the rear 4 plugs, guess he could not reach all the way to the front to get the other two...I had to use a 1/2" drive deepwell socket to get down the the hexnut on the old style plug with only the lower hex in the usual spot. A 3/8" drive socket was jut shorter than the 1/2" This tip is thanks to a SS search function returned thread. Unfortunately in my rush to turn the wrenches I failed to note who should get the credit, So I'll thank the Site as a whole for another top tip.
The MMO is Old School, but the effects are still just as real.

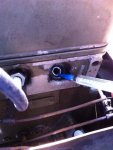
Injected into the cylinder for pre ignition lube. I used a children's medicine dropper to draw up the oil and dispense it neatly in the cylinder.

Once the plugs were cleaned and back in place, I opened the distributor cap, cleaned the carbon off the contacts and points with a piece of very fine sand paper. Sealed it back up, but noticed that the distributor shaft was rotating 15-20 degrees very freely. I have to assume the old owner unscrewed it in an attempt to adjust the timing ( fingers crossed). so I turned it to somewhere in the middle,
I also freed up the manual choke cable and carburater linkages, popped off the snorkle intake to the carb. and hooked up the 2 new batteries.
Well, Finnally time to Fire this Mother UP!Video removed as link stunk! Sorry
Yes it is a very very brief run, AND on ether. But it at least confirms that the components inside the motor are still doing their jobs. I did a few more with more "canned fuel" but held off any extended running so as not to burn any valves. It was smooth and the MMO smelled so sweet as it burned. Next i'm working my way back through the fuel system,
Try the carb on clean gas from a test tank and new plumbing. fuel filters and lines are a no brainer but these are hard plumbed steel lines that will no doubt be replaced with a more flexible more technologically advanced line. I am however on the fence with reguard to the original tanks, I am sure the are filled with Varnish and rusty crap. Do I ditch the frame mounted steel cans and go with a newer polyplastic tank mounted higher with an electric pump? Or try and keep it original, pull the tanks dump them and epoxy line them. Decisions decisions Both options mean similar dollar outlay so it is purely an asthetic decision. Any ideas?
Today we removed the shielded spark plugs to inject a bit of Marvels Mystery oil to lubricate the cylinders. The sheilded plugs are quite a bit different from the civilian ones Im used too. This is a newer style champion plug that has a second hexnut a little higher to facilitate easier removal.

THe wire has a threaded cap that keeps the water and radio waves out. I'll add an extra layer of aluminium foil for those conspiracy theorists, ;D THe previous owner only changed the rear 4 plugs, guess he could not reach all the way to the front to get the other two...I had to use a 1/2" drive deepwell socket to get down the the hexnut on the old style plug with only the lower hex in the usual spot. A 3/8" drive socket was jut shorter than the 1/2" This tip is thanks to a SS search function returned thread. Unfortunately in my rush to turn the wrenches I failed to note who should get the credit, So I'll thank the Site as a whole for another top tip.
The MMO is Old School, but the effects are still just as real.

Injected into the cylinder for pre ignition lube. I used a children's medicine dropper to draw up the oil and dispense it neatly in the cylinder.

Once the plugs were cleaned and back in place, I opened the distributor cap, cleaned the carbon off the contacts and points with a piece of very fine sand paper. Sealed it back up, but noticed that the distributor shaft was rotating 15-20 degrees very freely. I have to assume the old owner unscrewed it in an attempt to adjust the timing ( fingers crossed). so I turned it to somewhere in the middle,
I also freed up the manual choke cable and carburater linkages, popped off the snorkle intake to the carb. and hooked up the 2 new batteries.
Well, Finnally time to Fire this Mother UP!Video removed as link stunk! Sorry
Yes it is a very very brief run, AND on ether. But it at least confirms that the components inside the motor are still doing their jobs. I did a few more with more "canned fuel" but held off any extended running so as not to burn any valves. It was smooth and the MMO smelled so sweet as it burned. Next i'm working my way back through the fuel system,
Try the carb on clean gas from a test tank and new plumbing. fuel filters and lines are a no brainer but these are hard plumbed steel lines that will no doubt be replaced with a more flexible more technologically advanced line. I am however on the fence with reguard to the original tanks, I am sure the are filled with Varnish and rusty crap. Do I ditch the frame mounted steel cans and go with a newer polyplastic tank mounted higher with an electric pump? Or try and keep it original, pull the tanks dump them and epoxy line them. Decisions decisions Both options mean similar dollar outlay so it is purely an asthetic decision. Any ideas?
Attachments
-
44.9 KB Views: 15
-
76.7 KB Views: 15
-
54.9 KB Views: 18
-
51.1 MB Views: 6
Last edited:


