• Steel Soldiers now has a few new forums, read more about it at: New Munitions Forums!

  • Microsoft MSN, Live, Hotmail, Outlook email users may not be receiving emails. We are working to resolve this issue. Please add support@steelsoldiers.com to your trusted contacts.

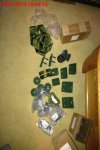
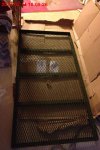
Camo rack assy. kit arrived..

emmado22

Moderator
Super Moderator
Steel Soldiers Supporter
7,058
147
63
Location
Mid Hudson Valley NY
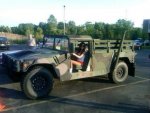
What type of HMMWV are you going to install it on? The instructions tell you to put 2 holes in the canvas top to attach it to the B pillar. That, as expected, makes it leak. In the Army, and on my HMMWV now, I never did that, I just let it "free float" on the B pillar, and put a piece of heater hose slit down the side on the metal angle iron part that made contact with the canvas. It's a great kit they were highly sought after, but somewhat unobtainable when I was in. But, being the crafty guy I was, made one appear. I put all my camo netting stuff on it, which freed up a ton of space out of the back of the 2 seater I had/have.

It attaches to the A pillar and the B pillar, and goes over the driver/front passenger. http://www.armyrecognition.com/humv...data_sheet_specifications_pictures_video.html
 
Last edited:

hummer4x4guy

Member
770
4
18
Location
Lansing, Mi
As Emmado posted on that link they go above the front two seats.
Emmado do you still have the paper work for figures 1-5? My kit is missing that one paper. :/
 

emmado22

Moderator
Super Moderator
Steel Soldiers Supporter
7,058
147
63
Location
Mid Hudson Valley NY
No paperwork. Just look in the 24P-2 under "Camo rack and stowage rack assembly" for how it all goes together. I you need close up pictures, I can take some and post them. It's pretty easy. The parts with the threads go INSIDE the windshield frame, the threads thru the front of the frame, then the block, then the bigger of the 2 angled supports, then the metal dish, then rubber donut, then smaller angle, then donut, then metal dish. Add the bolts and metal bushing. the rack itself bolts to the smaller of the angle supports. I didn't bother with the B post supports.
 
Last edited:

hummer4x4guy

Member
770
4
18
Location
Lansing, Mi
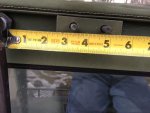
Putting it together isnt the issue.. Its a matter of proper hole placment on the A pillar I dont wana mess up. Photo with some type of measurement for proper hole placement would work also.
I am adding it to my 2 man..
Thanks
 

Attachments

Last edited:

emmado22

Moderator
Super Moderator
Steel Soldiers Supporter
7,058
147
63
Location
Mid Hudson Valley NY
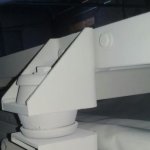
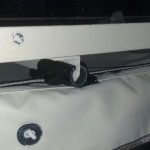
Here is a close up of the mounts. They are both the same for both sides. Add the 3 straps, and your done. Pretty easy to install. If you do install that rear set of mounts, the canvas will leak in the rain. I don't drive my truck that much to worry about the rub thru with the heater hose on the canvas.
 

Attachments

Last edited:

hummer4x4guy

Member
770
4
18
Location
Lansing, Mi
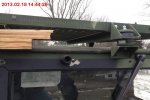
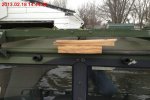
some more photos...
If you install it solo like I did I used shims to adjust the hight to the best....hight.
When you drill into the windshild frame you do not want the holes to be too high up or the piece with the two welded bolts will come in contact with the upper portion of inside the windshield frame and cause an issue. Try to center the holes as squarely inbetween the bottom of the channel for the soft top and the glass trim and you would be ok. Center the whole rack with the middle of the windshield and you will be fine. Use trasnfer punch if you have some to set your drill holes also if possible.
 

Attachments

Top
AdBlock Detected

We get it, advertisements are annoying!

Sure, ad-blocking software does a great job at blocking ads, but it also blocks useful features of our website like our supporting vendors. Their ads help keep Steel Soldiers going. Please consider disabling your ad blockers for the site. Thanks!

I've Disabled AdBlock
No Thanks