• Steel Soldiers now has a few new forums, read more about it at: New Munitions Forums!

  • Microsoft MSN, Live, Hotmail, Outlook email users may not be receiving emails. We are working to resolve this issue. Please add support@steelsoldiers.com to your trusted contacts.

Canadian M152 Camper/Bugout Mods

thmpr

Active member
80
136
33
Location
Phoenix, AZ
View attachment 668000
Maybe photo magic that and see how it would look with the rear wheel well opened closer the the front sizing.
I think the factory made the rear opening too small.
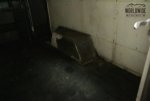
The rear opening size is limited by the interior tub, which is an angular item. 1484738-3-large.jpg 1484738-1-large.jpgEven grafting a M37 fender may not fit. May have to remove the interior tubs and repace it with matching M37 bed tubs. Will get it all figured out when the replacement 14 bolt axle is procured.
 

Attachments

Last edited:

thmpr

Active member
80
136
33
Location
Phoenix, AZ
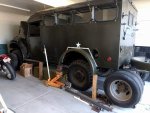
Update: just got the truck delivered on Saturday. Runs, drives, is built much tougher than imagined. Looks like a repaint done in the '80's. Metal is in wonderful conditon with only a few spots requiring any rust patching. Minor dents and dings can be floated out and primed prior to the new vinyl wrap. Getting A-TAC camo color samples sent. The command box is quite the billboard and is begging for murals. Playing with ghosted images of Mount Rushmore over the American flag on one side and the Grand Canyon with eagles on the other. Can have a local micrographics company print the vinyl murals as they do on commercial vehicles. Needs lots of more design time, and will take the "military" edge off the vehicle making it appear repurposed for civilian use. I was never in the military and do not want to confuse anyone.

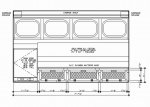
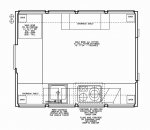
Needs door, window, windshield gaskets. That large, gasoline powered box heater needs removal as does the overhead exhaust ducting in the command box. Switching vehicle to 12 volts with second battery for camping box power. Measured and re-measured the box interior for camper plans. It is longer than expected :) The headroom is low having to crouch to move around. The interior is designed with that in mind. The kitchen is a sit-down kitchen for cooking, washing, etc. Counter height @ 30", similar to lower bathroom vanities. Will roll around on a caster storage ottomans to do stuff inside. Attached preliniary cabinet designs. 1-1/2" x 1-1/2" aluminum angle for boxes and door fronts. Doors and drawer fronts infilled with flattened expanded metal lath to play on the exterior window grids. Can still have access to the refrigerator and the wardrobe drawers with the full bed layed open. The cassette toilet is going between the driver and passenger seats in a custom console. Will need pull-down shades on the front cab windows :)
M152-KIT-1.jpgM152-BED.jpgM152-FLR-1.jpgM152-NIT-1.jpg
Will also be using similar expanded metal lath on a fold-down rear ramp/paio and rooftop expedition rack for the spare tire, etc.
 
Last edited:

thmpr

Active member
80
136
33
Location
Phoenix, AZ
Has anyone removed the Southwind heater and heater box from their rear compartment? I have removed all the heater components and controls and am pulling my hair out trying to figure out how the heater box is secured to the truck. I want it gone. That's where the refrigerator has to go. Installing a new floor, so don't care about mutilating the old to access the box.

Also, what is the demand for good M152/M37 pieces, parts? I will have a vast assortment of stuff available as I mod this truck. A running 30,000 mile 251 in-line six, trans, transfer, front and rear 5.83 axles with brand new brake shoes and cylinders, wheels, tires, complete wiring harness, 24 volt reg and generator, seats, Southwind heater, overhead exhaust vents, gauges, etc.

Glenn
 

thmpr

Active member
80
136
33
Location
Phoenix, AZ
Time for an update. Have been working on the rear box disassembly while still keeping the truck drivable. Been taking it to the weekly Pavilions Cruise in Scottsdale, AZ where it receives tons of attention. Unlike the other hands-off garage queens, I let kids climb all over it like a jungle gym - tell them not to push the self-destruct button. Parents love the photo op.

Driving impression. This thing drives like a TURD! 45mph top speed and it takes about 30 seconds to get there. Slush box transmission, stiff, shaky steering, 55 year old tires. I've had time to understand the vehicle and even had a Vulcan Mind Meld asking what it wants. It looks forward to the nice camper, engine, trans and brake upgrades, but wants to keep its original color, most of the exterior, axles and steering. Unfortunately, after much research, keeping the axles just is not feasible. The expensive 4.89 gear sets are not available with another production run scheduled in about a year. The locking hubs are too expensive. The disc brake kits are rediculously expensive. Available tubeless Budd-type rims are not DOT approved for highway use. So ... it will get a current GM 14 bolt 4.10 ratio in the rear with disc brakes and a matching Dana 60 front with discs. Sorry truck.

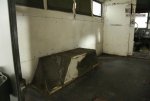
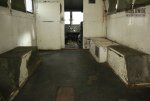
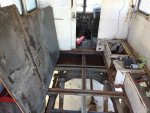
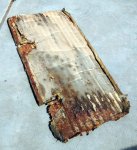
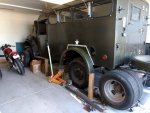
Attached a few pics of the ongoing disassembly. M152 Demo 1.jpgM152 Demo 2.jpgM152 Demo 6.jpgM152 Demo 3.jpgM152 Demo 4.jpgM152 Demo 5.jpgThere is a lot of surface rust down low with a few pin holes through. Some areas will require metal patching. When the box is completely stripped including the ceiling to expose the roof bows, the box interior will be soda blasted and primed with a rust stop sealer. The original paper-backed insulation is a mess. The pictures show the better pieces. This will all be replace with foil-backed polystyrene. Simple things will be done to make it look great. For instance, after paint removal, all the black-out shade holddowns are of brass and will be polished. The two original red map reading lamps are also of brass and will be polished. These lamps have to stay as they are recessed into the ceiling panels with large holes. These ceiling panels will be covered in a celestial vinyl wrap.

Camper ideas are continuously evolving. I am trying to simplify the design with less "systems" such as a high performance rotoformed ice chest or 12volt freezer/refrig instead of the typical propane refrigerator. Searching more overland sites for ideas and feedback. Stay tuned.

Glenn
 
Last edited:

thmpr

Active member
80
136
33
Location
Phoenix, AZ
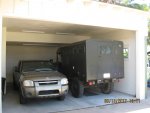
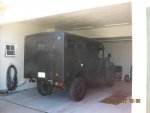
Another M152 update 6/27/17. Mods have been back-burnerd as I added a second garage onto my existing residence with a 9'3" tall overhead door to house the M152 and/or any other future project. Garage is insulated and will be getting a mini-split airconditioner. It's 115 degrees now in Phoenix.IMG_1476.jpgIMG_1475.jpg

Currently, the M152 is not running. Fuel delivery issue. Original pump failed and filter is bad. Installing a 24 volt electric pump near the fuel tank and hopefully that will get it running again. Do not want to spend lots of money on the original engine as it's going to be replaced with the turbo diesel. Picking up a 2004 Chevy 2500 HD 14 bolt, 4.10 rear axle with discs brakes tomorrow. Still looking for a divorced NP205. If I find that, I may start the mechanical swap sooner than later.

Got bunches of stuff for the camper: Whynter two door freezer/refrigerator, Camp Chef two burner stove with oven, 8 WaterBricks, stainless 15" sink, single lever gooseneck faucet, single hole soap dispenser, 160 watt folding solar panel with charge controller, Progressive Dynamics 35 amp distribution panel/battery charger, 24" flat screen TV mount, etc. The cabinet design has changed to house the purchased items. Now, two opposed sofas will fold flat into a 70" x 48" bed.

Figured out a super cool way to add small hinges to the side window grids. No new holes, (restorable - bagged the original hardware). When parked, grids can be tilted up and secured at any angle to open the interior view and give shade. Looks cool.

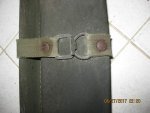
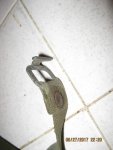
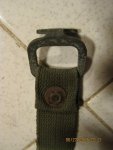
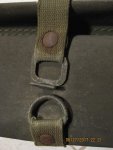
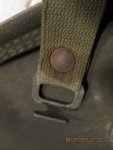
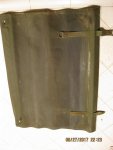
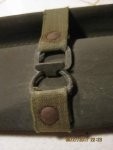
Remaking the roll-down, canvas window shades and hunting for new d-ring hardware, but can't find the d-ring hooks anywhere. Tips?

Glenn
 

thmpr

Active member
80
136
33
Location
Phoenix, AZ
Finding a source of these hooks for the black-out shade D rings would be greatly appreciated.IMG_1557.jpgIMG_1558.jpgIMG_1561.jpgIMG_1562.jpgIMG_1564.jpgIMG_1565.jpgIMG_1566.jpg If nothing remotely similar, I will switch to common double d-ring on one end and pass the strap through like on a motorcycle helmet.
 
Last edited:

nattieleather

Well-known member
1,882
143
63
Location
Cleveland, OH
The expensive 4.89 gear sets are not available with another production run scheduled in about a year. The locking hubs are too expensive. The disc brake kits are rediculously expensive. Available tubeless Budd-type rims are not DOT approved for highway use. So ... it will get a current GM 14 bolt 4.10 ratio in the rear with disc brakes and a matching Dana 60 front with discs. Sorry truck.
Didn't I say that...lol. That is why I went for an axle swap on my M37. The rear should just about drop right in. May have to move the spring perches just a .5 inch or so. The front is the one where you will either have to shorten the drivers side or move the passenger side leaf spring to make it fit. Not hard just time consuming.

As for the d-ring clip. Check with WeeBee webbing or Beachwood Canvas and see if they have them. They are canvas makers for the MV hobby and they may have those clips.
 

thmpr

Active member
80
136
33
Location
Phoenix, AZ
Update 7/8/17. Installed an electric fuel pump back by the fuel tank in place of the failed mechanical pump and, upon hooking new fuel line to the Carter carburator, the needle valve bung is stripped. The threads in the Carter body are completely gone. The only practical solution is to epoxy the bung to the carb body making any further rebuild very difficult. I think maybe instead of concentrating on the camper section, attention should shift to doing the mechanical upgrades. So ... this may be the time to stop driving the 152 and disassemble and SELL all the stock stuff.

Where is the best place to advertise these M37/M142/M152 parts? In the "for sale" forum or right here in the M37 forum? I visited the "for sale" forum and did a search for M37 and got nothing.

Things that need to go away:
Complete and running Canadian 251 engine with cold start pump, air and oil filters
Complete clutch, transmission and NP200 transfer
Complete front and rear axles with new brakes
Old MDCC tires and stock wheels - new axles are 8 lug
Both drive shafts
24 volt generator and regulator
Original gauges
Possible radiator
Complete Southwind gas fired heater
Rear cabin ventilation ducts
Rear double door M142 bottom catches
Much more

I would like a Pioneer tool kit and rack. There is space to mount it vertically on the rear wall.
 

nattieleather

Well-known member
1,882
143
63
Location
Cleveland, OH
Unless they changed the forum rules you can not post parts for sale in the M37 forum and would have to post them in the for sale forum. You could also go over to G741.org and post them on their for sale section. heck post them in both...or sell them on fleabay.
 

thmpr

Active member
80
136
33
Location
Phoenix, AZ
Update 7/18/17. Posted for sale ads at Steel Soldiers and G741. Come and get them parts :)

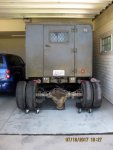
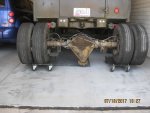
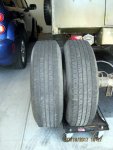
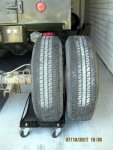
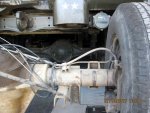
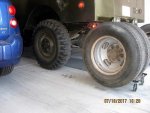
Got a great price on a 2006 Chevy 14 bolt full floater, dually 4.10 rear axle with disc brakes, all six 8 lug dually wheels and tires and a divorced NP205 off of local Craigslist. Axle came from a C3500 cab and chassis. The spring pirches are set 7/8" narrower per side than the M152's. Pretty good fit. Attached pictures show the added track the dually will have over stock. Will fab a set of M37 fenders to the box.IMG_1712.jpgIMG_1713.jpgIMG_1714.jpgIMG_1715.jpgIMG_1716.jpgIMG_1717.jpg The dually wheels will accept 9.00 x 16 tires. Painted olive drab, the wheels will have a proper look.
 

thmpr

Active member
80
136
33
Location
Phoenix, AZ
Did not get a front axle yet. Hunting for a Dana 60 to have shortened on the driver's side. They are kind of expensive. No real rush on that, though. Even if I install the diesel, trans, transfer and rear axle, I can still drive it with the stock front axle sans driveshaft for a while.
 

thmpr

Active member
80
136
33
Location
Phoenix, AZ
Update 1/5/18

It's been quite a while since my last update and much has progressed on the M152 project. The design changes on-the-fly as opportunities present themselves.

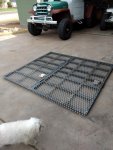
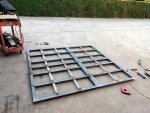
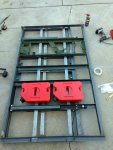
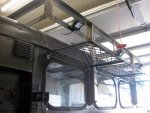
Currently, the large expedition rack is back from the finish welder and powder coat ready. I can tack weld, but horrible finish welder. Let someone else do it correctly. The rack has expanded metal side panels that exactly match the existing expanded metal window grids - so looks factory and includes 4 flag holders. After powder coat, will install the decking, 8 LED Zombie work lights and my Union Pacific Nathan K3LA three trumpet train horn before hoisting into place. It's heavy. Viar air compressor and 1.5 gallon tank are in the storage area under the dirver's seat with horn quilling valve readily on the right. These are insanely loud and sound ... well ... like a friggin' train? Thankfully, the stock horn is retained for the steering wheel.
M152 Roof Rack.jpg

The rear suspension will have a few leafs removed to lower and soften the ride. Independantly adjustable air shocks will be added and used for ride height and to level the truck when camping.

The window grids are now operable instead of stock fixed which gives the interior much more light when lifted and locked in the open position - and can clean the glass after 63 years. Hinges were added to the top bolts and strong N50 magnets to the bottom bolts. Grids snap shut with authority.

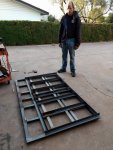
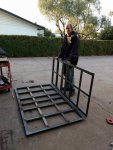
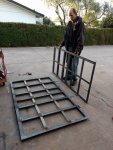
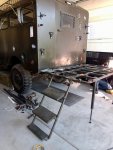
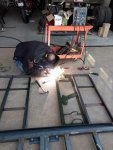
The bi-fold rear deck is almost ready for the finish welder. It holds a Pioneer tool rack, two Rotopax fuel packs and can hinge down and be a motorcycle ramp. The smaller portion unhooks, splits in half to get through the rear door and becomes an interior bunk bed when reassembled. Strong, full length, steel bunk bed cleats were added to the box sides using existing bolt locations and seriouly strengthened the box walls. If needed, in a Zombie epocolypse bug-out, the truck can comfortably carry 5 (two up front and 3 on the full size sofa) and sleep 3 inside and 2 outside on the rear deck or roof rack.
M152 Rear Deck 1.jpgM152 Rear Deck 6.jpgM152 Rear Deck 2.jpgM152 Rear Deck 4.jpgM152 Rear Deck 3.jpgM152 Rear Deck 5.jpgM152 Rear Deck 9.jpgM152 Rear Deck 10.jpgM152 Rear Deck 8 Support Mock Up.jpg
Body and paint: all bolt on items will be camo black such as fenders, bumpers, front grill, window grids, all lights, mirrors, roof rack, rear deck, power outlets, fuel inlet, etc. Main body, hood, doors, steps, etc will be olive drab or three color green camo. Have decided to spend money on soda blasting, rust mitigation, panel reconstruction and paint by others. As usual, there is a significant amout of rust at the roof gutter and some areas under the cab.

Still hunting for a Dana 60 front axle, 4.10 ratio, disc brakes, passenger drop. Hard to find.

Rear dually fenders: Getting ready to put the AAM rear dually axle under the M152. This extends the vehicle rear track about 7" per side for substantially more stability at highway speeds, but needs the addition of large rear fenders. Looking for WC-56 command car rear fenders that will be modified to fit or have custom fenders made. Want the fender lip detail to match the front fender insted of the rounded lip of M37 or WM300 rear fenders. The M152 box walls extend past the rear wheel tub a significant amout, so a larger fender opening can be carved into the box walls s to accomodate a larger diameter rear fender. Ths new fender can extend clear back to the existing tub side so the underneath looks continuously round and factory.

As a final note, it is hard to describe, but this build is becoming greater than the sum of its parts. Ultimately, I am very thankful for the opportunities made available by living in the United States. Dreams reinforced with hard work are truly rewarded. My design business was successful enough to allow me to retire early with good health, good friends and family. I count my blessings daily and now volunteer 3 days a week to a homeless kitchen. I think this is what Sea To Shining Sea is about. It's time to give back, time to pursue happiness, time to see the Nation, travel its backroads and meet its people ... and I cannot imagine a better way than in a very capable M152 tribute truck. We will travel all four corners and Alaska ... or bust.

The truck's logo for the 3 doors.

Sea To Shining Sea Logo 3.jpg
Happy New Year to all.

Glenn
 
Last edited:

thmpr

Active member
80
136
33
Location
Phoenix, AZ
Update 2/10/18

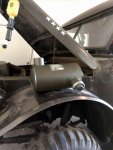
More work on the deck. It fell and bent. Restraightened, now the hinge centerlines are off. Added step cutouts on either side.2-10-18 Steps.jpg Added 6 fold-down steps to access the roof rack. Added a LED amber porch light above the rear door to light up the deck area. Obtained a Donaldson fender mount dual action air filter as part of the axle sale. Donaldson still sells the fender mount brackets, rain caps, etc. Will work well with the turbo diesel.2-10-18 Donaldson.jpg

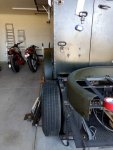
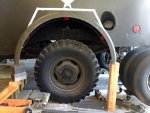
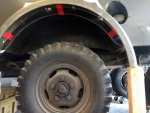
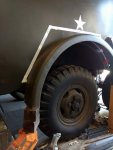
Got a pair of NOS M37 rear fenders off eBay. Decided to use M37 fenders to keep the look in the same family of vehicles. THEY FIT! The stock wheel tub is outlined with masking tape on the exterior wall. The photos show that the wheel well arch is about the same as stock, just the M37 wears their fenders higher. The truck's side walls need to be carved out to match the fenders final location and extensions rolled to continue the arch through the depth of the wheel well.2-10-18 Fender 5.jpg2-10-18 Fender 1.jpg2-10-18 Fender 2.jpg2-10-18 Fender 3.jpg2-10-18 Fender 4.jpg

Tried raising the fenders to the top of the tub line, but the arch cuts too deep into the tubs and interferes with the fuel filler neck. The 1-1/2" difference in height is not worth the concern. Fenders all the way up = 44" from floor to lip. Fenders set to fit existing tub = 42-1/2" from floor to lip.2-10-18 Fender 6.jpg

Next: shave the AAM dually axle clean and roll into place with new spring perches.

Glenn
 

thmpr

Active member
80
136
33
Location
Phoenix, AZ
Update 7/20/18
Much has happened in the M152 build. EVERYTHING is taking longer than anticipated. Chores that should be done in a weekend take multiple weeks. Example: swapping the rear axle. Once the old 5.83 axle was removed, I was able to swing the hanging leaf spring packs laterally side-to-side a substantial amount. The shackle bushings were that hogged out. Then, the leaf packs themselves were nearly rusted together. This required complete disassembly. Each leaf was painstakingly ground smooth and painted - days of tedious angle griinding with rust dust everywhere. Five of the smaller bottom overload springs were removed lowering the rear of the truck about 2.5". When static, the camper now sits dead level instead of the original forward rake. Eggs will stay in the frying pan. I will be able to fine tune later if a leaf is needed back. All new bushings, bolts, grease, "Poly Slide" betweem the leafs, new shocks, etc. $550.00 later, the rear suspension looks and works ... amazing. Soft and supple. I can assume the front leafs will require the same attention when I get there. Same with installing my rebuilt Nathan K3LA train horn. First procuring all the hosing, fittings, compressor, air tank, dither valve, etc.; then getting it installed. Weeks of fussing and routing to be completely hidden. Needed 8 new mounting holes in the channel frame for the compressor and air tank. Each hole took one hour on my back. Then routing the air line hidden in the walls and ceiling. Good grief! AND... it's getting hotter and hotter in the garage. 110 degrees in Phoenix. Inside the M152 is torture. I'm soaked in sweat.
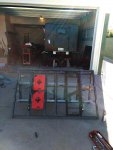
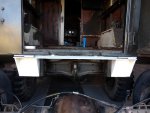
6 new STA Super Lug tires now adorn freshly powder coated dually rims in federal standard 34079 olive drab. Had to order new dually valve stems online. Could not believe they were not available locally. Now, waiting on wheel spacers. Discovered that 1" spacers are needed for the inside tire to safely clear the wheel well and 2" spacers are needed between the dually wheels to keep the Super Lugs properly apart. Cannot start on the rear fenders until I know the final track width. Yep ... three weeks on wheels and tires.

9 new Autometer Z series guages and bomber style bezels on order. Southern Air Mini Cool airconditioning evaporator fits on an angle under the dash in front of the cowl vent with short duct runs to the 3 dash vents that sit directly in front of it - no cfm loss. Cowl vent actuator rod had to be relocated toward driver's side. Gobie cabin heater sits centered, vertically on firewall with 3 downward firing vents. Glove box remains intact. See attached dash diagram. Have to cut dash for new wider gauge mount plates. Grab handle added to passenger side. Makes getting in a lot easier. Large expedition rack with 8 LED Zombie lights, train horn, 4 flag holders and deck winch is done. Side window hinged grids are done. Rear bifold deck is done with Pioneer tool rack and two Rotopax gasoline jugs. Mounted 24" flat screen TV is done. 60" Hi Lift jack and 2 LED Zombie lights added to front bumper is done. Cabinet designs are done - waiting on interior soda blast and rust repair.

Decided on having the vehicle vinyl wrapped instead of painted. Body work will consist of rust repair, smoothing and priming for the wrap. Pulling the original 251 engine out around August 1st. Cannot believe this did not sell. No interest. Will video it running before the pull, then put it on a rolling cart complete with clutch and transmission. If no home found for it, unfortunately, it will be scrapped. Need to get the diesel located and engine/trans mounts made. Having a Dana 60 king pin front axle built specific width to this truck with 4.10 gearing, discs, etc. Installing Hydroboost and dual circuit master cylinder under floor near original position. Rear axle is also diisc brakes.

I know I forgot a lot of things. Saving to show progress photos for when it is more complete. Hope I can get it reasonably done by June of 2019, as I want to do short summer shake-down trips. Sometimes, I have minor anxiety attacks when thinking about the work that remains. Just keep going forward knocking one item down at a time and, before I'll know it, Sea To Shining Sea will be done.

GlennM152 Dash.jpg
 
Top
AdBlock Detected

We get it, advertisements are annoying!

Sure, ad-blocking software does a great job at blocking ads, but it also blocks useful features of our website like our supporting vendors. Their ads help keep Steel Soldiers going. Please consider disabling your ad blockers for the site. Thanks!

I've Disabled AdBlock
No Thanks