• Steel Soldiers now has a few new forums, read more about it at: New Munitions Forums!

  • Microsoft MSN, Live, Hotmail, Outlook email users may not be receiving emails. We are working to resolve this issue. Please add support@steelsoldiers.com to your trusted contacts.

Central FL M1031 project

deank

Well-known member
Steel Soldiers Supporter
237
402
63
Location
Florida
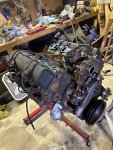
Today I had some time to remove the oil pan, timing chain cover and replace the rear main seal. The rear main seal was made of felt and crumbled to oily dust in my hands.
The inside of the engine is immaculate!

IMG_9306.jpeg
 

CARC686

Well-known member
275
486
63
Location
Las Cruces, New Mexico
I wish the outside of our engines looked like the inside of yours. Forgive my ignorance, but is the timing chain behind that plate that sits behind the IP gears? I haven't been that deep in my 6.2 yet.
 

deank

Well-known member
Steel Soldiers Supporter
237
402
63
Location
Florida
Yes, that is a thin sheet metal baffle. The next time I am in the shop I will take another picture now that I have the timing chain cover off.
 

deank

Well-known member
Steel Soldiers Supporter
237
402
63
Location
Florida
Today was a hardware cleaning day. Seemingly endless stream of ziploc bags of nuts and bolts to be cleaned before reassembly begins.

before and afters
IMG_9334.jpeg

IMG_9335.jpeg
IMG_9350.jpeg
IMG_9351.jpeg
You get the idea…

lots more, no need for more pictures.
 

deank

Well-known member
Steel Soldiers Supporter
237
402
63
Location
Florida
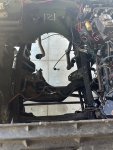
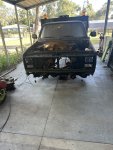
Today has been a good day. After several months of doing little things at a time resealing the engine, trans and transfer, I have finally started putting the truck back together. Engine and trans went back in today.

IMG_9520.jpeg


IMG_9671.jpeg

IMG_9672.jpeg
IMG_9676.jpeg

The transmission dipstick and the vacuum hardline are really fun to put back in…
IMG_9678.jpeg
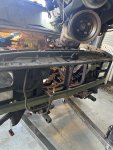
I also completed the cooling system upgrade.
Next up, loosen the cab mounts so I can get the transmission crossmember to go back in (thank you Rick for the input).
 

deank

Well-known member
Steel Soldiers Supporter
237
402
63
Location
Florida
Another good afternoon. Finished up the crossmember and tightened up the cab mounts. Installed the torque converter bolts.

Somebody help me out, do the transmission lines go behind the oil pan and then forward on the drivers side of the oil pan to the radiator?

IMG_9684.jpeg
 

deank

Well-known member
Steel Soldiers Supporter
237
402
63
Location
Florida
Good evening,

hope all is well where you are.

I have been making good progress these last two days reassembling my truck.

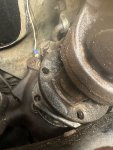
I have encountered one issue tonight. I have installed new transmission mounts and motor mounts. IMG_9701.jpegWhen I went to install the front drive shaft, the transfer case front output flange is hitting the transmission crossmember and I cannot install the front drive shaft.
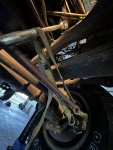
IMG_9702.jpegHas anyone seen this before, and how did you solve it? I am considering adding 3/4 of an inch worth of washers to raise it all up.
 

cucvrus

Well-known member
11,473
10,438
113
Location
Jonestown Pennsylvania
Is it possible you have the transmission cross member on backwards. They have an area that is rounded out just for the driveshaft flange. That is only on one side of the cross member, and I suspect that is what you done. Check it out and report back. It happens.
 

deank

Well-known member
Steel Soldiers Supporter
237
402
63
Location
Florida
For my next trick, I need some help from the audience.

I am trying to remember where this cable goes. It appears to have had a star washer holding it in place which leads me to the bus bars but I cannot remember where it goes. Please assist.

IMG_9703.jpeg

IMG_9704.jpeg
 

deank

Well-known member
Steel Soldiers Supporter
237
402
63
Location
Florida
Just finished for the night. Made excellent progress. Pictures tomorrow for that. I am at the point of adding all fluids and connecting the batteries.

I finally managed to get one picture of how I tighten the power steering pump.

IMG_9706.jpeg

13/16 socket on the threaded boss for the bottom power steering pump bolt, adjustable strap around the steering knuckle. Pull to desired tightness and tighten all the bolts. Easy peazy.
 
Top
AdBlock Detected

We get it, advertisements are annoying!

Sure, ad-blocking software does a great job at blocking ads, but it also blocks useful features of our website like our supporting vendors. Their ads help keep Steel Soldiers going. Please consider disabling your ad blockers for the site. Thanks!

I've Disabled AdBlock
No Thanks