• Steel Soldiers now has a few new forums, read more about it at: New Munitions Forums!

  • Microsoft MSN, Live, Hotmail, Outlook email users may not be receiving emails. We are working to resolve this issue. Please add support@steelsoldiers.com to your trusted contacts.

CUCV 1986 M1008 - In a Real Pickle - Bad Heads - Need Advice

cucvrus

Well-known member
11,467
10,402
113
Location
Jonestown Pennsylvania
It should not be tapered. Stop now. I can take no more of this. Post your address. I will send you this very rod. i have had it 20 years I doubt I need it anymore.DSCF3526.jpgDSCF3524.jpgIt is genuine CUCV with no taper. DO NOT PUT A TAPERED ROD IN. DO NOT SAND THE FUEL PUMP PUSH ROD. YOU HAVE THE WRONG ROD. Address please.
 

85CUCVtom

Active member
712
25
28
Location
Lakewood, Ohio
I'm kinda with CUCVRUS on this one. I would rather have a used GM push rod than a new parts store push rod.

It the part doesn't fit, it's the wrong part.


Sent from my iPhone using Tapatalk
 

Commander5993

Active member
Steel Soldiers Supporter
I should have upped the wager I placed on my diagnosis. But glad to hear you got it. I am glad you got it. I was sure you would. I was a day late with my pictures. but I was just watching from the stands. Have a great day. do the seal. You are 95% there. If the pan was NOT off I would not do it.
The pics are always appreciated! May help someone else too.

I was going to change the main seal, and even thought about the oil pump... but I don't have them on hand, and the local autoparts store said it would be wednesday before they could get them, due to their "labor day weekend". I don't want to wait that long, so I'm just going to go ahead and reassemble. If something goes bad, I'll just have to take it back apart then and fix it.

That thing on the bottom of your posts. About the big hammer. I think it is time to get rid of the hammer and put silk gloves on and be more surgical. I seldom need to hammer things or force them into place. Force is an enemy of mechanical work. Finesse is more useful during assembly work.
LoL. Yeah, I'm not the best at finesse sometimes, especially when something just isn't working without a visible reason.
For some reason that reminded me of one time back when I was in highschool, I was able to swap some of my regular classes for some auto tech courses at the tech college just up from the high school. I was driving a renault eagle car, and had brought it to the shop to fix a bad head gasket on it (just coincidence :)) which was causing it to burn a lot of oil. I was having a real issue with the timing if I remember right, and had reassembled everything for the ...??? umteenth time... and it still didn't work again. I got pretty hot, and what had taken me several hours to disassemble before, took me about 20 minutes... but there were casualties, I cut my hands several times and there was blood on some of the pulleys, some on the engine, and even some on the floor. The other people in the class and even the teacher, just stayed back aways and watched "out of the corner of their eye" so to speak. I did finally get it fixed though :mrgreen:


I've tried to change and not be that way anymore... but every once in a while something happens at the wrong time, and just hits me the wrong way, and it tries to peak out
 

Commander5993

Active member
Steel Soldiers Supporter
It should not be tapered. Stop now. I can take no more of this. Post your address. I will send you this very rod. i have had it 20 years I doubt I need it anymore.View attachment 697422View attachment 697423It is genuine CUCV with no taper. DO NOT PUT A TAPERED ROD IN. DO NOT SAND THE FUEL PUMP PUSH ROD. YOU HAVE THE WRONG ROD. Address please.
Sorry, didn't see this until just now.

I sincerely Appreciate the offer Cucvrus, I really do.

But...

german m1008 said he had the same issue.

The length of the rod is dead on. its just the width.
And no matter what part supplier you look up, they all show the same .499" width size for the push rod.

But it is not tapered, its the same size from end to end, it was just a hair larger.
It literally was .005" - .006" (thousands) larger than the used original rod. Maybe not even that much difference, as my dial calipers are just a cheaper set.

Should it have been the correct width to start with? Yes.
Since it wasn't, would I have liked to put it on a lathe, sure...
But I took my time and finished "machining" it with 320 grit wet/dry sandpaper, and it fits fine now, slides in and out easy.

I've already got the fuel pump reinstalled, and cranked the engine over by hand, didn't see, hear, or feel any issues this time.
I should have cranked it by hand the first time, and I wouldn't needed a new rod...

I think it'll be ok. Whats your thoughts?
 
Last edited:

Commander5993

Active member
Steel Soldiers Supporter
I'd like to tap your knowledge/experience and get your guys opinion... again :mrgreen:

The oil pan did not have a gasket, just rtv on it. It had several very small leaks, but I wasn't worried about it before, as the valve cover leaked much more.

Anyway, already cleaned the pan and block of all rtv rements.
Got a new felpro rubber two piece gasket.

Should I use rtv gasket sealer?
I'm betting that it is required with these gaskets, yes?

I was going to use the "right stuff" gasket maker.... but my can fell over broke the nozzle and it then spit out all the remaining sealant... and I really don't want to spend another $27 for gasket maker...
 

cucvrus

Well-known member
11,467
10,402
113
Location
Jonestown Pennsylvania
You should use a sealer. $27. is peanuts when you have to remove the pan the second time for a leak. You already have done everything twice. Do as you wish. But I would wait the holiday out and replace the rear main seal and get the correct sealer. The right stuff is the Right Stuff. Good Luck.
 

ken

Active member
Steel Soldiers Supporter
2,479
25
38
Location
Houston Texas
I would use the gasket plus RTV. These oil pans love to leak. The military used both a gasket and RTV on these. The last owner probally did not have a gasket and used what they had.
 

85CUCVtom

Active member
712
25
28
Location
Lakewood, Ohio
I would use the gasket plus RTV. These oil pans love to leak. The military used both a gasket and RTV on these. The last owner probally did not have a gasket and used what they had.
This is my method. Thin layer of RTV, then the gasket, then another thin layer of RTV. I have used this method for years and have never had much of an issue.
 

Commander5993

Active member
Steel Soldiers Supporter
You should use a sealer. $27. is peanuts when you have to remove the pan the second time for a leak. You already have done everything twice. Do as you wish. But I would wait the holiday out and replace the rear main seal and get the correct sealer. The right stuff is the Right Stuff. Good Luck.
I tried to look up the napa part number for the rear main seal, which is listed here on SS as being: FPGBS40529.
The closest napa to me is about 60 miles or so. So I tried to cross it at o'reilly, but nothing comes up.

I did find this one on Amazon, which appears to be the right one, fel-pro number BS 40529... which I was able to find at oreilly... I'm assuming the "FPG" in the napa number stand for "fel pro __? "

Amazon BS 40529 Link: - http://amzn.to/2evQhiI
 

cucvrus

Well-known member
11,467
10,402
113
Location
Jonestown Pennsylvania
That will work. Do not line up the ends with the ends on the main bearing cap. If you do you will have trouble. Put the ends at 4 and 10 , 2 and 8. But do not put them at 3 and 9. A little light oil and push them right up in there. Easy as that. Good luck.
 

Commander5993

Active member
Steel Soldiers Supporter
Finally got everything buttoned back up... again...

I got fuel to the filter, but now when you stop cranking the engine, the fuel filter housing starts leaking... A steady quick drip until the pressure leaks off.

I pulled the new filter and fuel went everywhere as it was under pressure... I then installed another new filter, open the vent to bleed the air, got fuel, closed the vent, cranked again, still the same leak.

I don't know if I cranked it enough to bleed the air from the injectors or not, but it didn't start when I put the pink wire back on... and when I stopped cranking the fuel started leaking again.

EDIT:
By the way, never had an issue with this filter base or filter ever before.
And its not leaking from any hoses, of which I only took one single hose off anyway.
 
Last edited:

cucvrus

Well-known member
11,467
10,402
113
Location
Jonestown Pennsylvania
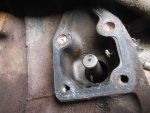
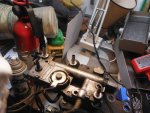
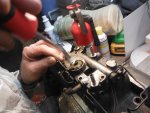
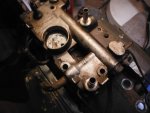
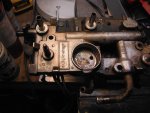
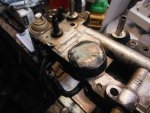
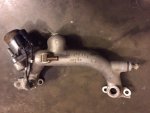
What filter base do you have? How about a picture?DSCF2559 (1).jpgDSCF2560 (1).jpgDSCF2561 (1).jpgDSCF2562 (1).jpgWith out any pocket money or extra expenseDSCF2566.jpg I would just eliminate the pressure switch. But make sure that is what is leaking. I tapped it and put a self tapping screw in the hole and filled the hole with The Right Stuff. Maybe not the exact way to do it but it worked. And I bought a brand new fuel filter assembly from a member here for $350. and it was missing the switch. Did the same thing to that filter base. Mean Green is the M1009 that needed the base. Guess what that is plugged also. On occasion I see the switches for sale on Ebay. I buy them but going forward I will just put self tapping screw in the hole. Vacuum test it fill it with sealer and call it fixed. Good Luck I hope that helps. The switch will never be needed. Never.
 

ken

Active member
Steel Soldiers Supporter
2,479
25
38
Location
Houston Texas
Did you crack the lines at the injectors? You will need to with the wire on. This will push the air out at the injectors. When they start seeping fuel, tighten the lines back up and try to start. You can take the wire loose to the glow plugs so they wont drain the batteries while cranking to bleed the air out. If you don't bleed the air out at the injectors, it will never start.
 

Commander5993

Active member
Steel Soldiers Supporter
What filter base do you have? How about a picture?View attachment 697783View attachment 697782View attachment 697785View attachment 697784With out any pocket money or extra expenseView attachment 697786 I would just eliminate the pressure switch. But make sure that is what is leaking. I tapped it and put a self tapping screw in the hole and filled the hole with The Right Stuff. Maybe not the exact way to do it but it worked. And I bought a brand new fuel filter assembly from a member here for $350. and it was missing the switch. Did the same thing to that filter base. Mean Green is the M1009 that needed the base. Guess what that is plugged also. On occasion I see the switches for sale on Ebay. I buy them but going forward I will just put self tapping screw in the hole. Vacuum test it fill it with sealer and call it fixed. Good Luck I hope that helps. The switch will never be needed. Never.
I was just reading your posts about this on someone elses thread.

Any particular way to tell if it is this switch that is leaking?
Looking at it with the filter on, when its leaking it seems to be coming from somewhere in the lower 1/3 of the filter, as i can see some wet on the side, but mostly I just see it dripping off the bottom of the housing.

I'll try this, if it doesn't fix it then still nothing lost.
Can't do it today though, I'm out of time. Shabbat is tomorrow, so it'll be wednesday before I can get to it.

Once again, Thanks for the reply and info Cucvrus
 

Commander5993

Active member
Steel Soldiers Supporter
Did you crack the lines at the injectors? You will need to with the wire on. This will push the air out at the injectors. When they start seeping fuel, tighten the lines back up and try to start. You can take the wire loose to the glow plugs so they wont drain the batteries while cranking to bleed the air out. If you don't bleed the air out at the injectors, it will never start.
no I didn't crank the injectors. I didn't think you had to on these engines... guess thats why it didn't fire.
Thanks for the info Ken, I'll try that next time after I get this fuel leak fixed...
 

cucvrus

Well-known member
11,467
10,402
113
Location
Jonestown Pennsylvania
And to truly make it easier on the starter and batteries. Remove the glow plugs while cranking to bleed the system. Makes it easier all around. Takes about 10 minutes in 10 minutes out. Shorter then the time it takes to change the starter or charge the batteries. Good Luck. Report back Wednesday.
 

dependable

Well-known member
1,720
188
63
Location
Tisbury, Massachusetts
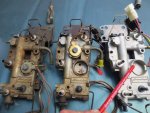
Filter base pictures from my SS attachment file.

There is no hole in the one with red pencil. The updated version.

Or if you have old one, remove sensor and plug hole with sheet metal screw or bolt and a dollop of JB weld.
 

Attachments

Top
AdBlock Detected

We get it, advertisements are annoying!

Sure, ad-blocking software does a great job at blocking ads, but it also blocks useful features of our website like our supporting vendors. Their ads help keep Steel Soldiers going. Please consider disabling your ad blockers for the site. Thanks!

I've Disabled AdBlock
No Thanks