• Steel Soldiers now has a few new forums, read more about it at: New Munitions Forums!

  • Microsoft MSN, Live, Hotmail, Outlook email users may not be receiving emails. We are working to resolve this issue. Please add support@steelsoldiers.com to your trusted contacts.

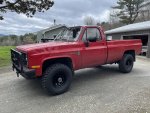
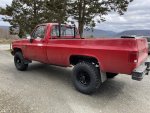
CUCV M1008 Build

adf5565

Well-known member
375
688
93
Location
Tioga, PA
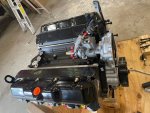
As part of the change in motors I went with a DB2-4911 IP. I purchased this from Diesel Care. There seems to be a lot of bad reviews on them, however they have one of the best prices and I've seen on here that cucvrus recommended them so figured I'd take a chance. It took 2.5 months for the pump to ship, however I do believe this is from a true backlog of orders. So if you're not in a hurry for a pump they seem to be a good choice.
 

Attachments

WWRD99

Well-known member
Steel Soldiers Supporter
1,139
1,755
113
Location
York Pa
Holy smokes!!!! After all that with the engine it turned out to be cracked! That stinks...guess you're better off just replacing it with the new engine. Are they rebuilds of certain kinds of castings? I've heard there's different ones depending on year. Is the ip matched with the injectors for a turbo setup? I really know very little about putting a turbo on one of these.

Sent from my SM-S906U using Tapatalk
 

adf5565

Well-known member
375
688
93
Location
Tioga, PA
Well I think the block cracks were unrelated to the head gasket issue, that was most likely installer error. 😂 I tried to “fix” the cracks here beforehand, probably would’ve been okay but I just lost faith in the motor after the gasket issue.


The motor is brand new (not a rebuild) so they supposedly fixed the crack issues that plagued the 6.2s and 6.5s. This was a good article I found.


And yeah the db2-4911 is just a slightly higher output version of the IP that’s normally in our vehicles, supposed to push a little more fuel to make up for the higher demand of the 6.5 turbo. I did 6.5 injectors too, “pop” pressure is higher, but from what I’ve learned from a functionality standpoint I don’t think it matters too much on what the pump/injector combo is. (Outside of course the fact that the 6.5 injectors are short and the CUCVs are long so the lines are different).
 

WWRD99

Well-known member
Steel Soldiers Supporter
1,139
1,755
113
Location
York Pa
Well I think the block cracks were unrelated to the head gasket issue, that was most likely installer error. I tried to “fix” the cracks here beforehand, probably would’ve been okay but I just lost faith in the motor after the gasket issue.


The motor is brand new (not a rebuild) so they supposedly fixed the crack issues that plagued the 6.2s and 6.5s. This was a good article I found.


And yeah the db2-4911 is just a slightly higher output version of the IP that’s normally in our vehicles, supposed to push a little more fuel to make up for the higher demand of the 6.5 turbo. I did 6.5 injectors too, “pop” pressure is higher, but from what I’ve learned from a functionality standpoint I don’t think it matters too much on what the pump/injector combo is. (Outside of course the fact that the 6.5 injectors are short and the CUCVs are long so the lines are different).
That's a ton of info!! I've never seen that type of insert before. Looks very long. I've used heli coil but moved on to time certs since I think they're permanent vs might uncoil if removed again. From the sounds of it you got a new engine without all the casting issues the old stuff had. I'll look up how much something like that is..I bet a decent amount but most engines these days are. My son is a 6 2 engine collector so if you may want to recoup some out of that old engine lmk!

Sent from my SM-S906U using Tapatalk
 

adf5565

Well-known member
375
688
93
Location
Tioga, PA
That's a ton of info!! I've never seen that type of insert before. Looks very long. I've used heli coil but moved on to time certs since I think they're permanent vs might uncoil if removed again. From the sounds of it you got a new engine without all the casting issues the old stuff had. I'll look up how much something like that is..I bet a decent amount but most engines these days are. My son is a 6 2 engine collector so if you may want to recoup some out of that old engine lmk!

Sent from my SM-S906U using Tapatalk
The motors aren’t cheap but hopefully worth it. And I will definitely let you know! In the next week or so I want to go through all of the parts from this project and see what I don’t want/need anymore so I’ll PM you with a list.
 

adf5565

Well-known member
375
688
93
Location
Tioga, PA
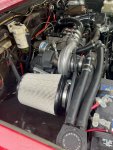
Time for a 1000 mile update since the new motor/turbo was installed. Well it sure feels like a completely different truck now, power is (obviously) significantly better than a stock 6.2 and drivability is much improved especially when climbing hills. I highly recommend the Quadstar Tuning intake and Super 54 turbo, it spools up fast with no noticeable lag. The wastegate is preset to 15psi. From what the folks over at Quadstar have told me, this turbo has a 1:1 drive pressure to boost ratio, which is much improved from the stock GM turbos (supposedly closer to 2:1), which is supposed to be better for the motor even with the higher boost. They stated drive pressure and heat are what kills motors, not boost.

I haven't had any issues with EGTs at this point either, as the turbo spools up easily even at 15 psi boost they're less than 950. Temps are related to how much fuel is sent to the motor (again obviously) so if the peddle is to the floor they might become too high, however in the 10-15 psi range the truck feels like it can do anything so I don't need to put the peddle to the floor.

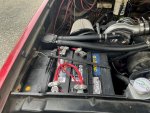
A few other things I did as part of the build I haven't touched on. I put both batteries on the front tray. I switched to group size 65 batteries, they're 850 CCAs but smaller dimensions than the group 27's which were previously on. Between them, new IP, and new injectors the motor starts instantly, never had problems before but it is much improved now. I still need to fab a better battery hold down but for now it works.

For air cleaner i used an SB 75-5045D which is the aftermarket 6.5 cleaner for 90's trucks. I didn't use the box as that didn't fit, just filter/tube but it seems to work well. And I also installed a Mishimoto Universal High Flow Baffled Catch Can between the CDR and the intake. After 1000 miles there is about 2 ounces in it. I used to have oil use "problems" on the old 6.2, but as that was working/reving much harder and higher I think it was sucking more oil into the intake.

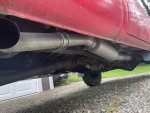
And lastly, I routed the turbo back exhaust on the outside of the frame rail to exit prior to the rear tire. I purchased from Summit SUM-680060, which again is the 90s kit. It was less helpful than i expected, i used the muffler and a few pipes but had to do alot of custom work. The 3" downpipe I fabricated from a turbo downpipe flange and a few short sweep 90 and 45 degree elbows welded together. It actually turned out fairly well in my opinion, and only required minor bending of the inner fender liner for clearance.
c.jpgb.jpga.jpg
 
Last edited:

87cr250r

Well-known member
1,267
1,991
113
Location
Rodeo, Ca
Take the caliper off and rotate it so the bleeder is on the bottom before flushing. Rock Auto has caliper seals. It's really inexpensive to open the calipers and clean them out properly. They are tricky to reassemble. Mine had a waterline at the middle of the piston. The piston and bore are chrome plated so they don't corrode too badly. However, the water must have steamed up my new master cylinder as that corroded quickly after a short time.
 

adf5565

Well-known member
375
688
93
Location
Tioga, PA
I have about 2000 miles on the motor so far and overall I’m pretty happy with it. I was having issues with the accuracy of my temp gauge so I changed the threaded coolant plate to this. Puts the sender into the head more so now I’m seeing 195 when warmed up.


Now that I have an accurate way of monitoring temps, I’m very impressed with the cooling system setup I have. With the new aluminum radiator and high flow pump even with the motor working hard my temps only rise within a few degrees of thermostat full open (~207) and seem to stay, then will drop back to 195 quick.

I’ve hauled my camper on a few longer trips as well as the dump trailer with a few 9k lb loads, and a pallet of concrete bags in the bed. It Does better than any other truck I’ve owned so I cant complain.

A few things I still want to do:

- Intake drone at mid range RPMs still gets annoying. I’m sure it is from my S&B intake as other trucks I’ve owned that had a “cold air” intake also droned bad. I’m going to swap my hood insulation to Dynamat, and if that doesn’t help going to look into a different intake.

- T-case has a few small leaks so going to pull that out and redo the anaerobic gasket maker.

- Do some adjusting on the timing to see if it helps performance at all.

- Body work and paint


CF2792E0-921B-4127-84B1-D547DDB676C4.jpeg2991BB02-2B23-4465-A0BB-14B0212E7953.jpeg
 
Last edited:

nyoffroad

Well-known member
945
690
93
Location
Rochester NY
Time for a 1000 mile update since the new motor/turbo was installed. Well it sure feels like a completely different truck now, power is (obviously) significantly better than a stock 6.2 and drivability is much improved especially when climbing hills. I highly recommend the Quadstar Tuning intake and Super 54 turbo, it spools up fast with no noticeable lag. The wastegate is preset to 15psi. From what the folks over at Quadstar have told me, this turbo has a 1:1 drive pressure to boost ratio, which is much improved from the stock GM turbos (supposedly closer to 2:1), which is supposed to be better for the motor even with the higher boost. They stated drive pressure and heat are what kills motors, not boost.

I haven't had any issues with EGTs at this point either, as the turbo spools up easily even at 15 psi boost they're less than 950. Temps are related to how much fuel is sent to the motor (again obviously) so if the peddle is to the floor they might become too high, however in the 10-15 psi range the truck feels like it can do anything so I don't need to put the peddle to the floor.

A few other things I did as part of the build I haven't touched on. I put both batteries on the front tray. I switched to group size 65 batteries, they're 850 CCAs but smaller dimensions than the group 27's which were previously on. Between them, new IP, and new injectors the motor starts instantly, never had problems before but it is much improved now. I still need to fab a better battery hold down but for now it works.

For air cleaner i used an SB 75-5045D which is the aftermarket 6.5 cleaner for 90's trucks. I didn't use the box as that didn't fit, just filter/tube but it seems to work well. And I also installed a Mishimoto Universal High Flow Baffled Catch Can between the CDR and the intake. After 1000 miles there is about 2 ounces in it. I used to have oil use "problems" on the old 6.2, but as that was working/reving much harder and higher I think it was sucking more oil into the intake.

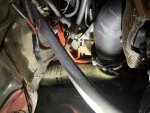
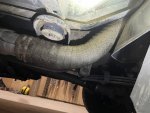
And lastly, I routed the turbo back exhaust on the outside of the frame rail to exit prior to the rear tire. I purchased from Summit SUM-680060, which again is the 90s kit. It was less helpful than i expected, i used the muffler and a few pipes but had to do alot of custom work. The 3" downpipe I fabricated from a turbo downpipe flange and a few short sweep 90 and 45 degree elbows welded together. It actually turned out fairly well in my opinion, and only required minor bending of the inner fender liner for clearance.
View attachment 906988View attachment 906989View attachment 906990
Can you post up a pic or two of the front of the exhaust? I'm about to depart on that journey and seeing one already done would help tremendously!
 

adf5565

Well-known member
375
688
93
Location
Tioga, PA
Unfortunately it looks like I didn't take any pictures during fabrication so I will have to take some pics when I get home. You're referring to the turbo downpipe, correct?

Here are the parts that I purchased/used, all from Summit, in order starting at the turbo. I originally ordered a few extra elbows/pieces and fit things together and then returned what i didn't need. Also, I can't confirm exactly but i may have listed the 45 degree elbows in the wrong order, but I'm not sure how much difference it would make in either case. You can move them around and see what fits best, and i also used a few mildly tightened 3" exhaust clamps to hold things in place until i was able to finalize positions and weld it together. I then wrapped the downpipe in header wrap to keep heat in check since it is fairly close to the cab/frame in spots.

- Flange PTU-PTP074-3014
- 90 elbow WLK-41685
- long 45 elbow WLK-42760
- connector (to extend length slightly) WLK-41811
- short 45 elbow SUM-623043
- ball and socket flange from SUM-680060

From there I pieced together various pipe sections and muffler of the 680060 kit.
 
Last edited:

nyoffroad

Well-known member
945
690
93
Location
Rochester NY
Not sure how helpful these are but here are the pics. It doesn’t touch the frame or body (although it is close in spots) and the header wrap also took up some of the open space there.
View attachment 910046View attachment 910047
That's great, I thought for sure I'd have to trim a bit on that inner fender, still might but now I know it can be down! Thanks for the pic's and THANK YOU for the part numbers!
 

adf5565

Well-known member
375
688
93
Location
Tioga, PA
That's great, I thought for sure I'd have to trim a bit on that inner fender, still might but now I know it can be down! Thanks for the pic's and THANK YOU for the part numbers!
I just bent the liner in a little bit at the bottom but even what I did was more than needed. The way i bent it wasn’t perfect and I wasn’t able to put in the one bolt to the cab near the exhaust pipe. But it is still very solid and I’m sure with a cleaner bend it would still fit. Here’s one more pic from the inside. Good luck!
68678A36-7708-45DF-9CB0-9C27D4012A68.jpeg
 

adf5565

Well-known member
375
688
93
Location
Tioga, PA
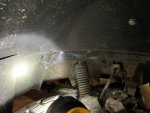
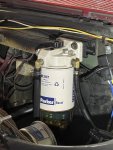
I haven’t done much over the winter to the m1008 but recently took a break from my other projects to work on the truck to get it back on the road for spring. Started with the basics of an oil change and grease, and swapped a new fuel filter cartridge in as well.

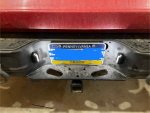
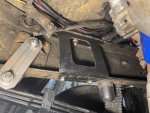
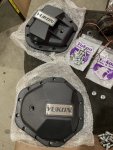
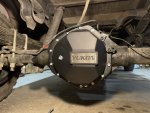
Last time I got the truck inspected over here in PA they said I should have license plate lights so I finally got around to putting those on. I also picked up a pair of OEM takeoff front frame braces from Hillbilly Wizard so I installed those as well. And then to help facilitate easier differential oil changes (and of course look cool) I got Yukon differential covers so I’m currently working on that.

IMG_2390.jpegIMG_2389.jpegIMG_2382.jpegIMG_2381.jpegIMG_2391.jpeg
 
Last edited:

adf5565

Well-known member
375
688
93
Location
Tioga, PA
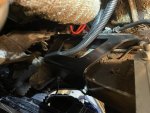
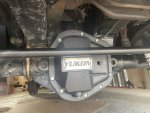
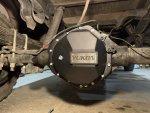
I was able to finish the diff cover install. The Yukon covers are beefy and look great but they don’t come with any provisions for reinstalling the brake line bracket off the rear axle. I ended up getting 3/4” bushings (1” and .5” long) and then machining .030” off so they fit into the cover bolt recess. And then got longer bolts to reattach the bracket.

I also removed the rear brake load sensing valve as it isn’t set up/working right so my rear drums don’t do much. Just need to rebleed the system and hope for them to stop salting the damn roads so I can take it for a spin and test it out.


IMG_2396.jpegIMG_2398.jpegIMG_2399.jpeg
 

rsrxc700

New member
14
11
3
Location
MPLS
Next up, braking improvements. Last year I installed new pads and shoes, but overall I wasn't impressed with the braking. Granted I was still able to lock up the fronts, but the peddle felt like a brick and the rears didn't seem to be doing much. So I decided to do new rotors, pads, drums, shoes, and also remove the proportioning valve. Slightly annoyed with myself that I didn't just do all this last year but at least it gives me a chance to regrease the bearings and inspect everything.

I started on the fronts, pressed out the studs and installed the new rotors. I wanted to go with Hawk Performance pads but I somehow ordered ones for a K20 (which don't fit) and then realized Hawk doesn't seem to make pads for the K30. So now I've ordered EBC Yellow's and will get those on once they arrive. Pricing is a little crazy so I hope they work well.

For the rear, so far I finished the passenger side and have the driver's apart. Last year when I had it apart I measured the drums and they were roughly max spec size, but with the new shoes it ended up so that I only had contact on 1/3-1/2 of the shoe on the drum. Just from working the e-brake and setting adjustment it feels much better already with the new drums.

One thing on the driver's side, for whatever reason my e-brake cable seems to be too short and it is pulling the lever inside the drum even fully retracted. I've added pictures of drivers (pic a/c) vs passenger (pic b) to illustrate. I'm not sure how big of a deal it is (as the brake adjustment will be set from the current position), but I figured it would be worth changing the e-brake cable while it's apart. There doesn't seem to be any adjustment I can do to the driver's side that i could tell. Rockauto has 2 different cables for the left rear, a 51 5/8" and a 55 1/2" so I ordered both and will see which works best.

Nice work!
My rear brakes are locking up in the wet or if I have to really get on them. I thought I would remove the proportioning valve on the rear axle first to see if that helps. Any tips or pics on this?
 

adf5565

Well-known member
375
688
93
Location
Tioga, PA
Nice work!
My rear brakes are locking up in the wet or if I have to really get on them. I thought I would remove the proportioning valve on the rear axle first to see if that helps. Any tips or pics on this?
Thanks! I'm not sure if removing the load sensing valve would help the lock up. The valve is supposed to reduce the pressure so if you're already getting too much removing it probably wouldn't make a difference.

The valve could be set up improperly but I'm not sure of a good way to check proper setup. The lever arm from the axle attaches to the valve with a splined shaft which doesn't seem to have a "home" position so it can easily get put together wrong. I'd suggest first removing the drums and adjusting the shoes inward so they're not as tight in the drums. That should allow the fronts to do more work prior to the rears engaging. If that doesn't work you may have to remove the load sensing valve and replace with a manual one so you can adjust the rear brake pressure.

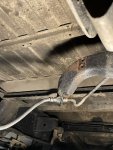
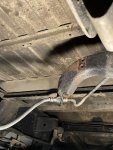
I didn't take alot of pics but here are some, the hardest part is just unscrewing the brake lines from the valve (as after all these years they can be frozen).

This thread also has more info.
 

Attachments

Top
AdBlock Detected

We get it, advertisements are annoying!

Sure, ad-blocking software does a great job at blocking ads, but it also blocks useful features of our website like our supporting vendors. Their ads help keep Steel Soldiers going. Please consider disabling your ad blockers for the site. Thanks!

I've Disabled AdBlock
No Thanks