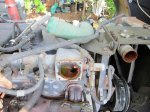
bchauvette
New member
- 810
- 12
- 0
- Location
- Easley SC USA, 29640
Disclaimer; not a liable prone how to, Just sharing my experience.
The radiator drain petcock is right above the glad hand, use a cut section of garden hose to direct the draining coolant into the bucket. (B.T.W. petcock end is hard to find in the dirt).
Used a 2" 3/4 drive socket for an install tool. Fits perfectly. There is no back lip where the seal seats. If it goes in crooked push it through then gently pulled it back out. It very much wants to be crooked.
I rough cut the gasket material then placed it on top of the housing then used a ball peen hammer gently taped the gasket around the areas to be removed to get an impression on where to cut and punch the holes. Insure old gasket is completely removed from both pieces. Applied a generous coating of red RTV. Don't use so much so that it oozes in to the inner works.
Run up to operation temp and insure thermostat is open and coolant is flowing then recheck coolant level. Monitor running temp, fan clutch and overflow frequently. Recheck fluid lever after running.
 Technical makes a good work platform
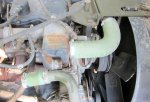 Thermostat location
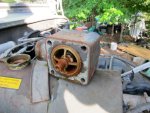 back side of housing, note thermostat orientation.
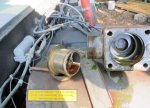
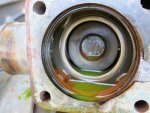 inner seal, note lip orientation
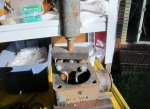 slide puller removing inner seal.
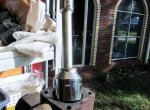
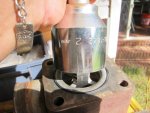 2" 3/4 drive socket makes a perfect seal and thermostat install tool
Stuff used that came with the M944: 1/2 drive socket set, Slide puller, 3/4 drive 2" socket and extension, gasket hole punch set, gasket material, Vise, Life is wonderful
The radiator drain petcock is right above the glad hand, use a cut section of garden hose to direct the draining coolant into the bucket. (B.T.W. petcock end is hard to find in the dirt).
Used a 2" 3/4 drive socket for an install tool. Fits perfectly. There is no back lip where the seal seats. If it goes in crooked push it through then gently pulled it back out. It very much wants to be crooked.
I rough cut the gasket material then placed it on top of the housing then used a ball peen hammer gently taped the gasket around the areas to be removed to get an impression on where to cut and punch the holes. Insure old gasket is completely removed from both pieces. Applied a generous coating of red RTV. Don't use so much so that it oozes in to the inner works.
Run up to operation temp and insure thermostat is open and coolant is flowing then recheck coolant level. Monitor running temp, fan clutch and overflow frequently. Recheck fluid lever after running.
 Technical makes a good work platform
 Thermostat location
 back side of housing, note thermostat orientation.
 inner seal, note lip orientation
  slide puller removing inner seal.
 2" 3/4 drive socket makes a perfect seal and thermostat install tool
Stuff used that came with the M944: 1/2 drive socket set, Slide puller, 3/4 drive 2" socket and extension, gasket hole punch set, gasket material, Vise, Life is wonderful

Attachments
-
71.7 KB Views: 69
Last edited:


