Carrera911
Active member
- 138
- 31
- 28
- Location
- Cumming, Georgia
Picked up a NOS airlift bumper several months back and finally got around to getting it installed. The bumper was reasonably priced ($150) which is only slightly more than the tube of steel it is made of. However, the brackets to mount it are going for crazy money now. So I decided to make my own. Not being one to slap on a stock bumper, I decided to make it my own while I was at it.
Making the brackets themselves was probably the most tedious part of the project. The thought of having to make almost 30 holes through 3/16 and 1/4 steel and making them all line up is the reason I put this off for so long.

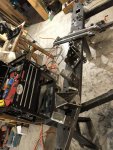
I don't like the look of the hollow bumper with the open ends so I trimmed and capped them for a more aggressive look.
Welded in a standard 2 inch receiver hitch since the pintle is basically useless to me. Gusseted front and rear and I capped the oval shaped hole on the back.
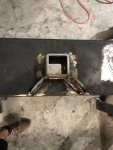
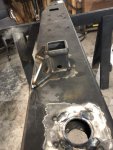
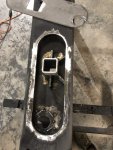
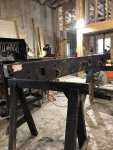
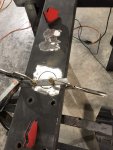
Capped the trailer wiring hole and cut a smaller one out to fit a standard trailer cannon plug. Welded on 4 threaded bosses to space the tag above the mounting bolts. Tear drop shackles are cool but not as cool as the sellers on ebay think they are. I made some 3/4" shackle mounts to accept standard shackles. Cut out holes for flush mount LED lights.
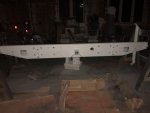
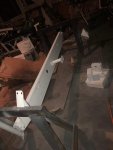
Got it primered with Rust Oleum clean metal primer. Also pictured is the additional brace from the hitch to the old pintle mount. Probably overkill, as the bumper itself is stronger than even any class IV hitch I've seen but better overbuilt than under built.
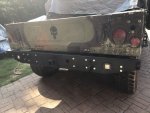
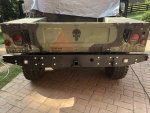
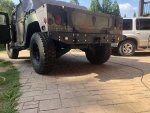

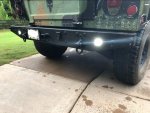
Painted it with Rust Oleum flat black from a HVLP gun, same as everything else I do lol. Got it mounted with anti-seize on all the bolts (for when I never take this thing off). Installed the lights and sealed them with RTV. I'm trying to make it as water tight as possible but I also have two tapped 3/8" drain bolt holes on the bottom, under the shackles. Still need to wire the lights and trailer connector, put the stock shackles on the ends, paint the bolts and order some standard 3/4" shackles.
I also realize I used grade 5 hardware for the main mounting bolts. This is 1. because the hardware store didn't have that many grade 8 bolts, but 2. grade 8 is way overkill. The tensile / shear strengths of 1/2" X 13 grade 8 bolts are ( 21,300/ 17,870) while grade 5 are ( 17,000 / 14,730). Even grade 5 adds up to 272,000 pounds of pulling force and 235,000 pounds of downward force. This is excluding the fact the brackets are mounted to the frame using 8 bolts vs the 16 on the bumper.If there were only 4 bolts holding the bumper on then I would go with grade 8.
Making the brackets themselves was probably the most tedious part of the project. The thought of having to make almost 30 holes through 3/16 and 1/4 steel and making them all line up is the reason I put this off for so long.


I don't like the look of the hollow bumper with the open ends so I trimmed and capped them for a more aggressive look.
Welded in a standard 2 inch receiver hitch since the pintle is basically useless to me. Gusseted front and rear and I capped the oval shaped hole on the back.


Capped the trailer wiring hole and cut a smaller one out to fit a standard trailer cannon plug. Welded on 4 threaded bosses to space the tag above the mounting bolts. Tear drop shackles are cool but not as cool as the sellers on ebay think they are.
 I made some 3/4" shackle mounts to accept standard shackles. Cut out holes for flush mount LED lights.

Got it primered with Rust Oleum clean metal primer. Also pictured is the additional brace from the hitch to the old pintle mount. Probably overkill, as the bumper itself is stronger than even any class IV hitch I've seen but better overbuilt than under built.


Painted it with Rust Oleum flat black from a HVLP gun, same as everything else I do lol. Got it mounted with anti-seize on all the bolts (for when I never take this thing off). Installed the lights and sealed them with RTV. I'm trying to make it as water tight as possible but I also have two tapped 3/8" drain bolt holes on the bottom, under the shackles. Still need to wire the lights and trailer connector, put the stock shackles on the ends, paint the bolts and order some standard 3/4" shackles.
I also realize I used grade 5 hardware for the main mounting bolts. This is 1. because the hardware store didn't have that many grade 8 bolts, but 2. grade 8 is way overkill. The tensile / shear strengths of 1/2" X 13 grade 8 bolts are ( 21,300/ 17,870) while grade 5 are ( 17,000 / 14,730). Even grade 5 adds up to 272,000 pounds of pulling force and 235,000 pounds of downward force. This is excluding the fact the brackets are mounted to the frame using 8 bolts vs the 16 on the bumper.If there were only 4 bolts holding the bumper on then I would go with grade 8.
Last edited:


