• Steel Soldiers now has a few new forums, read more about it at: New Munitions Forums!

  • Microsoft MSN, Live, Hotmail, Outlook email users may not be receiving emails. We are working to resolve this issue. Please add support@steelsoldiers.com to your trusted contacts.

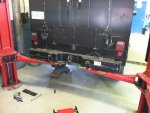
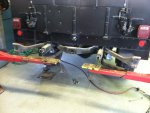
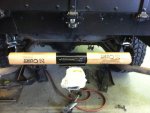
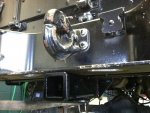
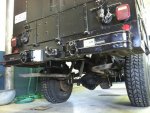
Documented Curt 14082 Receiver Hitch install on my M1031

Skinny

Well-known member
2,130
490
83
Location
Portsmouth, NH
Why Documented you say? I was tired of combing through all of the receiver hitch threads to find random information, no photos, or one photo of something that was questionably helpful. Decided to make my own thread so anyone searching would find it with no issues. My apologies if a useful one exists...

Basic install require some cutting and additional fitting. I will break it down into simple steps.

1) remove pintle, bumper, all brackets, and tow rings
2) fit up receiver hitch
3) remove (I cut flush and air hammered out) outer downwards facing crossmember rivet on both sides
4) cut inner downwards facing rivet in half and remove interfering portion
5) drill out stock framerail hole to 1/2"
6) cut slot in rear most frame rail oval for the rear hitch bolt
7) receiver should bolt up at this point, front and back bolts facing down, middle facing up in the large hole,
trim middle receiver bolt flush with nut

On to fitting CUCV bumper "stuff" back on with modifications
9) mock up bumper brackets and cut where it will hit receiver hitch, follow the hitch contours
10) cut tow ring tube inserts past the second horizontal bolt hole
11) install all bumper stuff loose
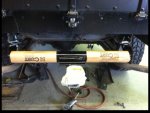
12) I used a 2x4 chunk on both bumper ends to keep everything aligned, tighten all fasteners

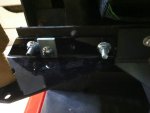
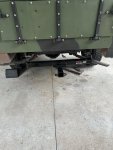
NOTE: I deviated from the manufacturers receiver bolt holes because one would go into the rear crossmember in a bad spot. This is why the middle receiver bolt in facing up with the slotted carriage bolt insert acting as a very beefy washer against the big hole in the receiver hitch. It is a compromise of sliding the hitch back further on the frame by an inch and getting the 3 receiver hitch bolts in the correct locations and cutting ALOT of material out of the bumper brackets and tow ring tubes or pushing the hitch forward a bit and compromising.

Oh well...I'm insured:mrgreen:

IMG_1540.jpgIMG_1541.jpgIMG_1542.jpgIMG_1543.jpgIMG_1545.jpgIMG_1546.jpgIMG_1547.jpgIMG_1548.jpgIMG_1549.jpgIMG_1550.jpg
 
Last edited by a moderator:

Skinny

Well-known member
2,130
490
83
Location
Portsmouth, NH
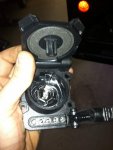
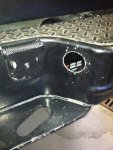
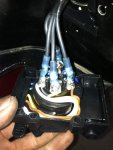
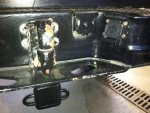
I picked up a 7 flat pin RV and 5 pin flat combination trailer wire connector at Napa for $30. I wired this into the NATO harness which has two weatherpack connectors right at the bumper. If I have to removed the bumper, all trailer wiring stays with the bumper. All connections got solderless weather shrink butts or ring terminals. Now I am ready for anything military or civilian! Requires a 2" hole saw.

IMG_1578.jpgIMG_1579.jpgIMG_1580.jpgIMG_1581.jpg
 

doghead

4 Star General /Moderator
Staff member
Super Moderator
Steel Soldiers Supporter
26,246
1,179
113
Location
NY
Unlike other websites, we require a moderator or admin to create or endorse an "official anything" thread.

Yes, this has been beat to death and I do not think one more thread will solve any issue.

Who searches "official" anything?
 

Skinny

Well-known member
2,130
490
83
Location
Portsmouth, NH
Feel free to modify the thread title if necessary. I personally got tired of combing through many receiver hitch install threads about which hitch fits or how the brackets need to be cut, etc. etc.

All the ones I've read had all of the information, just not in the same thread. Not trying to clog bandwith, just keeping unnecessary questions about a receiver hitch install to a minimum because it seems to come up on a weekly basis.
 

prairie

New member
84
0
0
Location
Bloomfield, Nebraska
Well done, and a very much needed thread for the reasons you stated.
I went through the same thing when researching receiver hitches for my M1008.
To late for me, but your post would have been very appreciated, no sense reinventing the wheel.
Thanks for doing your part in making this forum informative and helpful.
Ignore the criticism.
 

Skinny

Well-known member
2,130
490
83
Location
Portsmouth, NH
Glad I could be of assistance. Like I said before, many people have posted up the part number and photos of the hitch installed but I have not really seen any threads which detail what needs to be cut or any other complications. No prob...if one person is enlightened by the thread then it was worth a few minutes of my time to post up.
 

swbradley1

Modertator
Staff member
Super Moderator
Steel Soldiers Supporter
14,263
1,767
113
Location
Dayton, OH
I like the thread, even the title. ;-)

Good information and well done.
 

Skinny

Well-known member
2,130
490
83
Location
Portsmouth, NH
Nothing yet...working on building a dirtbike carrier for it because riding season is here. May pull a small trailer soon to pick up some crushed stone in the next month or so. No plans for any major pulls in the near future.


Why do you ask?
 

Skinny

Well-known member
2,130
490
83
Location
Portsmouth, NH
Nice writeup!

I think I will be adding a square u-bolt to go around the receiver hitch portion and run it up through the two holes directly below the pintle. This should tie both the hitch and bumper assembly together. It will also help with any extra tongue load. I noticed that with my bike on the back, it deflects slightly when I push the bike around. I'm sure it's nothing but it won't hurt tying the two together.
 

unaffiliated

Member
394
11
18
Location
Coosa, Georgia
True that. It certainly wouldn't hurt to have extra support. My motto is "If less is good, More is better". My hitch brackets were really long and went around the rear spring mounts and I had to trim the spring mounts. It would appear your rear spring mounts are different. I am assuming that is due to the lift kit? Did you install the lift? Did you have to change the spring mount brackets?
 

deank

Well-known member
Steel Soldiers Supporter
239
405
63
Location
Florida
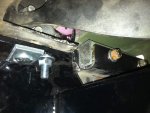
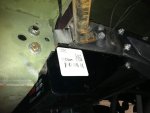
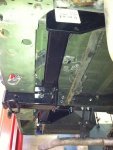
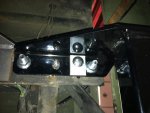
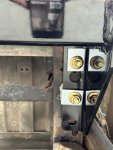
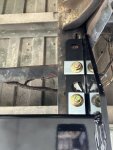
I really liked your write up. I have followed all the steps for mounting so far. I am ready to start putting all the bumper brackets on loosely. I made two bolt location changes that I think will work better for me. I drilled out the outboard rivet holes and used 1/2” bolts. Then I drilled two holes for the forward bolt holes.
IMG_9238.jpeg
IMG_9241.jpeg
IMG_9244.jpeg
IMG_9243.jpeg
Thanks for the step by step.
 

nyoffroad

Well-known member
944
690
93
Location
Rochester NY
I really liked your write up. I have followed all the steps for mounting so far. I am ready to start putting all the bumper brackets on loosely. I made two bolt location changes that I think will work better for me. I drilled out the outboard rivet holes and used 1/2” bolts. Then I drilled two holes for the forward bolt holes.
View attachment 923259
View attachment 923260
View attachment 923261
View attachment 923262
Thanks for the step by step.
Those rectangular shiny steel pieces, if I'm not mistaken have square holes punched in them and are supposed to be on top of the bottom frame flange and provide reinforcing and hold the HD carriage bolts that should have been in the hardware kit.
 
Top
AdBlock Detected

We get it, advertisements are annoying!

Sure, ad-blocking software does a great job at blocking ads, but it also blocks useful features of our website like our supporting vendors. Their ads help keep Steel Soldiers going. Please consider disabling your ad blockers for the site. Thanks!

I've Disabled AdBlock
No Thanks