• Steel Soldiers now has a few new forums, read more about it at: New Munitions Forums!

  • Microsoft MSN, Live, Hotmail, Outlook email users may not be receiving emails. We are working to resolve this issue. Please add support@steelsoldiers.com to your trusted contacts.

engine swap

rattlecan6104

New member
357
7
0
Location
Oak Harbor, WA
The engine compartment will get a bit of cleaning and freshening up as well... unfortunately I dont think I can get away with that at my shop due to environmental reasons, so its wire wheels, degreaser, scotch brite, and scrapers.

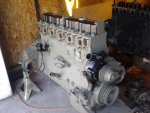
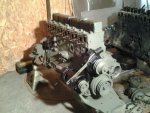
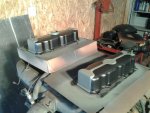
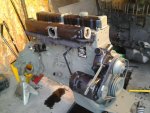
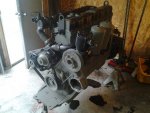
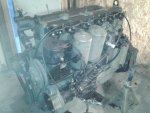
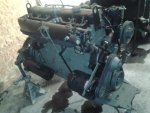
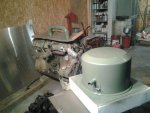
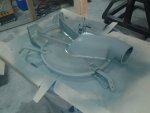
On the other side of things, got a few more goodies cleaned and painted, slapped a few pieces on the engine to give you guys an idea of how its gonna look. I am still waiting on ordered parts to come in and I still have a few more parts to clean and paint, so all is good at this point. The valve covers got treated to a little two tone, so they are looking pretty sharp. I am still debating whether to take it a step further and paint " WHITE MULTIFUEL 134 H.P. 478 CU. IN." would look pretty cool IMHO however I am worried of making it look crowded. At the moment I have a choice between the single and the two piston air compressor, not too sure which one I am gonna go with, any thoughts or ideas?
 

Attachments

swbradley1

Modertator
Staff member
Super Moderator
Steel Soldiers Supporter
14,253
1,709
113
Location
Dayton, OH
When my engine blew Jul 1 a lot of people thought it was the head gasket but since I have not pulled the engine or heads I don't know for sure yet. I do know I had a few small chunks in the oil pan and the oil looked fine.

Your build is looking very nice.
 

rattlecan6104

New member
357
7
0
Location
Oak Harbor, WA
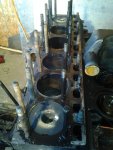
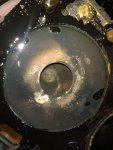
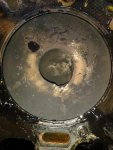
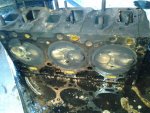
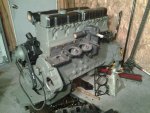
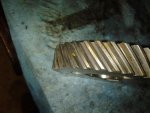
So today wasnt really productive as far as getting the replacement engine together, however I did satisfy my curiosity of how exactly the onside of the combustion chambers look. I pulled the heads and now have a better understanding of the reasoning behind the injectors having two holes, and the "cup" machined into the piston. I also noticed some interesting marks on the #4 piston,(picture#3) it looks like it was attacked with a hammer and punch. Upon inspection of the heads and head gaskets I found no visible signs of cracks, or gasket seal breakage. I did however see serious carbon buildup on the injector port holes.

Keeping in mind that this is an engine that I have ran straight motor oil about 70% of the time, and a blend of 50-75% WMO to 25-50% gas or diesel the other 30% of the time for 3 years. So this is how the combustion chamber looks after about 3 years of that as a DAILY DRIVER. Not too bad considering really.

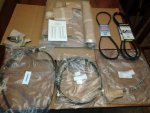
Any way after I called it a day and headed back home I was pleasantly surprised with a package on the door step. What you see in that picture is a new oil pressure sending unit, new belts, speedometer cable, tachometer cable, and a complete engine gasket and seal kit. I still have parts coming in from other sources, but at least now a lot of the parts I have been cleaning and reconditioning can be put on the engine now. Looks like tomorrow is gonna possibly be a very long day, but hey, I like it!
 

Attachments

Clay James

Member
524
4
18
Location
Reno/NV
Thanks for the pics of the inside of the combustion chambers. I've been curious how these look after prolonged use of WMO. Gotta love the multifuel.
 

rattlecan6104

New member
357
7
0
Location
Oak Harbor, WA
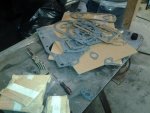
Now that I have gotten in the gasket set, I was able to start putting the freshly cleaned and painted parts back on the engine... starting to look good, however I had one minor issue with the gaskets... they aren't necessarily labeled as to what they are, granted pubs label them by part number, however I did not have any pubs at hand in my shop, so it was up to the old eyeball and chinese blueprints. It was a long and tireing day, especially after reinstalling the flywheel after I replaced the rear main seal, and boy let me tell you a thing or two about these flywheels, they are frickin heavy, and a pain in the @$$ to deal with. But I showed it who's boss and got it installed. I had ordered a clutch kit as well, that showed up along with a few other goodies today, however I was a little disapointed there wasnt a clutch alignment tool. I know it was wishful thinking, but now I will need to rig something up to make it work, I have seen a makeshift tool made of a socket, tape, and a chunk of large dowel rod. Looks like creativity is gonna ensue.
 

Attachments

rattlecan6104

New member
357
7
0
Location
Oak Harbor, WA
Since I never tore the replacement engine down past the block and heads, I cant clearly answer your questions o1951. The replacement engine was a good runner that had sat under a tarp in the Florida rainy season, so a lot of the exterior components were a little on the rough side, but the internals are from what I can tell pretty solid. Before the engine was pulled after the truck blew out a drivetrain component, the owner said it ran like a scalded dog.

On to my current progress, as I was trying to pull a plug out of the bell housing I wound up having to remove it with an E-Z out... that didnt work, instead it cracked the bell housing, so it was on to swapping them out. I wasnt too happy about it since last night I fought with the flywheel for what seemed like forever and wasnt looking forward to it again. One thing I noticed about the bell housings is that one was considerably heavier than the other. It turns out that the one that cracked was made of steel, while the other (that was attached to the engine that came out of the truck) was made of aluminum. This was a bit of a shock to me, the engine that came out of the deuce was a hercules, and the one going in was a white. I knew there are minor manufacturing differences, but I would consider this more of a major difference. Either way, the aluminum bell housing withstood everything I have put it through, so it should continue to do so.

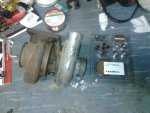
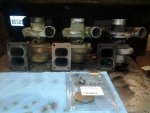
As the engine sits now, I essentially have just the fuel system, clutch assembly, turbo system, and filters left before the engine is ready to go back in. While on that note I received the turbo rebuild kit I ordred today, so here soon I can do that little project, I havent torn any of the turbo's in my current possession down, so I am not fully sure of the condition of the one I plan to rebuild, but the way I figure, I have 3 whistlers in my possession, one is bound to be rebuildable.rofl
 

Attachments

Gunfreak25

Well-known member
1,561
620
113
Location
Yuma, AZ
I see you opted for the single piston compressor, good choice. IMO, if they pump just as much air and there are a few less moving parts it's a win win situation.
 

rattlecan6104

New member
357
7
0
Location
Oak Harbor, WA
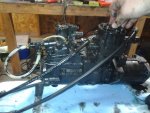
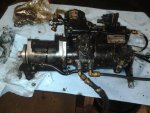
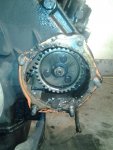
Today was a bit of a rough day. I had planned on completely installing and timing the fuel system, rebuilding the turbo, and getting the clutch pilot bearing removed if I had time. I had a couple setbacks to say the least. First I had to pull the fuel pump out of the old engine and get it ready for installation into the new engine. Reading through the TM's really helped as I didnt realize there was so much involved in timing the fuel pump. You can see more of the nastiness in the engine as I was pulling the pump gear out. Once I had removed the pump and got it on the work table I noticed it had a few lines looped back to themselves :-?

I went to the old chinese blueprint and saw how it was supposed to be routed. I need to do a little research.. but I am pretty well convinced it is the fuel density compensator that has been bypassed. I have never really checked into it when I got the truck since I started running WMO before I ever heard of bypassing the FDC and figured mine wasnt bypassed since it still ran like a champ anyways. For now I am going to leave it as is since I know the truck runs in this configuration and I will address that at a later date.

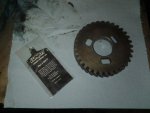
So, on to setting the timing. I have officially decided that rigging flight controls on the EA-6B Prowler is a more pleasant task. The replacement engine had the fuel pump removed, however the pump gear was left in it sealed in a plastic bag. It had a couple rust spots, but nothing a brass wire brush cant fix. I figured it would be best to reuse it rather than transferring the one out of the old engine to the new one. The line of thought here would be the same as if you reuse cam lifters, they go right back in the same spot since they have worn together and are "mated." I had a bit of assembly lube from a cam install on a different project left over and figured this would be a good time to use it. I really fear severe damage upon initial fire up, so in my mind an ounce of prevention here is worth a pound of cure.

As per the TM's, once initially timed and installed, the fuel pump shaft has to be held steady as you torque the gear bolts. I wish I could have gotten a picture of this, you guys would have had a laugh. I needed to hold the crank still as well, so there I was with my big 4 foot long ratchet resting on my shoulder, breaker bar in my left hand holding the pump shaft steady, and torque wrench in the right torquing those gear bolts, all while trying to lean over and keep an eye on the pump timing marks. It was a royal pain, but I got it.

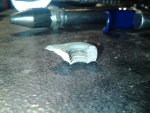
Moving on I put fresh fuel filters in the canisters and filled them with a mixture of diesel and seafoam, mounted them up. Plummed them into the fuel pump. Installed the fuel injectors and as I was going through final torque I heard a big SNAP :doh: I had broken a chunk off of the head where the injector hold down bolt threads into. I am way too far into this assembly to have this happen. Turns out that after checking the depth of the screw hole, I still had "plenty" of room for a longer bolt to get good thread grip. This is where the redneck ingenuity side of me came in. Granted it doesnt look pretty, it held torque, the real test will be if it holds under pressure of running. This is a gamble, but at this point its worth a shot. Its not like it will destroy any major component if it fails. I am tempted to use something to the sort of J-B-weld on it just for some extra hold, but I am undecided.

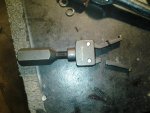
After all my little setbacks and dealing with a couple customers, I found myself working way into the night. The fuel system wasnt complete, but at a stopping point, obviously the turbo rebuild hasnt even been started, but I figured I would pull the clutch pilot bushing out real quick so I can return the rental tools in the morning... the removal tool broke aua I find it ironic that the brand name of the tool was "evertough" ... Evertough my @$$!
 

Attachments

silverstate55

Unemployable
2,075
872
113
Location
UT
Good grief, I thought these kinds of setbacks only happened to me...glad to see I'm not alone!!!

Good work, keep it up, everything is looking great!
 

rattlecan6104

New member
357
7
0
Location
Oak Harbor, WA
If my project gives another person an idea to try out, great! that's what this is all about.

So today I got a little progress done, after lots of ill faded attempts with bearing pullers and the "grease" method I said screw it, and pulled out a dremel with a milling bit and carefully made a relief cut in the clutch pilot bearing and with a hammer and chisel, I broke it apart and finally got it out. Installed the new pilot bearing, clutch and pressure plate, and while I had a bit more time, I went through checking the valve lash on the rockers, and am now essentially ready to rebuild the turbo and do final assembly. sorry guys, no pics this time.
 

rattlecan6104

New member
357
7
0
Location
Oak Harbor, WA
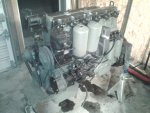
Got a little more done, now that I am a full time student in college for diesel technology, I dont have nearly as much time to myself as I used to. Today I got the starter in place, finished plumbing the fuel system on the engine, got the oil filters in place with the canisters "rebuilt" dumped in the "sacrificial" break in oil. I figured it would be a good idea to plan on running the engine for about 30 minutes at about 1400 RPM just to let the internal components reseat themselves as well as flushing out any potential contaminants in the block. Then drain, change filters, and cruise like its going out of style. That being said I still need to pick out one of the turbo's, rebuild it, install, and stuff the engine back into the truck.
 

Attachments

Gunfreak25

Well-known member
1,561
620
113
Location
Yuma, AZ
Good for you on working to achieve the all mighty "certificate" that proves you have enough horse sense to know which side of a wrench is the business end. Seriously though, nothing wrong schooling. Always felt "what you give is what you get" when it comes to such things. We are all watching your engine build, you've given me the initiative to refinish my 6.2 as I slowly put it back together. I would agree with the 30 minute break in period to get things broken in so to speak. I suppose any chance of video is out of the question. :p
 

rattlecan6104

New member
357
7
0
Location
Oak Harbor, WA
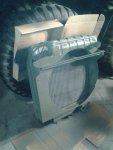
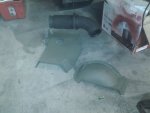
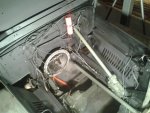
As I look at the engine, then back over to the engine bay, i decided it was time to get my butt in gear and make that engine bay look presentable, so today was all about more cleaning, priming and painting. The engine bay isnt show room quality, but eons better than it was, I sprung the extra cash for sound deadening rubberized undercoating for the firewall, hood, and fenders. I dont expect to see much of a difference in noise, if at all, but the texture adds a little rigidity and durability to the hood and fenders, so either way it should be worth it. Lots more goodies are painted up, still a few more items to go, and still the turbo rebuild. Guess we will see what production tomorrow brings
 

Attachments

Top
AdBlock Detected

We get it, advertisements are annoying!

Sure, ad-blocking software does a great job at blocking ads, but it also blocks useful features of our website like our supporting vendors. Their ads help keep Steel Soldiers going. Please consider disabling your ad blockers for the site. Thanks!

I've Disabled AdBlock
No Thanks