• Steel Soldiers now has a few new forums, read more about it at: New Munitions Forums!

  • Microsoft MSN, Live, Hotmail, Outlook email users may not be receiving emails. We are working to resolve this issue. Please add support@steelsoldiers.com to your trusted contacts.

First MEP 803A, fix up help

Pirotess

Member
18
37
13
Location
Lavaca County, TX, USA
Another update and more questions...

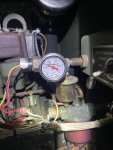
Well, I got an oil gauge mod installed. It showed 42psi at startup, and it dipped to 34psi after warming up under light load (about 12A L1/12A L3). It is nice to be able to look at the analog oil for confirmation. The panel seems to be around the same pressures.
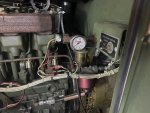
IMG_1078.jpg

The Frequency Transducer seems to check out OK as well, and the gauge shows the correct 60Hz!


Well, now for the bad news. I was trying to put some load on it, I think I was up to about the same 35ish Amps, when the PRC Ammeter suddenly shot up and the over load safety light tripped. The load was nowhere near enough to actually do that though...
And now my test loads show up around double on the PRC than what they did before..?

I have been pouring over the diagrams, and have one culprit so far:
R10, R11, & R12 should be 7.5 Ohms, but are reading around 1 Ohm each. They have gone bad.
R13-R15 check good.

So, I can't seem to find any replacements for them ( HLM-20-10Z7R50J ). Nowhere to be found online!
I am looking at getting some CAL-RMCX250 20W 1% 7.5 OHM Power Resistors, but I will have to modify the mounts if I do. The specs look the same though, so I think they will work. Does anyone know anywhere to get the originals?

Second, has anyone had this problem before? Is it just bad resistors, or do I need to look for something else that is bad? The way I understand it, the circuit is connected to S8, S6, K8, CT1-3, and R10-12. Do I need to check something on K8 (the Overload Relay)? What would have caused this?

Thank you for the help!
 

kloppk

Well-known member
Steel Soldiers Supporter
2,135
3,501
113
Location
Pepperell, Massachusetts
To check R10, 11 & 12 you need to disconnect 1 of the wires from each resistor so that 1 terminal on each has no wires on it. I think you'll find they are OK.
The original resistors are no longer made. The manufacturer does make a newer version that will mount up just the the originals.
I'll look them up next time I'm on my PC.

What positions are S8 & S6 set to?
What lugs do you have the load(s) connected to?
 
Last edited:

Pirotess

Member
18
37
13
Location
Lavaca County, TX, USA
To check R10, 11 & 12 you need to disconnect 1 of the wires from each resistor so that 1 terminal on each has no wires on it. I think you'll find they are OK.
The original resistors are no longer made. The manufacturer does make a newer version that will mount up just the the originals.
I'll look them up next time I'm on my PC.

What positions are S8 & S6 set to?
What lugs do you have the load(s) connected to?
I followed the TM on testing the resistors. It did not say anything about needing to take them out of circuit. Are you sure about that? If so, I can try that later.

S8 is set to 120/240 1 Phase
S6 was set to the 240V ( 1 Phase L1-L3 L3)
The loads were connected to L1, L3, N/L0, and G

When I tested the PRC earlier it was reading correctly for the amps it was getting. So I think that is ok.

Umm, FSOT2011E7R500JE is not going to work. Only see it on Mouser, with a minimum of 250 and a lead time of 20 weeks. Sigh.
 

Pirotess

Member
18
37
13
Location
Lavaca County, TX, USA
The reason the readings are off is because the CT's and K8 are connected in parallel to the resistors in the circuit.
Well, I just ran out and disconnected 1, 2, and 3 on K8. The resistors now read 7.6-7.7 ohms. So I guess they are ok. But I am back to trying to figure out where this phantom power draw is..?

It only does it with a load. Unloaded it reads 0. With a load, it seems to be reading about 2x the current it actually is putting out now. It was reading a bit high when I started working on the generator, but it suddenly jumped up to like 2x and overloaded that one time. The output to the heaters was the same the whole time though. If it is not the resistors, what could it be?
 
Last edited:

kloppk

Well-known member
Steel Soldiers Supporter
2,135
3,501
113
Location
Pepperell, Massachusetts
If it is not the resistors, what could it be?
The overload was/is probably dirty contacts inside S8. When in 120/240 setting S8 connects R12 & R13 in parallel for an effective resistance of 3.75 ohms. The combination of R12 & R13 form the burden resistor across CT3. If S8's contacts for R13 paralleling aren't making contact the effective resistance 7.5 ohms causing K8 to get twice the voltage (representing load) causing it to trigger an overload fault.

You ought to use some contact cleaner such as Deoxit on both S6 & S8 and then exercise each switch with the set OFF.
 

Pirotess

Member
18
37
13
Location
Lavaca County, TX, USA
The overload was/is probably dirty contacts inside S8. When in 120/240 setting S8 connects R12 & R13 in parallel for an effective resistance of 3.75 ohms. The combination of R12 & R13 form the burden resistor across CT3. If S8's contacts for R13 paralleling aren't making contact the effective resistance 7.5 ohms causing K8 to get twice the voltage (representing load) causing it to trigger an overload fault.

You ought to use some contact cleaner such as Deoxit on both S6 & S8 and then exercise each switch with the set OFF.
Yes, I understand L3-L1 is both loads. So will the L3-L0 read the same, or half the load? I don't think mine affected the PRC, can't remember just now.
Anyway, my 803a was reading at like 105% on the PRC when I was pulling about 37A on L1 and 39A on L3 with heaters. (That is wrong, correct? It should be 52A/52A for 125%, right? So 100% should be 42/42A?) Then it suddenly pegged the PRC at over the max and it went into overload. Before it tripped the overload I was taking current and the output was stable 37A/39A. I was testing the PRC gauge at the time so it was running fairly stable at that point. I think the PRC was getting 0.79A AC and suddenly jumped to 1.5A AC with that same load.

I have sprayed half a can of CRC electronic cleaner 05103 in S6 and S8 and exercised them earlier. That is the same as the Deoxit, isn't it? I also went through and check all screws for tightness.

Should I pull S8 out of the gen to clean it? Is there a better way to clean it?
When I got this generator, someone had unbolted the muffler and ran it like that, for I don't know how long, so there is a fine layer of soot stuck everywhere. It doesn't wipe off easily, kind of smears or just seems to have stained. I suppose S8 could have it inside too. I thought the CRC electronic cleaner would have cleaned it though...
IMG_0997.jpgIMG_0998.jpg
Thanks for the help
 
Last edited:

rickf

Well-known member
Steel Soldiers Supporter
3,131
1,631
113
Location
Pemberton, N.J.
Soot is carbon and carbon is conductive so I can see where there could be all kinds of issues with contacts and switches.
 

Pirotess

Member
18
37
13
Location
Lavaca County, TX, USA
I am working on cleaning S8 and doing a radiator flush, but I am confused about the coolant type to use. The parts sticky just says to use a heavy duty coolant. Napa has a matching green coolant, but it is listed as just conventional. Their heavy duty truck coolant is pink and has SCA precharged with Nitrite and low silicate. I have seen others that are nitrite and silicate free. Is the pink stuff good to use?

Also, any tricks to get the engine block drain open? Seems like someone cranked it down too tight and the handle bar just spins now. I can't open it.
 

rickf

Well-known member
Steel Soldiers Supporter
3,131
1,631
113
Location
Pemberton, N.J.
I would think the normal green coolant will be just fine. I don't think liner cavitation is an issue with these engines which is what the SCT is needed for. As far as the broken valve just get a wrench and take the whole valve out and replace it.
 

2Pbfeet

Well-known member
422
747
93
Location
Mt. Hamilton, CA
Yes, I understand L3-L1 is both loads. So will the L3-L0 read the same, or half the load? I don't think mine affected the PRC, can't remember just now.
Anyway, my 803a was reading at like 105% on the PRC when I was pulling about 37A on L1 and 39A on L3 with heaters. (That is wrong, correct? It should be 52A/52A for 125%, right? So 100% should be 42/42A?) Then it suddenly pegged the PRC at over the max and it went into overload. Before it tripped the overload I was taking current and the output was stable 37A/39A. I was testing the PRC gauge at the time so it was running fairly stable at that point. I think the PRC was getting 0.79A AC and suddenly jumped to 1.5A AC with that same load.

I have sprayed half a can of CRC electronic cleaner 05103 in S6 and S8 and exercised them earlier. That is the same as the Deoxit, isn't it? I also went through and check all screws for tightness.

Should I pull S8 out of the gen to clean it? Is there a better way to clean it?
When I got this generator, someone had unbolted the muffler and ran it like that, for I don't know how long, so there is a fine layer of soot stuck everywhere. It doesn't wipe off easily, kind of smears or just seems to have stained. I suppose S8 could have it inside too. I thought the CRC electronic cleaner would have cleaned it though...
View attachment 903878View attachment 903879
Thanks for the help
What is the correct number of wraps on a current transformer? I thought that I had seen a number somewhere, but on rereading a TM, it just recommends the same as before when replacing. I thought that I had seen a number of wraps specified somewhere, but I am not finding it at the moment.

Regardless, have you confirmed that the L3 meter reported current is what your own DVM reports? i.e. the PRC might be incorrect, or the L3 meter might be incorrect, or both.

Good luck,

2Pb
 

Digger556

Well-known member
Steel Soldiers Supporter
268
608
93
Location
Denver CO
What is the correct number of wraps on a current transformer? I thought that I had seen a number somewhere, but on rereading a TM, it just recommends the same as before when replacing. I thought that I had seen a number of wraps specified somewhere, but I am not finding it at the moment.

Regardless, have you confirmed that the L3 meter reported current is what your own DVM reports? i.e. the PRC might be incorrect, or the L3 meter might be incorrect, or both.

Good luck,

2Pb

8 for a 802a
4 for a 803a

When looking at the CT, remember there are multiple conductors. I think it was 2 each.
 

2Pbfeet

Well-known member
422
747
93
Location
Mt. Hamilton, CA
8 for a 802a
4 for a 803a

When looking at the CT, remember there are multiple conductors. I think it was 2 each.
Thank you!

Yes, I was remembering four wraps from somewhere, and eyeballing the photos above, it seemed like it was closer to eight conductors on @Pirotess's unit, but I had forgotten that the conductors are doubled.

All the best,

2Pb
 

Pirotess

Member
18
37
13
Location
Lavaca County, TX, USA
Hi all.
Been busy with stuff lately, but wanted to put an update.

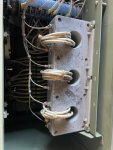
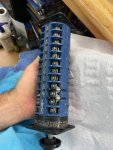
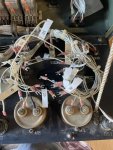
I ordered some DeoxIt and removed and cleaned the S8 switch. I found soot on the contacts that was making 13 to 14 have a high resistance which is what I believe was causing the overload under small loads. The voltages on L1 and L3 are closer now as well, about 1V apart. (119V and 120V). The load was still reading about double what was actually being put on it still though.
IMG_1201.jpgIMG_1233.jpg

I went ahead and did the radiator flush, I think I did about 3 or 4 flushes with water before putting the concentrate antifreeze in it. I guess there was rust because the flush water was somewhat orange. I went ahead and used the heavy duty antifreeze from NAPA. And I put in a new thermostat. The temp on it was 77C I believe, so 170F on the gauge seems good.

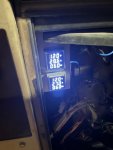
I also ordered and added two small meters for L1 and L3 in the wire lug compartment. It really helps out getting a read on the outputs at a glance!
IMG_1261.jpg

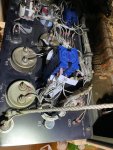
Anyway, I still had the problem with the load gauge, so I cleaned S6 as well as the voltage POT, but neither fixed it. I went ahead and removed S6 to do a better cleaning.
IMG_1272.jpgIMG_1282.jpg
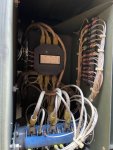
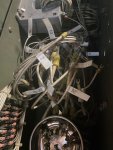
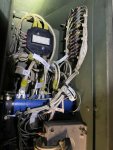
When I was putting it back, some of the wires looked weird so I checked all the connections and a couple of wires were out of place. A couple were on jumpers so they did not really matter, but I did find that 5 and 9 were reversed. I believe this put L1 and L3 load readings in series instead of parallel, which was why I was getting almost double the current reading that I should have.
SO, when I fixed those, the load gauge now reads correctly!

It is running well I think... I put some SeaFoam in the oil, and it has been running like 40-42psi at start, and dipped down to 28psi when I loaded it with 39A/37A. That was as much as I can go with the heaters I have. Smoke looks clear with that load on it.
IMG_1266.jpg
I still need to replace that coolant block valve and get a cover for the control panel.
 

Attachments

Top
AdBlock Detected

We get it, advertisements are annoying!

Sure, ad-blocking software does a great job at blocking ads, but it also blocks useful features of our website like our supporting vendors. Their ads help keep Steel Soldiers going. Please consider disabling your ad blockers for the site. Thanks!

I've Disabled AdBlock
No Thanks