• Steel Soldiers now has a few new forums, read more about it at: New Munitions Forums!

  • Microsoft MSN, Live, Hotmail, Outlook email users may not be receiving emails. We are working to resolve this issue. Please add support@steelsoldiers.com to your trusted contacts.

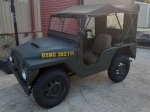
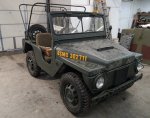
Fixing up my M422A1 Mighty Mite

M813rc

Well-known member
Steel Soldiers Supporter
4,218
3,255
113
Location
Near Austin, Texas
For some time I had been 'sorta looking' for an M151A2, as I wanted to add a small vehicle to the herd and I drove those in the Marines way back in the last century.
Back in November Roboskid sent me a link to an ad for several vehicles, and said "I know you want an M151, but look at the Mites!".
There were three in the picture, and those things just grabbed at me, so I called the seller, Jim.

Turned out he was also an old Marine, and while he was going to sell his vehicles, he said they were like his kids, he wasn't going to sell them to anyone but "the right home", preferrably another slightly younger old Marine. He'd already had a few calls that started with "That would be a great hunting buggy on the ranch...", he cut them off with an immediate and firm "Nope!".
I told him I was a collector, and that vehicles have a pretty soft life with me.
("Gatherer" might be more accurate than "collector". Collectors usually have certain criteria they look for, a theme; I simply go with "Oooh! I like that!").

So, I made arrangements to meet up with Jim at his place near Houston. Sid (Roboskid) wanted to go along, I warned him that after the phone conversation with Jim, I suspected it was going to be a lengthy day. Sid usually gets straight to business, bam bam bam, when he's making a deal, but I told him this deal likely wasn't going to be quick at all.
In short, we met up with Jim at 10am, looked at all his vehicles (he had a bunch!), went and had a two hour lunch, and didn't talk a word of business until around 4pm.
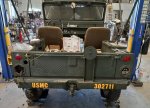
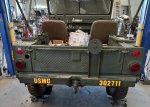
I apparently passed the adoption interview because we left with me owning one Mite, an M715, and a Coot.

Cheers

0.jpg 1.jpg 2a.jpg 2b.jpg
 
Last edited:

M813rc

Well-known member
Steel Soldiers Supporter
4,218
3,255
113
Location
Near Austin, Texas
All three vehicles were in good shape, but all have their issues, and none had been run for several years.
The Mite had it's rear wheel drive shafts disconnected because it wouldn't roll otherwise, unknown problem.
The M715 had a bad 350 engine (I'll do a separate thread on that truck).
The Coot engine was also bad, but had a brand new one waiting to be installed.

I hauled the Mite and the Coot home as one load. My buddy Scott/Reloader64 was kind enough to insist I take his truck and car-hauler trailer for the trip.
As he said, Houston and back is a long way driving an M1028A2. :)
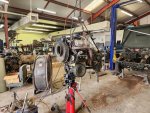
The Mite went straight into DrJay's shop to start figuring out its issues. While it is pretty, it was a disaster mechanically!

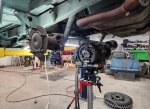
It turned out that the back left output shaft from the rear differential was missing a snap ring, allowing it to slide in and contact other parts and lock up.
That was a quick fix, as were the brakes.
The brake lines and master cylinder appeared to be in good shape, though a couple of wheel cylinders were bad. Brakes are not something to cut corners on, so the master cylinder and all four wheel cylinders were replaced.

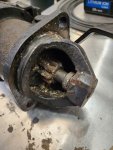
The engine could be easily turned over by hand, the oil was fresh and clean, but the starter wouldn't turn it over.
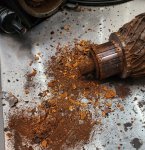
We pulled the starter off and it was simply horrific inside! If you told me it was recovered from a sunken U-Boat, I'd believe you.
So, onto the interwebs and after much searching I finally found a rebuilt starter from a guy in Arkansas. With the new starter, new points, condenser, and coil, and the plugs cleaned and gapped, the engine fired right up and runs very smoothly.

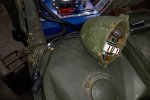
But running off a small gas can. We tried putting a little fuel in the Mite's tank, but it started coming out through multiple holes! We pulled the tank and found it to not be in good shape, so I'll either have to get it repaired or find a replacement.

Cheers


3.jpg 4.jpg 5.jpg 6.jpg 7.jpg
 
Last edited:

M813rc

Well-known member
Steel Soldiers Supporter
4,218
3,255
113
Location
Near Austin, Texas
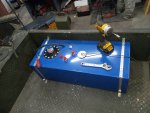
In kicking around ideas on what to do as a temporary solution for a fuel tank, one idea was a plastic boat tank up underneath the back where the regular tank goes. But plumbing/filling that would pose an issue since the filler and connections tend to be in the center of the top and, as it turns out, a tank with any usable quantity of fuel wouldn't fit anyway.
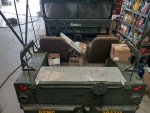
Since there is a hatch in the inside of the bed for accessing the fuel filler neck and tail-light wiring, we thought maybe we could stick a tank in the bed, run the fuel line down the hatch, and "cover it with something".
While looking at boat tanks online, we saw a rectangular 15 gallon aluminium tank that was a perfect size, and also had a sender for the gauge. And it was less expensive than the plastic boat tanks! Thus the plan was spawned to use that one, strap it down, and cover it with a diamond-plate aluminium box to hide it.

While I thoroughly dislike any permanent modifications to an MV , this installation required just a few bolt holes, which can be covered or welded up once the temporary tank is no longer necessary. So, it is done.
The tank cover is actually part of a truck bed toolbox and is very sturdy, with gussets along the fold. It is bolted to the floor, with hooks that go over the tailgate (no bolts needed there). There is a hatch in the top for the filler, and also allows access to the right side fuel lines and wiring. On the drivers side there is another hatch, this allowing access to the wiring hatch on that side, and also providing a covered storage area. I'll put a keyed lock on there for a modicum of security to keep less motivated folks out.

"Why such a bright blue tank?" I hear you ask. The answer is that the blue one was $20 cheaper than unpainted or any other colour! ;)

Once the paint I ordered from Rapco arrives, the cover will be nice Marine Green and hopefully look like it is supposed to be there. I may go so far as to paint the portions of the tank visible when the hatches are open.

Cheers

8.jpg 9.jpg 10.jpg 11.jpg
 
Last edited:

M813rc

Well-known member
Steel Soldiers Supporter
4,218
3,255
113
Location
Near Austin, Texas
Ah, the Coot! Such a strange and interesting vehicle. I knew of them, but had not seen one in person until this one. I just couldn't leave it behind! I didn't realize until afterwards that the factory was in Cedar Park until it closed down - that is only a few miles from me.

Cheers
 

M813rc

Well-known member
Steel Soldiers Supporter
4,218
3,255
113
Location
Near Austin, Texas
Next on the list was the stuck clutch, engaged all the time.
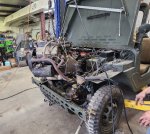
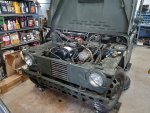
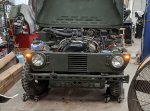
Getting at the clutch entails removing the entire power egg of engine, transmission, and front differential. Of course, this can't be done without removing all the front body sections too. :cautious:

The manner in which the body sections were attached was quite curious, for example the front left corner was held on by five bolts, two screws and one rivet. The rivet doesn't really make sense, since the part it was in also had three bolts in slots in the same line for adjusting the alignment of the panel as needed. The rivet, of course, prevents any such adjustment. :unsure:
During disassembly, the rivets had to be ground off.

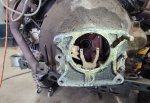
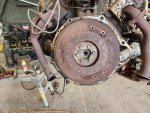
The suspicion that this Mite had been in flood water at some point of its life, which was sparked by the state of the starter, was further strengthened by all the crud in the clutch area. It was positively nasty, with lichen looking stuff inside. The clutch plate itself was stuck to the flywheel with rust; the throwout bearing was no longer a bearing, it was a solid locked up lump.

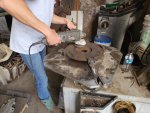
Everything was cleaned up, what could be power washed was. Courtney polished the flywheel which finished up surprisingly nicely.
A new clutch kit is available in which everything but the pilot bushing and the throwout bearing sleeve can be used, but those can be salvaged from the Mite parts.

Everything was reassembled with the new parts and installed back into the Mite. Prior to it going in, the broken front engine mount was repaired. The rivets removed during body panel disassembly were replaced with bolts.
And amazingly enough everything now starts, drives, stops and shifts gears as it is supposed to. Yay!!

The last major project will be rewiring the vehicle as a lot of the wiring appears to be original from 1961 and the insulation is hardened and just cracking off all over the place.

The last picture below shows Marines doing the same or a similar maintenance job in Vietnam.

Cheers

20230307_171302 - Copy.jpg 20230307_171333 - Copy.jpg 20230308_085006 - Copy.jpg 20230308_090300 - Copy.jpg 20230308_112659 - Copy.jpg 20230309_151603 - Copy.jpg 20230310_145312 - Copy.jpg 20230310_145327 - Copy.jpg 20230316_161907 - Copy.jpg Vietnam maint.jpg
 
Last edited:

Mullaney

Well-known member
Steel Soldiers Supporter
Supporting Vendor
7,716
19,766
113
Location
Charlotte NC
Next on the list was the stuck clutch, engaged all the time.
Getting at the clutch entails removing the entire power egg of engine, transmission, and front differential. Of course, this can't be done without removing all the front body sections too. :cautious:

The manner in which the body sections were attached was quite curious, for example the front left corner was held on by five bolts, two screws and one rivet. The rivet doesn't really make sense, since the part it was in also had three bolts in slots in the same line for adjusting the alignment of the panel as needed. The rivet, of course, prevents any such adjustment. :unsure:
During disassembly, the rivets had to be ground off.

The suspicion that this Mite had been in flood water at some point of its life, which was sparked by the state of the starter, was further strengthened by all the crud in the clutch area. It was positively nasty, with lichen looking stuff inside. The clutch plate itself was stuck to the flywheel with rust; the throwout bearing was no longer a bearing, it was a solid locked up lump.

Everything was cleaned up, what could be power washed was. Courtney polished the flywheel which finished up surprisingly nicely.
A new clutch kit is available in which everything but the pilot bushing and the throwout bearing sleeve can be used, but those can be salvaged from the Mite parts.

Everything was reassembled with the new parts and installed back into the Mite. Prior to it going in, the broken front engine mount was repaired. The rivets removed during body panel disassembly were replaced with bolts.
And amazingly enough everything now starts, drives, stops and shifts gears as it is supposed to. Yay!!

The last major project will be rewiring the vehicle as a lot of the wiring appears to be original from 1961 and the insulation is hardened and just cracking off all over the place.

The last picture below shows Marines doing the same or a similar maintenance job in Vietnam.

Cheers

View attachment 893545 View attachment 893546 View attachment 893547 View attachment 893555 View attachment 893549 View attachment 893550 View attachment 893551 View attachment 893552 View attachment 893553 View attachment 893554
.
Sure looking good - And pretty quick too!
 

M813rc

Well-known member
Steel Soldiers Supporter
4,218
3,255
113
Location
Near Austin, Texas
Thanks!
Work done over a couple of weeks, but it's taking up real estate in Jason's (DrJay) shop that could be used for real revenue generating customers, so I need to get it out of there as soon as feasible. I don't want to impose too much on his generosity. ;)

Cheers
 
Last edited:

M813rc

Well-known member
Steel Soldiers Supporter
4,218
3,255
113
Location
Near Austin, Texas
Progress slowed down a bit over the last week, waiting for parts.
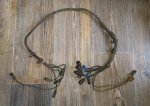
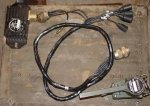
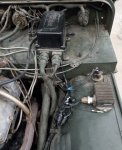
During that time, I have been cleaning up light fixtures and cleaning/repairing a lot of the wiring harness. The wiring looks to be original from 1961, some of the insulation was in sad shape, as were some of the Packard connectors (though a surprising number are still in near perfect shape), and some wires were badly corroded.
What needed replacing has been, and I reinstalled the front harness today.

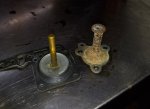
While the engine was running smoothly, it would hesitate when you blipped the throttle, and backfire sometimes. Looked like the accelerator pump wasn't working properly. So, after a lot of webcrawling research for ideas on what carburetor kit I needed, I ordered one.
The carburetor kit arrived in due course, so the carb has been refurbished. The engine now purrs even more smoothly, no more hesitation or backfiring when the accelerator is pushed. Some of the interior carb bits were pretty manky!

Carb kit information is attached for reference, as a full kit for this carb is not available. Most of the kit can be used, though a couple of gaskets have to be made by hand.

She is essentially roadworthy now, but there are a couple more things I want to do before she leaves the shop. More on that anon. ;)

Cheers

20230326_134406 front wiring harness - Copy.jpg 20230326_135215 front wiring harness - Copy.jpg 20230327_1 Carb Kit 1 - Copy.JPG 20230327_172535 carb rebuild - Copy.jpg
 
Last edited:

M813rc

Well-known member
Steel Soldiers Supporter
4,218
3,255
113
Location
Near Austin, Texas
And on to the "more"....

Mites didn't come from the factory with turn signals, though I have seen some in-service pictures of them modified to have them later. They also came with one tiny tail-light/brake-light on the driver's side, with just a blackout light on the right.
I intend to drive the Mite on the road sometimes and I do not trust other drivers to understand hand signals these days, nor to see one tiny tail light on the back. Hand signals are pretty useless in the dark anyway, and some shows start pretty early.

To this end, I will be adding turn signals front and rear, and converting both rear lights to have larger Gama Goat style lenses.
Turn signals to the rear are no real problem, they are integrated in the tail-lights and just a little extra wiring is needed.
Adding them at the front is more challenging.

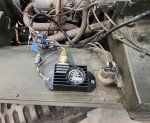
I bought a signal arm, flasher, and switch-to-flasher wiring harness from Mark at Rapco. Beats trying to figure out how to wire it!
Easy for some, but not necessarily me....
Installing that was quick, though it required a couple of screw holes in the Mite fender for the flasher. Argh!! I hate poking extra holes in it.
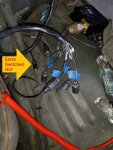
The picture with the flasher in it, the wiring is not tucked away yet, it's not staying like that!

The new flasher unit requires power. To provide this without cutting into the wiring from the master power switch, a simple Y plug on the back allows one power source to be split into two. While I was at that, I added a second switched power plug in case it was needed for something in the future. That one had a rubber cap placed on it to protect it in the meantime.

Figuring out front turn signals took some pondering. I tend to make picture-things for myself to help me figure stuff out, I have attached one of those showing my turn signal thought process.
One of Jim's Mites had turn signals mounted in the front fenders. They looked nice and clean, and could pass for stock, but they necessitated cutting two big holes in the sheet metal. Not an option I'd go ahead with.
I considered putting the standard bullet-fairing military turn signals inside the holes in the front bumper - nice idea, but they were too big.
Try putting them in the blackout light holes? Nope, wouldn't fit properly in there either.

That led me to the idea of removing the blackout light cat-eyes, replacing them with amber lenses, and putting bright bulbs in.
Some experimentation with just a cat-eye removed showed that this was a very workable solution. Coming from the 1"x1/2" hole, I didn't think they would be visible enough, but with bright bulbs they certainly are.
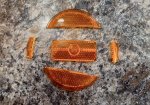
So, I removed the cat-eyes from both blackout lights, cut sections of amber reflectors to size and installed them in the holes. The circular section in the center of each lens concentrates a lot of light forward.
I have also ordered some extra bright LED bulbs to try out. Hopefully having a standard bulb in the rear lights will give enough resistance to make them flash properly, though the ad says they already have something built in to help with that.
In one picture the metal retainer for the cat-eye is there, but I chose not to reinstall them because they make the light hole even smaller.

While we were at all this, the non-working civilian headlight dimmer switch was replaced with the proper military one that should have been there, my example being salvaged from DrJay's parts deuce.

Cheers

12 - Copy.jpg 13 - Copy.jpg 14a - Copy.jpg 14b - Copy.jpg 20 - Copy.jpg 21 - Copy.jpg 15 - Copy.jpg 16 - Copy.jpg 17 - Copy.jpg 18 - Copy.jpg 19 - Copy.jpg
 
Last edited:

Mullaney

Well-known member
Steel Soldiers Supporter
Supporting Vendor
7,716
19,766
113
Location
Charlotte NC
And on to the "more"....

Mites didn't come from the factory with turn signals, though I have seen some in-service pictures of them modified to have them later. They also came with one tiny tail-light/brake-light on the driver's side, with just a blackout light on the right.
I intend to drive the Mite on the road sometimes and I do not trust other drivers to understand hand signals these days, nor to see one tiny tail light on the back. Hand signals are pretty useless in the dark anyway, and some shows start pretty early.

To this end, I will be adding turn signals front and rear, and converting both rear lights to have larger Gama Goat style lenses.
Turn signals to the rear are no real problem, they are integrated in the tail-lights and just a little extra wiring is needed.
Adding them at the front is more challenging.

I bought a signal arm, flasher, and switch-to-flasher wiring harness from Mark at Rapco. Beats trying to figure out how to wire it!
Easy for some, but not necessarily me....
Installing that was quick, though it required a couple of screw holes in the Mite fender for the flasher. Argh!! I hate poking extra holes in it.
The picture with the flasher in it, the wiring is not tucked away yet, it's not staying like that!

Figuring out front turn signals took some pondering. I tend to make picture-things for myself to help me figure stuff out, I have attached one of those showing my turn signal thought process.
One of Jim's Mites had turn signals mounted in the front fenders. They looked nice and clean, and could pass for stock, but they necessitated cutting two big holes in the sheet metal. Not an option I'd go ahead with.
I considered putting the standard bullet-fairing military turn signals inside the holes in the front bumper - nice idea, but they were too big.
Try putting them in the blackout light holes? Nope, wouldn't fit properly in there either.

That led me to the idea of removing the blackout light cat-eyes, replacing them with amber lenses, and putting bright bulbs in.
Some experimentation with just a cat-eye removed showed that this was a very workable solution. Coming from the 1"x1/2" hole, I didn't think they would be visible enough, but with bright bulbs they certainly are.
So, I removed the cat-eyes from both blackout lights, cut sections of amber reflectors to size and installed them in the holes. The circular section in the center of each lens concentrates a lot of light forward.
I have also ordered some extra bright LED bulbs to try out. Hopefully having a standard bulb in the rear lights will give enough resistance to make them flash properly, though the ad says they already have something built in to help with that.
In one picture the metal retainer for the cat-eye is there, but I chose not to reinstall them because they make the light hole even smaller.

While we were at all this, the non-working headlight civilian dimmer switch was replaced with the proper one that should have been there, my example being salvaged from DrJay's parts deuce.

Cheers

View attachment 894148 View attachment 894149 View attachment 894150 View attachment 894151 View attachment 894152 View attachment 894153 View attachment 894154 View attachment 894155 View attachment 894156
.
Wow... That Option 4 using the amber light with the dual filament socket - to make the signals and yellow running lights function is really good. And the least amount of metal mods too... Lots of imagination and it is shaping up nicely!

.
 

M813rc

Well-known member
Steel Soldiers Supporter
4,218
3,255
113
Location
Near Austin, Texas
Turn signals to the rear are no real problem, they are integrated in the tail-lights and just a little extra wiring is needed.
Well, that came back to haunt me!
After quite a bit of frustration and time wasted in trying to repair the rear wiring harness, it was decided that it was in bad enough shape that it just needed to be entirely replaced. Picture 4 below gives a good idea of the nasty crumbling wiring and plugs encountered inside.
So a new rear harness was made, from the engine compartment back, using much of an NOS harness for something else that Jason had in his wiring stash, which already included a trailer plug. With the harness completed, continuity checks from front to back showed everything was as it should be, so the little metal military number tags (salvaged off old wire) were put on and the wiring loom run through the vehicle.

That's where the worms started playing.
Working at the back now from the trailer plug, final checks were giving us different results than before, wires weren't showing continuity as they should, or showing up in the wrong places.
After check, recheck from the front, recheck from the back, and probably some ungentlemanly language, it was discovered that the trailer plug was wired incorrectly from the factory! An example is that wire 22-460, which is right turn/stop, which should run to socket J in the trailer plug, was actually wired to socket H, which is for auxiliary power when required. It lit up in a continuity check, just not in the right socket (which we failed to notice initially...oops!).
Once that was discovered, we had to rewire the trailer plug because, the way it was, interesting things would happen when the M416 was connected to it.
This would also explain why that NOS wiring harness was surplussed off by the military in the first place.

Removing tail lights that had probably been there since 1961 proved to be a task. The rear light wiring and housing bolts are all nicely protected within the body, access to them is through small hatches in the bed. Small hatches, big hands, and getting tools in there isn't exactly a formula for smiling while you work.
The left light gave up pretty quickly, but the right light did not want to be unseated. It probably knew it wasn't going back in later.
The joy of trying to work a socket and small breaker bar into the little hatch (because a full sized ratchet wouldn't fit) to get at bolts that were hidden behind the fuel filler neck proved to be a source of more ungentlemanly language. That light finally came out, and in a display of great restraint, I did not hurl it across the shop! Picture 1 below gives a good idea of inside that hatch.

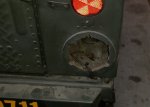
The left tail light was cleaned up and reused, the right light was a two-wire (blackout lights only) housing, so it was replaced with a nice 3-wire light from my stash. Once the lights were attached to the appropriate wires, but before bolting them in, there was a brief moment of consternation when right turn on the signal arm netted flashing running lights, but relief came when it was discovered that I just didn't have a good ground on my jumper wire. Whew!
Properly grounded, everything lit up as it should, and after bolting them onto the Mite (which proved to be much easier than removal) it all works. (Cue the Hallelujah chorus!)
The Gama Goat lenses were then put on.

The Mite now has turn signals, large tail lights on both sides, and even 4-way flashers.
Almost done there, just need to make a gasket to get the trailer plug bolted on.

You'll notice a lot of blue tape on the wires in the pictures. The proper metal number tags are on the wires, but without bright light neither DrJay nor I can read them without squinting and groaning, so they all had working tags with nice big numbers on them. :roll:
The tape is all gone now.

As the connections were made up front, each wire was cut back to it's proper length, a Packard connector was attached, and it got plugged into the circuit. The rat nest in the picture below dwindled until the wiring was all nice and tidy, ready to be tucked up neatly.

You'll notice the aluminium gas tank cover has disappeared again. This was to ease access to the wiring hatches, and also because it is transitioning from silver to green at the moment.

Cheers

19b - Copy.jpg 19c - Copy.jpg 22 - Copy.jpg 22b - Copy.jpg 22c - Copy.jpg 23 - Copy.jpg 24 - Copy.jpg 25 - Copy.jpg
 
Last edited:
SgtMajHarper

Well-known member
301
585
93
Location
Falcon, CO
Well, that came back to haunt me! After quite a bit of frustration and time wasted in trying to repair the rear wiring harness, it was decided that it was in bad enough shape that it just needed to be entirely replaced.
So a new rear harness was made, from the engine compartment back, using much of an NOS harness for something else that Jason had in his wiring stash, which already included a trailer plug. With the harness completed, continuity checks from front to back showed everything was as it should be, so the little metal military number tags (salvaged off old wire) were put on and the wiring loom run through the vehicle.

That's where the worms started playing. Working at the back now from the trailer plug, final checks were giving us different results than before, wires weren't showing continuity as they should, or showing up in the wrong places.
After check, recheck from the front, recheck from the back, and probably some ungentlemanly language, it was discovered that the trailer plug was wired incorrectly from the factory! An example is that wire 22-460, which is right turn/stop, which should run to socket J in the trailer plug, was actually wired to socket H, which is for auxiliary power when required. Once that was discovered, we had to rewire the trailer plug because as it was it was going to do interesting things when the M416 was connected to it.
This would also explain why that NOS wiring harness was surplussed off by the military in the first place.

Removing tail lights that had probably been there since 1961 proved to be a task. The left one gave up pretty quickly, but the right light did not want to be unseated. It probably knew it wasn't going back in later.
The joy of trying to work a socket and small breaker bar into the small hatch (because a full sized ratchet wouldn't fit) to get at bolts that were hidden behind the fuel filler neck proved to be a source of more ungentlemanly language. That light finally came out, and in a display of great restraint, I did not hurl it across the shop!

The left tail light was cleaned up and reused, the right light was a two-wire, blackout only, housing, so it was replaced with a nice 3-wire light from my stash. Once the lights were attached to the appropriate wires, but before bolting them in, there was a brief moment of consternation when right turn on the signal arm netted flashing running lights, but relief came when it was discovered that I just didn't have a good ground on my jumper wire. Whew! Properly grounded, everything worked as it should, and after bolting them onto the Mite (which proved to be much easier than removal) it all works. The Gama Goat lenses were put on
The Mite now has turn signals, large tail lights on both sides, and even 4-way flashers.

Cheers

(out of time now, heading off on a quick trip, pictures to follow in a couple of days)
Reads like this one is a big reason why I LOVE this site! Set up the lawn chair, get your snacks and drinks and learn new words......they will come in handy when you work on your truck next.
 

M813rc

Well-known member
Steel Soldiers Supporter
4,218
3,255
113
Location
Near Austin, Texas
I'd be very pleased if any of this can help anyone with their project in the future. As regards new words, those might have to go through less visible messaging, lest women, children, or timid men be alarmed. (Though I doubt there are any timid men on this site...)
I must add though, that I have sincere doubts anyone with Sgt Maj in their title would find words in my vocabulary that they were not already familiar with. :grin:

So, back from my quick trip to south Texas to help a friend of mine's elderly mum with a few things related to her car and house. I have edited posts 10 and 14 above, adding information and pictures (Yay!! We all like pictures! :D )

Cheers
 

M813rc

Well-known member
Steel Soldiers Supporter
4,218
3,255
113
Location
Near Austin, Texas
A brief setback today while installing one of the front turn signal lights with the newly arrived LED bulbs - the insulation inside the light gave up the ghost, caused a dead short, and this let the magic smoke out of my new flasher. That meant having to take the light apart to rewire it, which was a total pain. However, Jason (DrJay) had a spare salvage flasher in his stash, and it was installed in place of my fried one and worked just fine.
Once done and the lights reinstalled with the LED bulbs, the front turn signals are eye-catchingly bright.
I managed to catch a photo of them both on in 4-way flasher mode, attached below. Really rather pleasing!

That finished up the rewiring, re-lighting project. I have attached a picture showing the old limited-lighting lenses next to the bigger Gama Goat style lenses. You can see what a difference it made, and its all easily reversible to stock.

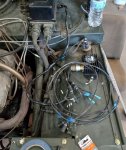
I also cleaned up the rats nest of wires in the engine compartment into a semi-tidy bundle.
The various actuator cables for front shutter, fording, spark plugs, etc., still look like the ramblings of a drunken spider and offend my sensibilities, but that's the way they came from the factory, so.... :shrugs:

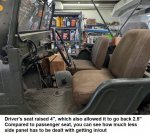
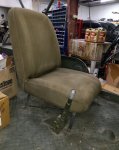
As mentioned before, my Mite does not have stock seats, and the ones in it were bolted directly to the floor. This put the seat cushions about four inches lower than they should be.
For me, that meant being a bit low looking over the hood, and also meant that with the tall side of the vehicle, it was difficult for me to extricate my aging and more-ample-than-ideal self from the seat! It also meant that my 5'3" daughter, who has claimed rights of operation of the Mite in parades, would have difficulty seeing out the windshield.
The original Mite seat sat on a spring base (picture an 18" square mattress boxspring). These have proven to be less common than hens' teeth, and I have failed to locate a set. Various complicated methods of reproducing these were kicked around, but in the end we decided to make a simple frame of steel flat stock with steel rod reinforcing. This actually worked out very well, lifted the seat to the desired height, and allows me to heft myself out of the seat without difficulty. Perhaps not gracefully, but purposefully and not flailing around like a beached seal.

The Mite is now pretty much done and ready for the road. I need to add the intake shutter protection grill, have a lot of paint touch ups to do on all the various new fasteners, and need to find an appropriate boot for the gear shifter, the one on it is barely sufficient. I also need to give her a well-deserved bath, she is absolutely filthy after several weeks in a fabrication shop! Then the canvas top needs to be put back on.

I'll take a few more pictures tomorrow.

Cheers

27 - Copy.jpg 28 - Copy.jpg 29 - Copy.jpg
 

M813rc

Well-known member
Steel Soldiers Supporter
4,218
3,255
113
Location
Near Austin, Texas
I suppose because I was busy Wednesday trying to get everything finished so we could test drive the Mite and possibly get it home before the predicted monsoon arrived Thursday morning, I neglected to take my usual "in progress" photographs. Some folks chuckle because I take so many pictures, but they are helpful later for recording exactly what was done, and how.
No matter, I'll take the seat back out later to paint the frame, I'll take my pictures then.

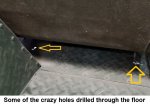
Once the seats were removed from the Mite floor, I was confronted by a plethora of holes. Whoever put those seats in had serious issues with spatial awareness and how to use any type of measuring device. It appears that he just drilled holes until he got four that allowed the seat bolts to all go through the floor at the same time. I may have uttered some unkind words about him and his ancestry.
Ideally, we would have welded these up, but remember the entire body is aluminium. Without knowing more about the aluminium itself, Jason didn't feel he could do it without possibly doing more damage than good. My own welding skills go little beyond "Ooh! Sparky fire make metal stick together!".
So, bolts, washers and sealant for the bigger holes, plain sealant for the smaller ones. The floor can always be revisited later once I find someone who can do the job properly.

Then, time to drive it !?! Nope.... :cautious:
While we thought the new rear wiring harness ran where it was supposed to, it had inadvertently been run along inside a panel it should have been outside of, so the clutch pedal linkage was hitting the harness. More naughty words. It was late by then, so we gave up for the night.

Typical Texas springtime - On Wednesday it was 87* and 90% humidity in the shop, the humidity left over from rain that morning.
Thursday morning it was 49* and hosing down rain outside.
I disconnected, moved, and reconnected the wiring harness, checked all the lights and they all still worked. The intake shutter grill was installed. I primed some bits and pieces to be painted green. Still hosing down rain outside.
So I packed up all the no-longer-needed spare parts and my wiring kit to take home. Still hosing down rain outside.
I vacuumed the vehicle out, then practiced getting in and out of the drivers seat, I actually look competent at that now! Still hosing rain outside, forecast is rain until Sunday.
But I want to drive this thing!!

Finally, the torrential rain abated to just rain. We've been wet before and haven't dissolved yet, so out we go to drive the Mite around the yard. That thing is a ball - zippy, light on the steering, and comfortable for such a tiny truck. And everything worked....except, the front brakes. The back brakes will lock up, but nothing up front.
Apparently the front brake line has clogged up. Early on, we blew air through it and it seemed clear, but now pushing hard on the pedal there is no flow to the front brakes at all. There are too many tight bends in the line to just shove something through to clean it out, so I'll see if I can find the right NOS ones from Bensinger. No more progress until the parts arrive.

Cheers

30 Electric shock.jpg 31.jpg 32.jpg 33.jpg 34.jpg 35.jpg 36.jpg 37.jpg 38.jpg
 
Last edited:

Mullaney

Well-known member
Steel Soldiers Supporter
Supporting Vendor
7,716
19,766
113
Location
Charlotte NC
I suppose because I was busy Wednesday trying to get everything finished so we could test drive the Mite and possibly get it home before the predicted monsoon arrived Thursday morning, I neglected to take my usual "in progress" photographs. Some folks chuckle because I take so many pictures, but they are helpful later for recording exactly what was done, and how.
No matter, I'll take the seat back out later to paint the frame, I'll take my pictures then.

Once the seats were removed from the Mite floor, I was confronted by a plethora of holes. Whoever put those seats in had serious issues with spatial awareness and how to use any type of measuring device. It appears that he just drilled holes until he got four that allowed the seat bolts to all go through the floor at the same time. I may have uttered some unkind words about him and his ancestry.
Ideally, we would have welded these up, but remember the entire body is aluminium. Without knowing more about the aluminium itself, Jason didn't feel he could do it without possibly doing more damage than good. My own welding skills go little beyond "Ooh! Sparky fire make metal stick together!".
So, bolts, washers and sealant for the bigger holes, plain sealant for the smaller ones. The floor can always be revisited later once I find someone who can do the job properly.

Then, time to drive it !?! Nope.... :cautious:
While we thought the new rear wiring harness ran where it was supposed to, it had inadvertently been run along inside a panel it should have been outside of, so the clutch pedal linkage was hitting the harness. More naughty words. It was late by then, so we gave up for the night.

Typical Texas springtime - On Wednesday it was 87* and 90% humidity in the shop, the humidity left over from rain that morning.
Thursday morning it was 49* and hosing down rain outside.
I disconnected, moved, and reconnected the wiring harness, checked all the lights and they all still worked. The intake shutter grill was installed. I primed some bits and pieces to be painted green. Still hosing down rain outside.
So I packed up all the no-longer-needed spare parts and my wiring kit to take home. Still hosing down rain outside.
I vacuumed the vehicle out, then practiced getting in and out of the drivers seat, I actually look competent at that now! Still hosing rain outside, forecast is rain until Sunday.
I want to drive this thing!!

Finally, the torrential rain abated to just rain. We've been wet before and haven't dissolved yet, so out we go to drive the Mite around the yard. That thing is a ball - zippy, light on the steering, and comfortable for such a tiny truck. And everything worked....except, the front brakes. The back brakes will lock up, but nothing up front.
Apparently the front brake line has clogged up. Early on, we blew air through it and it seemed clear, but now pushing hard on the pedal there is no flow to the front brakes at all. There are too many tight bends in the line to just shove something through to clean it out, so I'll see if I can find the right NOS ones from Bensinger. No more progress until the parts arrive.

Cheers

View attachment 894702 View attachment 894694 View attachment 894695 View attachment 894696 View attachment 894697 View attachment 894698 View attachment 894703 View attachment 894700 View attachment 894701
.
You just can't beat that...
The whole family is involved in the repair!

.
 

m715mike

Well-known member
2,797
3,823
113
Location
Montgomery, Texas
Rory, I saw this thread when you first posted, but did not have time at that moment to read it. So, I clicked the Watch button and (not so patiently) waited until I could read the whole thread. What a treat it was this morning!

Your writing style makes for a very enjoyable read. That’s in addition to several gems that I’ll tuck away in the memory banks for future use.

I have just one request Sir. Would you please PM me your vocabulary list. I have a feeling it will be needed as I tackle a project or two this Spring.
 
Top
AdBlock Detected

We get it, advertisements are annoying!

Sure, ad-blocking software does a great job at blocking ads, but it also blocks useful features of our website like our supporting vendors. Their ads help keep Steel Soldiers going. Please consider disabling your ad blockers for the site. Thanks!

I've Disabled AdBlock
No Thanks