• Steel Soldiers now has a few new forums, read more about it at: New Munitions Forums!

  • Microsoft MSN, Live, Hotmail, Outlook email users may not be receiving emails. We are working to resolve this issue. Please add support@steelsoldiers.com to your trusted contacts.

FLU419 SEE HMMH HME Owners group

glcaines

Well-known member
3,919
2,617
113
Location
Hiawassee, Georgia
I've now moved on to the brakes. Fortunately, I have plenty of DOT 5 fluid in the reservoirs for both the clutch and brakes. I have a good solid brake pedal, which will slow the truck if I stand really hard on the pedal. The problem is lack of air pressure assist. I have zero air pressure at the gauges, both needles. The compressor is running fine. I think I traced the problem to the Fluid Regulating Valve. As the compressor cuts in, you can hear it charging air pressure. However, after about 10 - 15 seconds, a blast of high pressure air exits the bottom port on the Fluid Regulating Valve located on the frame in front of the passenger side rear wheel. This keeps repeating. No air pressure ever builds up in either tank. The part number is: WABCO 975-303-447-0 or BOSCH 0-481-039-202. Someone may have more to add to this. I attached a copy of the removal instructions in TM 5-2420-224-20-2. The diagram on the bottom of the page shows the Fluid Regulating Valve. The unlabeled port on the bottom of the valve is where the high pressure air escapes from every few seconds. High pressure air from the compressor comes into the unit, but doesn't exit out of the line to the tanks. I tried lightly tapping on the regulator with a hammer to no avail. I guess it is also possible that two separate regulators mounted on the inlets of Tank 1 and Tank 2 could have failed instead of the unloader, but I find it unlikely that two different regulators could have failed at the same time, but anything is possible.
 

Attachments

Last edited:

peakbagger

Well-known member
734
360
63
Location
northern nh
I've now moved on to the brakes. Fortunately, I have plenty of DOT 5 fluid in the reservoirs for both the clutch and brakes. I have a good solid brake pedal, which will slow the truck if I stand really hard on the pedal. The problem is lack of air pressure assist. I have zero air pressure at the gauges, both needles. The compressor is running fine. I think I traced the problem to the Fluid Regulating Valve. As the compressor cuts in, you can hear it charging air pressure. However, after about 10 - 15 seconds, a blast of high pressure air exits the bottom port on the Fluid Regulating Valve located on the frame in front of the passenger side rear wheel. This keeps repeating. No air pressure ever builds up in either tank. The part number is: WABCO 975-303-447-0 or BOSCH 0-481-039-202. Someone may have more to add to this. I attached a copy of the removal instructions in TM 5-2420-224-20-2. The diagram on the bottom of the page shows the Fluid Regulating Valve. The unlabeled port on the bottom of the valve is where the high pressure air escapes from every few seconds. High pressure air from the compressor comes into the unit, but doesn't exit out of the line to the tanks. I tried lightly tapping on the regulator with a hammer to no avail. I guess it is also possible that two separate regulators mounted on the inlets of Tank 1 and Tank 2 could have failed instead of the unloader, but I find it unlikely that two different regulators could have failed at the same time, but anything is possible.
You are in luck, these are readily available from multiple sources. EI used to have a rebuild kit or you can buy new ones on Ebay and possibly Amazon. One of the two brand valves reportedly has a internal screen on the inlet. The term for the outlet is the "spit valve" its sort of the low point on the system so it spits out water that come along for the ride from the compressor. The valve sets the pressure in the system. Unlike a standard truck air compressor, there is no unloading valve in the compressor so its always is putting out pressure, this valve open and bleeds air out of the spit valve when the compressor pressure exceeds the setpoint pressure which is adjustable. Water vapor is also carried via the cross body air line to the air tanks. Once you get pressure in the tanks, you need to pop the drains on occasion. Note there is technical service advisory that the cross body air line rots out. The military upgraded the line to stainless. I elected to use copper nickel tubing as its easier to work with. The original line rots out from the inside and the rust flakes get carried into the air tanks and those tank pressure regulating valves. If you remove the drain plugs you may find rust flakes and that from the cross body air line
 

The FLU farm

Well-known member
Steel Soldiers Supporter
3,355
1,357
113
Location
The actual midwest, NM.
However, after about 10 - 15 seconds, a blast of high pressure air exits the bottom port on the Fluid Regulating Valve located on the frame in front of the passenger side rear wheel. This keeps repeating. No air pressure ever builds up in either tank.
Sounds to me like your regulator is doing what it should, but the air never makes it over to the tanks.
 

glcaines

Well-known member
3,919
2,617
113
Location
Hiawassee, Georgia
Sounds to me like your regulator is doing what it should, but the air never makes it over to the tanks.
I agree. It is unlikely that the regulators on the input side of the tanks both failed and equally unlikely that the line is 100% plugged up. I plan on removing the line from the regulator/unloader tomorrow and see if air is coming out. If not, the regulator is faulty. I found out that the unit on my SEE is a Bosch model. I can't find a rebuild kit in the U.S. but I found one in Germany. I think I'll try to rebuild mine since the cost for a whole new unit is $324.00 Euros, plus shipping from Germany.
 

peakbagger

Well-known member
734
360
63
Location
northern nh
The tubing fittings in the area between the tanks are very "tender" and its important to use tubing wrenches and make sure you put a wrench on the fittings to keep any torque off the fittings. I would suggest that you avoid breaking these connections if at all possible as some are custom and not readily available. The air drain set back a bit between the tanks is the logical fitting to break to see if there is air as its pretty beefy. The CARC coating needs to be chipped off the flats to get wrenches to fit.

FYI unless you are doing a concours rebuild, there are plenty of Wabco Unloader valves on Ebay for under $100.
 

glcaines

Well-known member
3,919
2,617
113
Location
Hiawassee, Georgia
The tubing fittings in the area between the tanks are very "tender" and its important to use tubing wrenches and make sure you put a wrench on the fittings to keep any torque off the fittings. I would suggest that you avoid breaking these connections if at all possible as some are custom and not readily available. The air drain set back a bit between the tanks is the logical fitting to break to see if there is air as its pretty beefy. The CARC coating needs to be chipped off the flats to get wrenches to fit.

FYI unless you are doing a concours rebuild, there are plenty of Wabco Unloader valves on Ebay for under $100.
No concours rebuild here! I disconnected the feed line that goes to the two tanks. It came loose with minimal effort. Zero air comes out of the tube, which means that it is the unloader valve at fault. The tubing on my SEE between the unloader valve and what goes to the two tanks appears to be 100% stainless steel, which means no internal corrosion. I have no idea about the tubing on the rest of the SEE, I haven't checked. Time to find a new unloader. I've been looking for a kit to rebuild the model of my Bosch unloader, but so far I've only found one place and that is in Turkey. I'll likely replace the unloader with a new Wabco.
 

The FLU farm

Well-known member
Steel Soldiers Supporter
3,355
1,357
113
Location
The actual midwest, NM.
Wish I remembered how (if) I fixed that same issue on one of my SEEs.

I know that I removed the left side of the tubing, but not what the result was. Of course, if it was on my latest attempt at getting a parts SEE (which is likely), it was a rushed attempt at getting a few things working, together with the new owner, before it got shipped.

Guess I should call him and find out what he did.
 

glcaines

Well-known member
3,919
2,617
113
Location
Hiawassee, Georgia
New problem now. I was extending the right and left stabilizers when I ran into a problem. I extended the right stabilizer until it rested on the ground. I then extended the left stabilizer. Unfortunately, the left stabilizer kept extending even after I removed tension on the control. The control for the left stabilizer is now frozen solid in the extend position with the stabilizer fully extended. I can't move the control at all. The right side still works fine. The left side used to work fine until now with the control stick moving very smoothly and easily.
 

glcaines

Well-known member
3,919
2,617
113
Location
Hiawassee, Georgia
Uh, oh. That reminds me.
I have a (left, I think) outrigger that operates normally when extending, but requires pulling HARD on the lever to get to go back up.

I need to remove the cover and see what (not) going on in there. Before I break something.
I went ahead and removed the seat and the three bolts that hold the cover on. I still need to remove the circlip and pin holding the hydraulic cylinder in place along with the grease fitting and all of the control knobs. However, I looked up under the base plate that is directly located over the control valve assembly. There isn't much room, but you can see the plungers. Several of mine are severely rusted. I'll let you know what I find. I did note that the control for the right side stabilizer pulls directly up and pushes directly down on the plunger. However, the left side stabilizer control doesn't directly pull up and push down on its plunger. There is a cross bar going from the left side to the right side that rotates and moves the left side plunger up and down. Both plungers are adjacent to each other on the right side of the control unit. There are grease fittings for each control and in my case it is obvious that someone recently greased the zerks. I'm going to try cleaning up the rust on the plungers with crocus cloth and oil and then grease them to protect them. You may very well have the same issue that I do. I'll take some photos once I get it apart.
 

peakbagger

Well-known member
734
360
63
Location
northern nh
No concours rebuild here! I disconnected the feed line that goes to the two tanks. It came loose with minimal effort. Zero air comes out of the tube, which means that it is the unloader valve at fault. The tubing on my SEE between the unloader valve and what goes to the two tanks appears to be 100% stainless steel, which means no internal corrosion. I have no idea about the tubing on the rest of the SEE, I haven't checked. Time to find a new unloader. I've been looking for a kit to rebuild the model of my Bosch unloader, but so far I've only found one place and that is in Turkey. I'll likely replace the unloader with a new Wabco.
One thing that popped up in my mind yesterday is that the SEE has a specialized air coupling to hook up an air hose on the unloader. Some unloaders have this fitting and some do not. It does not impact operation of the unloader. There is the same fitting on the other side of the truck. The matching air hoses can be bought on line. If you dont own the hose and the new unloader does not come with one, it would make sense to just install a standard air fitting on the drivers side and just use a longer standard hose.
 

glcaines

Well-known member
3,919
2,617
113
Location
Hiawassee, Georgia
My Bosch unloader came with the fitting for an air hose. However, the air hose that came with my SEE has a gladhand attachment on the end. I also have two other NOS military air hoses with gladhand attachments and I keep one in my M35A3.
 

The FLU farm

Well-known member
Steel Soldiers Supporter
3,355
1,357
113
Location
The actual midwest, NM.
Not knowing where that air outlet is in the circuit of the regulator, you could still use it to help trouble shooting, I'd think.
I've filled the system through a gladhand to search for leaks, without engine noise, and needless cold starts.
 

Speedwoble

Well-known member
606
302
63
Location
New Holland, PA
One thing that popped up in my mind yesterday is that the SEE has a specialized air coupling to hook up an air hose on the unloader. Some unloaders have this fitting and some do not. It does not impact operation of the unloader. There is the same fitting on the other side of the truck. The matching air hoses can be bought on line. If you dont own the hose and the new unloader does not come with one, it would make sense to just install a standard air fitting on the drivers side and just use a longer standard hose.
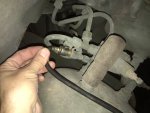
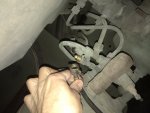
I was taking things out of the toolbox and saw my air hose. I thought it might be useful for others that don’t have one. Photo is of the fitting on the Left side.
72440C83-28D1-4736-8444-85D5BC81EE96.jpeg
F6C1B03C-1A07-464C-840F-ECBD73B62935.jpeg
 

peakbagger

Well-known member
734
360
63
Location
northern nh
Given the diameter of the hose, its not high volume but handy for topping up the tires especially the spare which I suspect does not get much attention unless its needed.
 

glcaines

Well-known member
3,919
2,617
113
Location
Hiawassee, Georgia
I use the gladhand line on my M35A3 all the time to fill my tires on both the truck and other equipment. The M35A3 has a Haldex air dryer that works quite well. I use the air on the M35A3 to run my larger impact wrenches when I'm away from my compressors. The compressor on the CAT 3116 engine puts out a large volume of air. One question I have is how do you turn on the air to the gladhands on the SEE? I didn't see any obvious valves, but then I haven't been looking either. Probably in plain sight.
 
Top
AdBlock Detected

We get it, advertisements are annoying!

Sure, ad-blocking software does a great job at blocking ads, but it also blocks useful features of our website like our supporting vendors. Their ads help keep Steel Soldiers going. Please consider disabling your ad blockers for the site. Thanks!

I've Disabled AdBlock
No Thanks