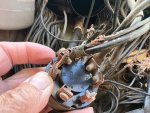
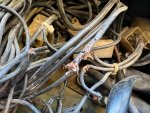
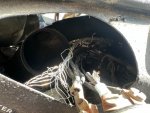
Look back in this thread there are a whole lot of posts talking about how to figure it out and suggesting some words that may help describe the project in front of you.

Hey at least you have access to a wiring diagram those guys were just using the tm. Good luck and let us know what words you come up with to describe the project.
Yup, I think I was the one long ago that flagged this issue. Texas and the Red River arrmy depot seems to be a common location for this damage.
I think I had more chewed wires than you. I did my repairs without the benefit of the wiring diagram which thankfully one of the Steel Soldiers members rescued from a government surplus auction and sold extra copes to other members. One of them also scanned it in high resolution. Get a copy from the Misc Tech Manuals section and go to Staples and have the print a couple of copies out and hang one on the wall. Buy yourself a goog magnifying glass as the wiring numbers on the diagram and the wiring is tiny. Note the student handbook has a lower resolution version cut in half, I would suggest skipping that and getting the high-resolution version that has been linked multiple times in this thread. Us lucky folks got the official US army laminated versions but far cheaper to just get some spare paper versions printed out.
I would not randomly take a chance on reconnecting wires. One of the members long ago decided to rip out the wiring and start from scratch, we never heard from him again and expect it was a big failure. I would suggest removing the loader as otherwise its a major PITA to get at the wires and the back of the dash (I did not and regretted it as there is no good way to stand ) I figured out the wire number on all the terminals on each dash component and also every one of the connectors where the harness plugs into the main distribution block. Using the electrical troubleshooting section I could usually come up with the wire routing adn numbering. You can now skip this now that the electrical diagram is available. I would suggest removing the speedo and the tach in order to get better access from inside the cab. I also used wire numbering tape to mark any wire I identified (Electricians use it). Once I know one end of the wire at the distribution block or the dash I hook my multimeter to one end and use the continuity test beeper to find the chewed end . I then mark it and then chase the other end. Once I got both chewed ends, I slip on heat shrink tubing, then twist and solder the joint, then slide the heat shrink over and heat it up until it seals the connection.
As far as I know, I got all the connections right and my SEE is still being used several years after the fix. A BTW is getting the ductwork back in place is a PITA and in my case I crushed the cheap cardboard/foil tubing used to convey heat to the windshield defrosters and managed to disconnect the Ether connection to the main air duct. I only use mine in above freezing conditions, so I did not replace the tubing or the Ether connection. Aircraft Spruce is good source for the heater tubing (its used in light airplanes). The ether connection is just a matter of getting to the location where it connects. It has been awhile but I think its in spot that is very hard to get to without the cab up. I was anxious to get it over with and probably just said the heck with it.
It took me months to do my fix but the research required without a diagram took the vast majority of the time, with a wiring diagram, Simple Green and rags to clean off the wires at each end to find the numbers and the loader removed I expect it would have been a long weekend.


