• Steel Soldiers now has a few new forums, read more about it at: New Munitions Forums!

  • Microsoft MSN, Live, Hotmail, Outlook email users may not be receiving emails. We are working to resolve this issue. Please add support@steelsoldiers.com to your trusted contacts.

FLU419 SEE HMMH HME Owners group

General Hood

Member
712
2
18
Location
Fort Towson, OK
That darn paint they applied is tenacious in spots. They applied so much it gunked up the breather vent on my fuel tank and was a factor in breaking fittings on my air system.
Given how lumpy the top coat is I would envision that the body would need to be stripped to get a good paint finish if someone wanted a "pretty" SEE. I just don't want it to rot out so its a non issue for me.
However, the paint flakes off in maple leaf size pieces where a man wants the paint to stay. :roll: Now that SEE #2 has a fresh coat of primer & paint on it, I'm hoping to not have to take a wire wheel to it anytime soon
 

General Hood

Member
712
2
18
Location
Fort Towson, OK
Feel free to do it anyway you want. I have described the successful method I used and that's what I did. Perhaps the description of fuse block is confusing, the fuse block is actually part of much larger assembly that has numerous electrical connectors plugged into its backside, they are almost impossible to access without unbolting the fuse panel from the cowl and carefully pulling the fuse panel and harness out towards the wheel well. I rarely if ever actually touched the fuse panel, everyone of the wires going into those plugs on the back are numbered. That's what I mean by tracing the wires one by one. If I find a number 23 on a dash board component and is gnawed off I then go searching for #23 generally either on one of these plugs or on occasion the four relays on the wheelwell. Then I hook my multimeter on #23 at the plug and figure out what gnawed wire makes the multimeter beep. I make sure to check that there are zero ohms and then I splice in new wire between the two points. I admit its not fast and easy and if I had to charge someone it would be up in the 50 to 100 hour range. Now that I have notes, that I posted previously I could probably cut my hours substantially especially if I remove the loader as working on the harness with it in the way is a bear.

I looked into installing a different fuse panel, I sure wouldn't want to do it unless I had a spare harness as it is integral to the main block where all the connectors are attached. I would guess that there is some interesting wiring or bus bars between the back of the fuse panel and the row of seven plugs. Not only does the power feed come through these blocks the main wiring between the cab also runs through it.

My feeling is if someone goes the way of custom building a harness from scratch unless they are very persistent I expect they will end up with parts SEE but feel free to prove me wrong

Looks like there may be a secondary market to get a good deal on a SEE bought on impulse with rat damage. ;)
LOL, you made me think of a TV show I used to watch when I was younger called "The Rat Patrol"
 

The FLU farm

Well-known member
Steel Soldiers Supporter
3,338
1,319
113
Location
The actual midwest, NM.
I looked into installing a different fuse panel, I sure wouldn't want to do it unless I had a spare harness as it is integral to the main block where all the connectors are attached. I would guess that there is some interesting wiring or bus bars between the back of the fuse panel and the row of seven plugs. Not only does the power feed come through these blocks the main wiring between the cab also runs through it.
I have also thought about replacing the stock fuse setup with something more likely to stay functional, but you just changed my plan.
Instead of actually removing the fuse panels, how about soldering wires to the tabs that hold the fuses and run them to the back of a more modern version?
Basically, installing "extension cords" between old and new. It just might work, I think.
 

73m819

Rock = older than dirt , GA. MAFIA , Dirty
Steel Soldiers Supporter
In Memorial
12,195
320
0
Location
gainesville, ga.
I am going to get two 12 fuse blocks. The F---en rat even ate a part of the defroster, of course where the hose goes where it comes from the heater, so the deforster is now useless, that part may go. Ate ALL the wires to the wiper motor, the start button, the window heaters, the h/l shift indicators (I think) wires that go a long way down in the left fender, I have know idea where they go, ate the cold start either hose, ate a bunch of wires right at the connectors and a bunch more that I have not figured out yet where they go. It is a wonder this thing did not create a bunch of smoke when power was put to it
 

The FLU farm

Well-known member
Steel Soldiers Supporter
3,338
1,319
113
Location
The actual midwest, NM.
My day was (eventually) better than Ron's, so my lack-of-progress report actually includes some progress.
Following my own advice and using a small wire brush on the cordless drill to de-paint the last bolt, and resorting to leg power on the 2-foot 3/4-inch drive ratchet, the second axle locating link finally came off.
Had manual labor not worked, the alternative was to cold start the M1009 (which lost a freeze plug two days ago) to get it out of the way, to then cold start the M1008 to jump the parts SEE (yes, another cold start) to use the hydraulic impact. Which would've then put 10W oil in my new hydraulic impact, with AW 32 in it. I hate cold starts.
But the best part was that last night I remembered that I have a cheap HF "tubing bender" (which I tried once, many years ago, and was very disappointed with).
Well, not only did I find it, and the dies, but it was perfect for straightening out the forklift bends with. I tried with a regular press yesterday, and ended up deforming the tubing.
For those of you with forklift damage underneath, I strongly recommend using a tubing bender of some sort. My good one is still not unpacked, and I think this cheapy actually works better for this.DSCN1238[1].jpg

Edit: The link in the foreground was the least damaged, the one that looks somewhat straight now was pretty bad.
 
46
1
0
Location
Tulsa
IIRC, the hammer drill, and chainsaw (and probably others) are supposed be "set" for one or the other. After a short search, I realized I have no idea what these people are talking about. I can say that my impact has forward and reverse, and no other noticeable switches. It works for me. Though it did want about 2.2K RMP to bust the lugs loose. It's all over my head, but hey, I still love the thing!
 

The FLU farm

Well-known member
Steel Soldiers Supporter
3,338
1,319
113
Location
The actual midwest, NM.
Well, given the option, I'd probably go for open center.
It just seems kinder to the hydraulic system not to have it deadhead. Then again, maybe it's not. It could build even more heat.
Now I need to look at the other tools (like yours, my impact is FWD or REV only) and see if there are any other switches or buttons to play with.
And you reminded me to look at lowering the "high idle", in a roundabout way.
 

General Hood

Member
712
2
18
Location
Fort Towson, OK
Update: I made progress on the wiring harness troubleshooting today, got most of the instrument panel gauges and indicators working, still no warning lights however. Still glad to have a couple more things working than I had yesterday. My goal was to get the starter switch to work so I wouldn't have to put the screwdriver to the solenoid to crank the motor. Like Peakbagger mentioned earlier, this is definitely not half day job. And be prepared to knock some skin off your knuckles in the process
 

Another Ahab

Well-known member
17,990
4,535
113
Location
Alexandria, VA
Armor for the Road Warrior

My goal was to get the starter switch to work so I wouldn't have to put the screwdriver to the solenoid to crank the motor. Like Peakbagger mentioned earlier, this is definitely not half day job. And be prepared to knock some skin off your knuckles in the process

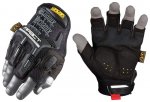
glove.jpg
 

General Hood

Member
712
2
18
Location
Fort Towson, OK
BTW, I had some thick wall heat shrink, and used it on connections I spliced in today. The splices will be hidden once I have complete my work, but I felt the need to give that added protection, and the heat shrink gives a splice that finished look as well
 

peakbagger

Well-known member
734
360
63
Location
northern nh
Great news on the progress, One circuit that I didn't need to delve into is the warning buzzer system. I think it will go off with loss of air pressure oil pressure and possibly engine high temp but it was intentionally disconnected on mine. The wiring appears complete, but the buzzer is disconnected. I guess we should be happy that we didn't end up with one like the one that 73M819 is working on which sound to have far more extensive damage.

I also used heat shrink tubing over the splices, one thing I found out after I was halfway through is that its available in white. I switched to white so that I could locate them in the future.

Have you checked the clutch safety switch wiring on the starter circuit? I have seen several references where its misadjusted so pushing the clutch down doesn't engage the switch and its also in the potential "rat zone" so it could just be gnawed off.
 

The FLU farm

Well-known member
Steel Soldiers Supporter
3,338
1,319
113
Location
The actual midwest, NM.
One circuit that I didn't need to delve into is the warning buzzer system. I think it will go off with loss of air pressure oil pressure and possibly engine high temp but it was intentionally disconnected on mine.

Have you checked the clutch safety switch wiring on the starter circuit? I have seen several references where its misadjusted so pushing the clutch down doesn't engage the switch and its also in the potential "rat zone" so it could just be gnawed off.
For those who haven't had the pleasure to hear the warning buzzer, it's LOUD. I ended up disconnecting mine as I didn't always remember to bring ear protection. As far as I know, it only shrieks until the air pressure is up to legal standards, but that's plenty long enough.
If it does alert for low oil pressure, too, I'd consider plugging the buzzer back in and putting a switch in the circuit. I definitely wouldn't mind knowing if the engine lost oil pressure while running the backhoe.

And speaking of safety items, can anybody think of a good reason to leave the potentially troublesome clutch safety switch operational?
 
Top