• Steel Soldiers now has a few new forums, read more about it at: New Munitions Forums!

  • Microsoft MSN, Live, Hotmail, Outlook email users may not be receiving emails. We are working to resolve this issue. Please add support@steelsoldiers.com to your trusted contacts.

Fuel Leak In the Valley

HoveringHMMWV

Well-known member
Steel Soldiers Supporter
475
1,092
93
Location
AL
Y'all are cracking me up. Seriously though, I did choose the thread title for it's possible comedic interpretation.

Not up for interpretation are the lessons learned so far during this project. And I still haven't pulled the pump, although it's the next step to be completed.
My top 10 list.....
1. Gloves are a must. I have changed oil, tires, even a starter. But this is a whole new level.
2. I will know my HMMWV after this is completed.
3. Using 2 wrenches on the drive pulley was easier for me to rotate the engine. It also reduced some anxiety about shearing off a bolt.
4. The serpentine belt on an A2 must be removed before the oil filler tube can be removed.
5. Using a breaker bar to release tension on the belt while removing the belt off the pulley should really be a two person operation. I'll be sore in the morning.
6. Removing the serpentine belt from the idler pulley before disconnecting the fan clutch hose allowed the fan to spin freely. This in turn allowed a better vantage for the quick disconnect.
7. I found it much easier to reach the quick disconnect from below the vehicle.
8. A wooden platform above the radiator is a must.
9. I'm doing this because it's a hobby and I don't play golf.
10. Don't look surprised when your wife asks "do you really know what you're doing?"
- Hovering HMMWV
 
Last edited:

HoveringHMMWV

Well-known member
Steel Soldiers Supporter
475
1,092
93
Location
AL
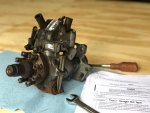
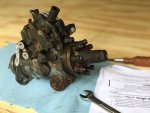
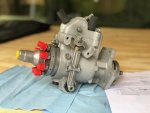
Finally able to extract the IP! Thanks to Andyrv6av8r and a few YouTube videos for the toilet paper tube technique! Very stressful though when hearing a "clink" and realizing the first gear bolt/washer were NOT in the tube! Highly relieved to find them on the garage floor after a frantic search!!! There was a very steep learning curve on this procedure and the last two bolts/washers were extracted uneventfully. A hearty thank you to my daughter who's assistance was invaluable.
Also, additions to my top 10 lessons learned......
11. Place container under IP inlet fuel line before turning engine to position pump gear bolts.
12. Don't look surprised when your wife asks AGAIN..... "do you really know what you're doing?"
- HoveringHMMWV

IMG_5301.JPG

IMG_5300.JPG
 
Last edited:

Milcommoguy

Well-known member
Supporting Vendor
1,708
2,261
113
Location
Rosamond, CA
Like pulling a old busted tooth, well sort of without the novocaine. Going to hurt at first till ya get the bugger out. New one going back in ya be ready to chew up some corn or the road.

Mr. HumV is going to feel a lot better when done.

That one was decayed to the bone OUCH, CAMO
 

HoveringHMMWV

Well-known member
Steel Soldiers Supporter
475
1,092
93
Location
AL
IP is enroute for rebuild. I used a few hours today to prep the intake manifold and IP pump mating surfaces by removing the old gasket material. A few more lessons learned.....
13. HMMWV manifold gasket residue is incredibly stubborn to remove.
14. Use a good gasket scraper (different widths are a plus) rather than relying only on a razor blade.
15. Frequent sharpening of the gasket scraper is mandatory.
16. Glad that I built that wooden work platform.
-HoveringHMMWV
 
Last edited:

TOBASH

Father, Surgeon, Cantankerous Grouch
Steel Soldiers Supporter
Supporting Vendor
3,569
3,475
113
Location
Brooklyn, NY
IP is enroute for rebuild. I used a few hours today to prep the intake manifold and IP pump mating surfaces by removing the old gasket material. A few more lessons learned.....
13. HMMWV manifold gasket residue is incredibly stubborn to remove.
14. Use a good gasket scraper (different widths are a plus) rather than relying only on a razor blade.
15. Frequent sharpening of the gasket scraper is mandatory.
16. Glad that I built that wood work platform.
-HoveringHMMWV

I don't know about the others but I have always found that various widths of wood chisels work best for removing gasket materials.
 

HoveringHMMWV

Well-known member
Steel Soldiers Supporter
475
1,092
93
Location
AL
I don't know about the others but I have always found that various widths of wood chisels work best for removing gasket materials.
Agreed. Used a previously purchased 3-piece set (1/2", 3/4", and 1"). Found the larger 1" was the most useful and less likely to gouge. The smaller were necessary for a few tight spaces.
- HoveringHMMWV
 

HMMWV Sweden

New member
9
11
3
Location
Sjöbo Sweden
Hi guys,i had the same fuelleak problem with with my HMMWV and just like HoveringHMMWV it turned out that the fuelleak was coming from the IP,turns out there is a weephole beneath the pump that releases fuel right down the valley when the seal begins to go bad,pretty neat instead of flooding the crankcase with dieselfuel(y).Had mine sent out to be refurbished a couple of months ago and runs great.(also a Stanadyne pump).Apparantly the "modern"diesel is dry and does not lubricate seals etc. so my dieselmecanic recommended me to mix in a dieselfueladditive in the fuel to keep the seals in the pump from drying up and in good condition .I´m one of the very few lucky over here in Sweden that owns one of these great vehicles and loving every minute of driving it too.
Hope you get your HMMWV running soon Hovering:)(y).
 

HoveringHMMWV

Well-known member
Steel Soldiers Supporter
475
1,092
93
Location
AL
Hope you get your HMMWV running soon Hovering:)(y).
Thank you very much! Was told this afternoon that the IP will ship back out tomorrow. Hopefully will have the M1097A2 up and running by the weekend. Have been missing my evening drives around the countryside (while wearing ear plugs).
 

HoveringHMMWV

Well-known member
Steel Soldiers Supporter
475
1,092
93
Location
AL
Spending some quality time on Saturday with my eldest daughter (assistant diesel mechanic).
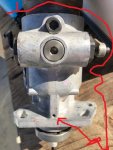
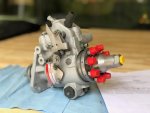
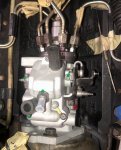
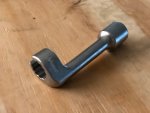
The IP was returned looking good as new. The installation on the gear drive (thru the oil filler tube hole) went as smoothly as could be asked for. The installation of the fuel lines, especially the lower ones, was fairly challenging. I purchased a special injector line socket which proved most valuable. Previous commitments may delay finishing up today. However, the installation has progressed much smoother than anticipated.
-HoveringHMMWV

IMG_5459.jpg

IMG_5460.jpg

IMG_5461.jpg

IMG_5466.JPG
 
Last edited:

HoveringHMMWV

Well-known member
Steel Soldiers Supporter
475
1,092
93
Location
AL
Finished up the installation mid morning. Waited 6 hours as per thread sealant tech data. Was partially successful on the first start after about 10 sec of cranking but wouldn't continue to idle. After a 30 sec wait, the second start attempt was fully successful and the M1097A2 continued to idle nicely. The exhaust spat, what I'm assuming is unburnt fuel, on the garage floor. Will watch for that on the next start. Installing the hood and securing the brush guard tomorrow morning. Ready for duty once again.
Thank you to those that contributed their knowledge and insight!
- HoveringHMMWV
 

HoveringHMMWV

Well-known member
Steel Soldiers Supporter
475
1,092
93
Location
AL
IP Swap After Action take-aways:
1. Make time for the procedures. I needed several days for both the removal and installation.
2. Wooden work platform. Must have.
3. Injector fuel line socket. Much better than a crows foot wrench especially during installation.
4. Take pics BEFORE disassembly and from different angles. Referenced many times during installation.
5. Bag and tag. Everything.
6. Use blue painters tape rather than masking tape. That stuff doesn't come off easily.
7. Note wrench and socket sizes during removal. Makes installation prep easier.
8. Glue rare earth magnets inside the socket for IP pump screw retention.
9. An assistant passing tools, and bagging n tagging, helps tremendously.
10. Lots of lighting.

YMMV

- HoveringHMMWV
 
Top
AdBlock Detected

We get it, advertisements are annoying!

Sure, ad-blocking software does a great job at blocking ads, but it also blocks useful features of our website like our supporting vendors. Their ads help keep Steel Soldiers going. Please consider disabling your ad blockers for the site. Thanks!

I've Disabled AdBlock
No Thanks