- 193
- 50
- 28
- Location
- Tidewater, VA
Ok, Im not saying that this is all inclusive or anything (thats what the "reply" function is for) but my fuel pump quit working and I was able to get it fixed through the advice of some folks outside of the forum, so I figured that I would post about it so that when somebody did a "Search" it would come up and be helpful right off the bat. 
Ok, so this is my first Deuce so Im still learning the ins and outs of how everything works. That said, was hanging out with another member asking him questions when I noticed that when he turned his "electrical" (?) switch on, I could hear his in tank electric fuel pump running and I realized that I had never heard mine running like that, and come to think of it, it was a little harder to start than his so I decided to check it out when I got home (I didnt have my truck there b/c my radiator was in the shop).
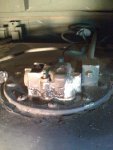
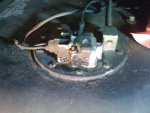
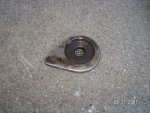
So, sure enough, I get home and try it out and nothing. Hmm. Well, what to do now I was told that there was a fuse under the square cover on top of the fuel pump on the tank (pic #1) and at the suggestion of a couple of folks, I figured Id try that first. KISS right? Yeah, not quite.
Come to find out, this was not going to be as easy as I had anticipated (being an aircraft mechanic, I should have known ) because the very first bolt (there's 3) that I tried to loosen stripped out and wouldnt allow me to remove the cover. I broke 3 flathead screwdrivers (the most commonly abused tool in the Navy btw, at least thats what they teach us) trying to get leverage on it but no joy.
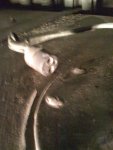
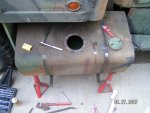
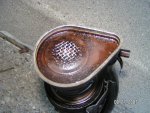
So, now Im forced to troubleshoot by other means. Well, the electrician in me told me to check the ground and voltage to the plug going into this fuse box (pic #2). If that was good, then it HAD to be the fuse, corrosion in the fuse block or a bad connection, or the pump itself. I made sure that the switch in the cab was off, then I got out my meter, set it to resistance, found a spot on the frame that was unpainted (that took a suprisingly long time ) and held one meter lead on that and probed both pins on the plug to see what I got. I got perfect continuity ( 0 ohms) in one pin (good ground) and 180.7 ohms on the other(reading through the switch). Next was to read for voltage. 2, 12v batteries=24vdc (doesnt take a genius) so thats what I looked for . I turned on the switch, went back to the plug and set my meter to VDC and on the pin that I got 180 ohms, I read 24vdc. Perfect! That means that I have good power and ground TO the pump so now to get that cover off.
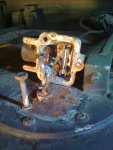
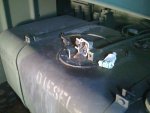
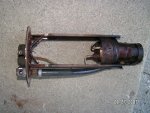
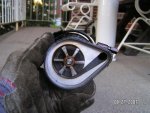
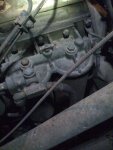
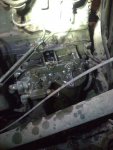
After much prying and some chiseling (man thats thick paint!) I got the cover off (pic #3). Lo and behold, the fuse was blown. Great news because fuel pumps arent cheap. I replaced the fuse, re-installed the plug and flipped the switch to test out my repair and sure enough, that was it. I did notice that the one wire running from the fuse block into the pump had chaffed on something and had some exposed wire so my guess is thats what caused the fuse to blow in the first place. I repaired that with some silicone and chafe tape and after everything dried, I re-installed the fuse block. I noticed a lot of corrosion on the inside of the fuse block so I treated the corrosion and added some clear RTV silicone sealant in between the block and the fuel tank in the hopes to seal out any further moisture (pic #4) before I completely installed the block again (pic#5) and re-tested the pump after everything dried "just to make sure".
Viola, a simple fix to a simple problem. I never even noticed that it didnt work because of the other 2 pumps, the only "problem" I had was it took a little longer to start than I figured it should (4-5 seconds). Unfortunately, I havent been able to see if this fix has made any difference in my starting time since my Rad is still in the shop, but thats it in a nutshell!
Ok, so this is my first Deuce so Im still learning the ins and outs of how everything works. That said, was hanging out with another member asking him questions when I noticed that when he turned his "electrical" (?) switch on, I could hear his in tank electric fuel pump running and I realized that I had never heard mine running like that, and come to think of it, it was a little harder to start than his so I decided to check it out when I got home (I didnt have my truck there b/c my radiator was in the shop).
So, sure enough, I get home and try it out and nothing. Hmm. Well, what to do now
Come to find out, this was not going to be as easy as I had anticipated (being an aircraft mechanic, I should have known
So, now Im forced to troubleshoot by other means. Well, the electrician in me told me to check the ground and voltage to the plug going into this fuse box (pic #2). If that was good, then it HAD to be the fuse, corrosion in the fuse block or a bad connection, or the pump itself. I made sure that the switch in the cab was off, then I got out my meter, set it to resistance, found a spot on the frame that was unpainted (that took a suprisingly long time
After much prying and some chiseling (man thats thick paint!) I got the cover off (pic #3). Lo and behold, the fuse was blown. Great news because fuel pumps arent cheap. I replaced the fuse, re-installed the plug and flipped the switch to test out my repair and sure enough, that was it. I did notice that the one wire running from the fuse block into the pump had chaffed on something and had some exposed wire so my guess is thats what caused the fuse to blow in the first place. I repaired that with some silicone and chafe tape and after everything dried, I re-installed the fuse block. I noticed a lot of corrosion on the inside of the fuse block so I treated the corrosion and added some clear RTV silicone sealant in between the block and the fuel tank in the hopes to seal out any further moisture (pic #4) before I completely installed the block again (pic#5) and re-tested the pump after everything dried "just to make sure".
Viola, a simple fix to a simple problem. I never even noticed that it didnt work because of the other 2 pumps, the only "problem" I had was it took a little longer to start than I figured it should (4-5 seconds). Unfortunately, I havent been able to see if this fix has made any difference in my starting time since my Rad is still in the shop, but thats it in a nutshell!
Attachments
-
70.9 KB Views: 99
-
69.2 KB Views: 110
-
77.1 KB Views: 118
-
63.1 KB Views: 112
-
72.2 KB Views: 110
Last edited:


