• Steel Soldiers now has a few new forums, read more about it at: New Munitions Forums!

  • Microsoft MSN, Live, Hotmail, Outlook email users may not be receiving emails. We are working to resolve this issue. Please add support@steelsoldiers.com to your trusted contacts.

G506 Class 525 (G7133) restore

jeffhuey1n

SMSgt, USAF (Ret.)
Steel Soldiers Supporter
1,887
1,477
113
Location
Laramie County, Wyoming
I just checked my truck, and found that I do have two sleeves as indicated. I only remembered one...
Could you fabricate one with a short length of pipe and a 1/2" or 5/8" thick steel "donut"??
I’m going to have to scrounge into my unbelievable pile of miscellaneous stuff. That’s a good idea. It’s better than the ideas I came up with: machine one out of a billet of steel or forge(?) one. Problems with my ideas: I don’t have a milling machine to make one, nor do I have the materials necessary to forge one. I like your idea much better.
One other idea came to mind, on 2 1/2 ton truck pintle, there’s a couple pieces that would be used to bolt the pintle hook to the frame. I don’t want to start drilling extra holes into the frame but if I install them on the shaft, they can help hold everything in place.
 

jeffhuey1n

SMSgt, USAF (Ret.)
Steel Soldiers Supporter
1,887
1,477
113
Location
Laramie County, Wyoming
I just checked my truck, and found that I do have two sleeves as indicated. I only remembered one...
Could you fabricate one with a short length of pipe and a 1/2" or 5/8" thick steel "donut"??
I dug around in my scrap pile and found some old pipe fittings that might do the trick. After much cutting, filing and hammering, I think this might work. Just need to do a bit of welding. Pics:
 

Attachments

jeffhuey1n

SMSgt, USAF (Ret.)
Steel Soldiers Supporter
1,887
1,477
113
Location
Laramie County, Wyoming
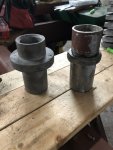
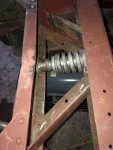
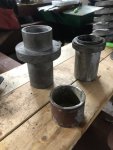
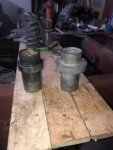
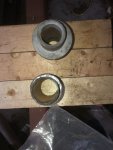
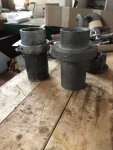
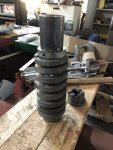
Welding is not necessary. I came up with a different plan. It’s a bit long winded and complicated so I’ll just give the short version. I needed a pipe or tube that fit over the pintle hook shaft. In addition, it has to fit inside the pintle spring and have a feature that holds the spring in compression, at least I think that’s what it does. Anyway, I have an abundance of steel pipe that used to be the plumbing for the fire truck. I cut off a section that was the same length as the flange. After cleaning it up, I needed to find something that would create a ring, like the original, thereby holding the spring in place. I just happened to have a busted gear that came off my fifth wheel trailer. Even though there was a shaft that ran up the middle of it, it was the correct size. Time to adapt, improvise and overcome. Ground and cut the center out of the gear. Then cut the gear “nubs(?)”, not sure what you’d call them… next was cutting it in half. Did that, set up a grinding tool in the bench drill press. Ground out the center till the pipe could be tapped into place. Put the two parts together very carefully. I’ve no idea what type metal the gear was made from but it made some real cool sparks cutting into it! I’ve got to figure out a method for locking the ring into place on the pipe. Maybe a couple set screws? When the original and my homemade flanges are ready, I’ll set them up and see what happens. The pics are of the original flange, next to my concoction.
 

Attachments

Mullaney

Well-known member
Steel Soldiers Supporter
Supporting Vendor
7,710
19,750
113
Location
Charlotte NC
Welding is not necessary. I came up with a different plan. It’s a bit long winded and complicated so I’ll just give the short version. I needed a pipe or tube that fit over the pintle hook shaft. In addition, it has to fit inside the pintle spring and have a feature that holds the spring in compression, at least I think that’s what it does. Anyway, I have an abundance of steel pipe that used to be the plumbing for the fire truck. I cut off a section that was the same length as the flange. After cleaning it up, I needed to find something that would create a ring, like the original, thereby holding the spring in place. I just happened to have a busted gear that came off my fifth wheel trailer. Even though there was a shaft that ran up the middle of it, it was the correct size. Time to adapt, improvise and overcome. Ground and cut the center out of the gear. Then cut the gear “nubs(?)”, not sure what you’d call them… next was cutting it in half. Did that, set up a grinding tool in the bench drill press. Ground out the center till the pipe could be tapped into place. Put the two parts together very carefully. I’ve no idea what type metal the gear was made from but it made some real cool sparks cutting into it! I’ve got to figure out a method for locking the ring into place on the pipe. Maybe a couple set screws? When the original and my homemade flanges are ready, I’ll set them up and see what happens. The pics are of the original flange, next to my concoction.
.
It sure looks like a heck of a plan to me!
 

jeffhuey1n

SMSgt, USAF (Ret.)
Steel Soldiers Supporter
1,887
1,477
113
Location
Laramie County, Wyoming
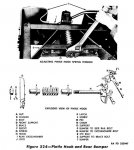
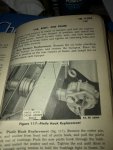
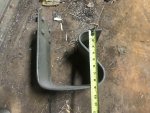
Once piece has been eluding me: the pintle hook front support. Item D in the picture. Time to get inventive. I scrounged up a chunk of metal (probably steel) and figured it could be made into the front support. Got called away before I could get pictures. Question, does anyone have a picture of a G 506 pintle hook front support? TM’s are great for getting a rough idea but I need to get more detail to make it right.
 

Attachments

WW2Chevy

Active member
113
57
28
Location
Bloomington, IL
Did you notice that your flanges are bent the reverse direction of the original? Yuou've got a very sharp bend at each end, where the original is greater then a 90.
 

jeffhuey1n

SMSgt, USAF (Ret.)
Steel Soldiers Supporter
1,887
1,477
113
Location
Laramie County, Wyoming
I’ve been using the pic to help guide my hammer. This picture more clearly shows what I need to do. The TM pictures I’ve previously seen aren’t very clear. I’m not sure where those pictures came from. Figure 117 of TM 9-805, dated 30 December 1943 is fairly clear. It shows the same setup as seen in the first picture.
 

Attachments

Last edited:

jeffhuey1n

SMSgt, USAF (Ret.)
Steel Soldiers Supporter
1,887
1,477
113
Location
Laramie County, Wyoming
Got a couple questions: how far back do the G506 bumperettes stick out? Also, how thick is the metal of the G506 bumperettes? I have a pair of M211 bumperettes that fit on a G506. Just need to do a little adjusting to get all 6 bolts installed. Then remove the extra metal.
 

Attachments

nattieleather

Well-known member
1,882
143
63
Location
Cleveland, OH
Well I don't have a G506 and I'm using my eyecromiter looking at pictures but it looks like they are about approximately 1-2 inches shorter than the pintle. Looking at pics the bed ends the bumper go out an inch or so beyond the bed but the pintle sticks out a little past the pintle. Sorry I don't have actual measurements but that's what I can see in photos that I googled. BTW your work is looking great. Keep up the good work!
 

jeffhuey1n

SMSgt, USAF (Ret.)
Steel Soldiers Supporter
1,887
1,477
113
Location
Laramie County, Wyoming
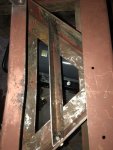
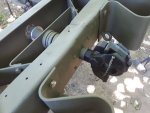
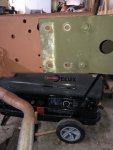
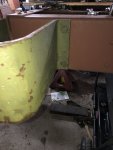
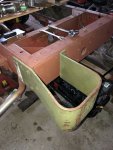
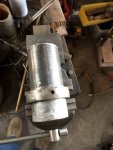
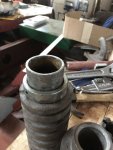
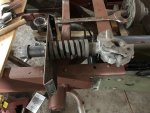
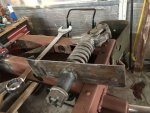
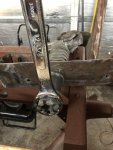
Been diligently trying to create parts for the pintle hook. The parts I have: the hook with all the little pieces, the spring, the washer, the nut (huge!), and one bushing. Missing are the second bushing and the front support. Neither of my replacements will ever win a beauty pageant but the suffice until I find the real parts. The front support was a real pain. Using steel leftover from the frame extensions, my son (the welder) and I (the fumble fingered helper) created a support. It works and installs. The real pain in the pahtootie is recreating the second bushing. I don’t have access to neither a forge nor a machine shop. So I made one out of various pieces of junk I had lying around the shop. I’m not sure welding is possible. The only thing I can say about both parts of the bushing is they’re both magnetic. This is an important point. Using a section of water pipe from the fire truck leftovers, I cut a piece to length. Then I cut up a gear from my fifth wheel travel trailer, which had been damaged in an accident. Much cutting and grinding later and I think it’ll work. A key point is making the ring lock in place. Methods used was first, friction. Didn’t work, scared the crud out of myself when the ring shifted, rather explosively if I might add. Next try was drilling and tapping three holes in the ring with the drill cutting into the pipe by a very shallow divot. Installed some 1/4 28 set screws then checked it again. It stayed in place a little longer but still went BOOM! Grumble… for the final attempt, I’ve drilled a hole through the ring and through the pipe then tapped it to 1/4 20 and installed three steel set screws. It’s all installed and locked in place. I plan on using some thread lock(?) once I see if this time it’ll work. Pictures below showing various steps along the way:
 

Attachments

jeffhuey1n

SMSgt, USAF (Ret.)
Steel Soldiers Supporter
1,887
1,477
113
Location
Laramie County, Wyoming
Got busy on the RH rear leaf springs. All removed and look okay. Just have to clean them up. They are nasty looking. I wouldn’t be surprised if the last time they saw service was probably in the 1950’s.
 
Top
AdBlock Detected

We get it, advertisements are annoying!

Sure, ad-blocking software does a great job at blocking ads, but it also blocks useful features of our website like our supporting vendors. Their ads help keep Steel Soldiers going. Please consider disabling your ad blockers for the site. Thanks!

I've Disabled AdBlock
No Thanks