• Steel Soldiers now has a few new forums, read more about it at: New Munitions Forums!

  • Microsoft MSN, Live, Hotmail, Outlook email users may not be receiving emails. We are working to resolve this issue. Please add support@steelsoldiers.com to your trusted contacts.

Gasser Cab Removal

Barrman

Well-known member
5,266
1,782
113
Location
Giddings, Texas
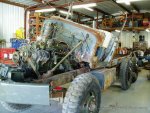
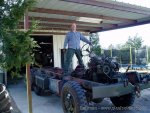
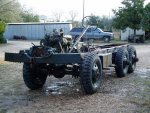
It seems there are at least a dozen people on here besides myself pulling a M35 apart down to the frame right now or are thinking about it. I painted my replacement cab a few days ago and pulled the original cab off Friday. I figured a few pictures and suggestions might help those of you still to do this.

I have been told repeatedly to leave the steering column alone and pull the cab off up and back. Since my steering is great, I took that advice. But, that means what ever means used to lift the cab has to be able to move or the truck has to be moved during cab removal. I have an electric winch mounted to the roof of my metal building. I use the winch to remove and store the hardtop for my M715. It picked up my stripped down replacement cab just fine. It would not pickup my stock cab because I hadn't stripped it down to just the tub.

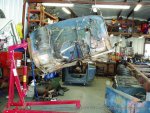
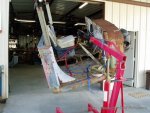
I tried an engine hoist and nylon straps. I broke 2 straps before I got them positioned so they wouldn't saw themselves in two. I can balance my replacement cab on the single hook of the hoist. I am not able to balance a cab on the single hook of the engine hoist however. I don't know why. Below are pictures of how I ended up doing it with captions.

I was able to move the truck out from under the cab. But, it wasn't a controlled lift. Meaning that a cab I wanted to use again would be scratched and dented some.

You must remove the t-case shifter and the pto shifter handle otherwise the cab will not be able to go back and work its way off the steering column. They are easier to remove before you start instead of after the cab is a foot above the frame by the way. SO, pull them at the start instead of half way through like I did.

I would suggest 2 engine hoist each picking up a side of the cab or better yet, a gantry crane to anybody that is going to do this.

To sum up:

Remove all the weight you can. Seats, dash, all items on the firewall. ( left mine on so I could look at them and see how stuff was supposed to go during reasembly. I should have just taken pictures. Take all the stuff out from under the seat too. My 10 ton bottle jack was still there.)

Use two lifting sources or make some kind of spreader bar. The under floor crossmember is not a balanced point for cab lifting.

Have another adult help. One more person who could think and pick up at least 100 pounds would have helped a lot.

Remove all shifters from the start. Transmission, t-case and pto.

Once I figure out a way to get my replacement cab on without scratching, denting or dropping it I will post up with a follow up.
 

Attachments

73m819

Rock = older than dirt , GA. MAFIA , Dirty
Steel Soldiers Supporter
In Memorial
12,195
325
0
Location
gainesville, ga.
BFR, show us your gasser cab removel technique, it seemed to work real well for you
 

Recovry4x4

LLM/Member 785
Super Moderator
Steel Soldiers Supporter
34,012
1,808
113
Location
GA Mountains
The column is part of the box. In order to take the box out you need to move some stuff out of the way. Not sure about the gassers but with a multi, you will need to move the engine or the IP or strip parts off the IP. To compensate for the angles needed to remove the cab off the column, you can upbolt the steering box and pivot the column up and down.
 

hndrsonj

Senior Chief/Moderator
Super Moderator
Steel Soldiers Supporter
7,584
363
83
Location
Cheyenne, WY
4 adults and just pickup the stripped cab. Not messing with the column was a good idea. An A-frame is the easiest way to do this.
 

ARMYMAN30YearsPlus

In Memorial
In Memorial
3,585
7
0
Location
Parkville, MD
I am going to pull the cab of the M52 when I get home for good and use that time to clean it up and install the winch controls that rest on a double crossbar that spans the frame under the cab. I want to do the same thing leaving as much in place as I can so I will follow your lead of course getting it moving back is not as hard with a tractor just take off the tool box and spare.

Thanks for posting the pictures and really drive it around with a chair strapped to the frame you will have a blast driving a big go cart.
 

Barrman

Well-known member
5,266
1,782
113
Location
Giddings, Texas
I have been really trying to figure out a way to get the painted redone cab back on the truck without scratching it all up. Yesterday I rebuilt my previously non working air pack and kept stopping to look at the steering box everytime I walked by. (Oh, does anybody have the seal for the rear cover of the air pack. Just that one cover and not a complete kit?)

The problems with removing the box from my point of view were the right sized wrench for the sector shaft nut, a puller to remove the pitnam arm and if I could get the assembly out of the frame once I got it all loose.

Well, my sockets stop at 1-1/4", but I have a bunch of 1-1/2" sockets since that is what size our lug nuts are. I think the sector shaft nut actually needs a 1-7/16" tool. I don't have one. I put one of those sockets Houdel sells on there and just let the impact gun burp. The nut moved so I zooomed it on off.

A normal automotive pitman arm puller just almost fit. The sector shaft is bigger than most car ones. I happen to have 3 pitman arm pullers. I tried them all and the 3rd one fit with not modifications needed. (A file or grinder to the inner surface of the tool would have been very easy to do and not destroy the tool for other uses.)

Once I knew I could unbolt it, I started looking at what else had to be removed. For the Gasser, just the winch PTO drive shaft is in the way. I pulled that, undid the 4 bolts holding the box to the frame and out it came.

So, you Gasser guys should have the tools around the house that are needed to pull the box. If not, you need a lug nut socket, so get one. The pitman arm puller will be used on other vehicles as well, so grab one of them. If you have a winch, pull the drive shaft. No winch, then the box will be out in about 5 minutes.

Also, the pitman arm and sector shaft on mine both have notches on them to show how they are supposed to be lined up. With the wheels straight ahead, the notches are at the 11 o'clock position on the parts. Look for this on both before you take it apart. If you can't find them, mark them someway. Otherwise, you will never get equal left/right turning again.
 

Barrman

Well-known member
5,266
1,782
113
Location
Giddings, Texas
NO! I did look at that before I took it off too Kenny.

But, since I have the dash all the way off, all I have to do is hit the hole in the firewall and then move it pretty much anyway I want. If doing it from the top of the frame rail doesn't work, I think I can bring it in from under the winch.

Either way, getting the cab on the truck itself will be a lot easier. I can loosely start the two spring loaded rear cab bolts and tilt the cab to some crazy angles if needed without it sliding off the frame and going SPLAT! on a nice round painted corner.

I had hoped to have the frame done today and try the cab mounting Tuesday. But, when I redid the air pack yesterday, I wanted to test it. I pulled the air feed line to the back of the pack off and applied shop air. I felt/heard the piston move and was very happy with my work. A little bit of air was leaking out around the rear cover, but not much considering I don't have a seal there anymore. Then SLPOOSH! brake fluid started flying out of my right front brake area. The metal line under the brush gaurd let go where rust had attacked it. As all of you know, brake fluid and paint don't mix. Making a new line and cleaning up all the brake fluid took most of yesterday.

Today, Jennifer and Colton decided to help me. Colton no problem, just give him some glasses, a putty knife and a Scotchbrite pad and he is good to go getting any flacking paint the powerwasher didn't remove. Jennifer wanted to use a "sander." She kept ripping up my D/A pad, so I gave her a wire wheel on a grinder. Then she kept collecting the wire in her clothes. She finally decided to let us do the work.

While I was using the big wire wheel on the frame, I noticed my metal fuel line had a few rust holes in it. So, out comes the fuel line trying not to bend or break it so I can make a new one. Same thing on the airpack/master cylinder vent line to the air filter. Then I got distracted looking for some 3/8 brake line I know I have. I didn't find the line, but I did change the oil in the air compressor, find the ladder I forgot all about that allowed Colton to get high enough on a tree to get his RC plane down from a tree and then I got hungry. Once I finish writting this, I am going to go bleed the brakes to make sure they aren't leaking and then start wire wheeling the frame. 1700 is my dead line to start painting otherwise it will get too cold before I am done.
 

badgmc56

New member
440
5
0
Location
Southington Ct.
Are you going to replace all the brake lines? When I started getting into my M-211, I noticed some weak brake lines so I figured I'd replace just those but as I started thinking about it [ blown brake line NOOO BRAKES] I decided to change them all with the NAPA coated brake lines.I mean all of the lines, even the ones at the backing plates.Just the thought of a 13000 lb runaway vehicle changed my mind.It's a good thing I did cause most of the lines were bad when I took them out and started bending them. Most of the steel lines broke before they would bend.Thats a good test to see if they are rotted or not.I did it with the cab and body on the truck so yours should be easy.
 
Top
AdBlock Detected

We get it, advertisements are annoying!

Sure, ad-blocking software does a great job at blocking ads, but it also blocks useful features of our website like our supporting vendors. Their ads help keep Steel Soldiers going. Please consider disabling your ad blockers for the site. Thanks!

I've Disabled AdBlock
No Thanks