Ray70
Well-known member
- 2,595
- 5,914
- 113
- Location
- West greenwich/RI
Hello everyone, Daybreak has asked me to start a new thread with this info so that it can be pointed to from a sticky for easy accessibility.
I purchased a set of stencils that I had custom made by a place on-line called Custom Cut stencils.
Attached are the proofs I used to purchase the stencils.
They basically charge by the letter and can make stencils out of oil board as well as other plastic materials. It cost about $100 for everything I had made. A bit pricey, but I have used them several times.
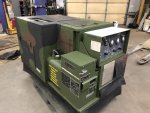
The best way I found to use them was to add about 12" of masking paper around the edge of each stencil to keep overspray off the machine, then tape it lightly into position and have someone wearing gloves help you by making sure the stencil is pushed up against the body panel, especially where you have to go over the pop rivets and bolts that are sticking out of the machine. You can also place some small magnets in areas to hold the stencil tight to the body. Since the panels are aluminum you have to place 2 magnets together on each side of the panel to attract each other.
If you are painting the machine first, I use the Gillespe paint from Rapco Parts. it is available in quarts, gallons and spray cans. You can get all colors, 383 green, the desert tan, the brown ( if you machine is tri-color camo ) Buy all you ever need in one shot to save on shipping.
for the flat black and stencils I use Rust-oleum high heat flat black. I found it sprays better, dries faster and looks closer to the original than all the other flat blacks I tried.
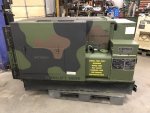
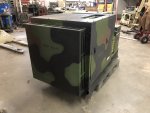
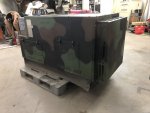
To recreate the camo pattern you don't want to tape off the individual colors, that will leave too sharp of a paint line, you want a slightly fuzzy edge. Best thing I found was to take large pieces of cardboard and cut out the pattern you want then use that as your stencil. this will give you a better looking edge.
Paint the entire machine green, then apply the black and brown using the Rapco spray can 383 brown and the Rustoleum high heat flat black.
Another option if you want to tape it off is to outline the patterns with DART tape ( door arperture refinishing tape ) it is a 1/2" diameter bead of foam with a line of light tack adhesive on one edge used to make door and hood openings when painting a car. It's available at any automotive refinishing supply store for $35 a box ( one box is plenty ) this will also give you a soft edge instead of a crisp paint line.
Here are the files I used. There are 2 sheets. I believe the first sheet gives you what you need for an 803A , for an 802A you need to substitute the "Heavy objects on top " stencil from 3/4" to 1/2" because the top cover is smaller.
I ended up ordering both so that I can stencil both machines, but please verify against your machine and what size you want because I have seen more than 1 size stencils used. It depends on if it is original or a tier2 reset. Also depends if an 802 or 803.
They will create a proof sheet for you to check and approve before they cut your stencils. Check them carefully because there were a few alignment errors on my first proof from them. ( left justified instead of center )
Unfortunately you can't attach word docs here, so I had to convert to .pdf to post them.
Web address is www.customcutstencil.com
email is customcutstencil@gmail.com
If you have any specific questions with regards to painting etc. feel free to send a PM.
Thanks
Ray.
Attachments
-
23.6 KB Views: 130
-
19.6 KB Views: 65


