• Steel Soldiers now has a few new forums, read more about it at: New Munitions Forums!

  • Microsoft MSN, Live, Hotmail, Outlook email users may not be receiving emails. We are working to resolve this issue. Please add support@steelsoldiers.com to your trusted contacts.

goldneagle's 1985 M1008 recovery and restoration thread...

goldneagle

Well-known member
4,490
977
113
Location
Slidell, LA
I ordered a bamboo drawer organizer to use as the top of the center console. I decided to go with a drop in lid. I will use a piece of 3/4" plywood the size of the opening to the console. I will attach the plywood to a piece of sheetmetal that is 1-1/2" longer and wider than the opening. I will attach the bamboo drawer organizer to the top of the lid. This will give me a place to store small items like sunglasses, cell phone, blue tooth ear piece, USB charging cables, flashlight, pens and coins. By lifting the lid up instead of a hinge I can keep all the stuff in the tray and still get access to the items inside the console.
 

goldneagle

Well-known member
4,490
977
113
Location
Slidell, LA
I got the metal lid cut, primed and painted. I attached a piece of 3/4" plywood (sized to fit in the opening of the console) to the metal lid piece with 4 flat-head wood screws. The 4 holes in the metal lid were counter-sunk to allow the screws to fit flush. Tomorrow I am receiving the bamboo drawer organizer. I will attach it to the top of the metal lid.
 

goldneagle

Well-known member
4,490
977
113
Location
Slidell, LA
I got the bamboo drawer organizer tonight. Didn't like the fit! Hung off the back about an inch. Found another one on AMAZON.COM for $25 and ordered it. According to the dimensions it will fit nicely!

I used the non fitting drawer organizer to hold all my remote controls for the entertainment center.

This afternoon I cut some 1/2" polyethylene foam to use as a inside liner for the center console. Once I made sure of the fit I applied polyurethane calk to the bak of the panels and installed them inside the center console. They fit really nice. Here are some quick pictures:
 

Attachments

goldneagle

Well-known member
4,490
977
113
Location
Slidell, LA
Since last entry I managed to install the new drawer organizer. The dimensions were a perfect fit. I also installed the console into the truck. It fit nice and snug between the seat frame pieces. All I need to do now is slice into the wire leads coming from the console to activate the radio and power outlets. Here are some pictures:
 

Attachments

Last edited:

tim292stro

Well-known member
2,118
40
48
Location
S.F. Bay Area/California
I'll be honest, I thought you would have turned that around 180degrees (radio backed up against the rear wall). Does that block access to the transfer-case shifter?
 
Last edited:

goldneagle

Well-known member
4,490
977
113
Location
Slidell, LA
I'll be honest, I thought you would have turned that around 180degrees (radio backed up against the rear wall). Does that block access to the transfer-case shifter?
I can reach that shifter if needed. I don't usually take it out of 2WD. Closest point to the console is 4WD LOW and it is vertical. We tried it today.
 

Csm Davis

Well-known member
4,160
393
83
Location
Hattiesburg, Mississippi
I'll be honest, I thought you would have turned that around 180degrees (radio backed up against the rear wall). Does that block access to the transfer-case shifter?
Hey tim292stro how would he see or reach the radio if it was turned around 180, and yes I understand you mean the console so the radio would face the front of the cab.
 

goldneagle

Well-known member
4,490
977
113
Location
Slidell, LA
Yes it does have a remote control. I still do not get having it turned around 180 degrees. How would I see the radio then? The way I have it now I can easily see the front of the panel and reach any of the buttons comfortably. I am 100% satisfied with the completed center console as it sits. If I had to do it over again I would not change anything.

There is 1 unexpected plus that I didn't intentionally design into the console. The 2" thick pink polyethylene foam piece I installed as a divider (separator) between the storage compartment and the speaker/electrical section is a great access panel to the wiring.

I had forgotten to attach one of the positive leads from the 12 volt receptacles to the fuse block. I was going to lift the console up out of the seat frame and remove the speaker to access the inside of the wiring section. But then I thought "why not pull the foam panel from the inside and get to it from there". This way I didn't have to go through all that hassle. It took less than 10 minutes to find the loose wire, feed it through the grommet (the hardest part) crimp a spade connector to the end, and attach to the fuse block. Then I just pushed the foam panel back into place.
 
Last edited:

goldneagle

Well-known member
4,490
977
113
Location
Slidell, LA
Last week I finished the console installation. I ran (2) #6 wires from the front battery through a large hole in the firewall (next to the fuel filter). I also ran (3) #14 wires for the spot lights I installed on the brush-guard. The rubber plug in the firewall was too dry-rotted to reuse. I ran all 5 wires through a piece of 1" heater hose to protect it from shorting on the metal of the firewall. I ran the positive wire through a split-loom to the front battery. I got all the wires secured under the hood. I installed a 100 amp circuit breaker to protect the wire going to the fuse panel on the center console. I attached it to the front battery hold down with a angle bracket.

Inside the cab I used a smaller heater hose on the positive lead to the fuse panel. I used a small split-loom for the (3) #14 for the light switch. I secured the cables with wire straps.

Once I got the wires secured I used some polyurethane caulking to seal around the heater hose and cables going through the firewall.

Here are the pictures.
 

Attachments

goldneagle

Well-known member
4,490
977
113
Location
Slidell, LA
I have been having issues fastening my seatbelt in my truck since i updated the seats and center console. The "female end" of the seat belt is not stiff like in today's cars. It requires me to hold it with one hand while twisting by fat body in order to insert the "male end" into the receiver. I knew I have to come up with a way to hold the "female end" securely so I can insert the "male end " into the catch with one hand.

I ended up using a 5/16" flat U-bolt, 2 spacers from behind the PCB box and 2 nylon lock nuts to secure the seatbelt to the side of the center console. Here are pictures to show how it was done:
 

Attachments

goldneagle

Well-known member
4,490
977
113
Location
Slidell, LA
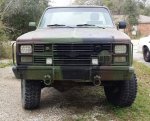
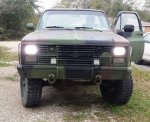
Just a little upgrade today. Installed some LED headlights I purchased on AMAZON.com.

TURBO SII 86-95 Jeep Wrangler JK YJ CJ TJ MJ XJ Rectangular 7x6 Inch LED Headlights Bulb Sealed Beam H6014 H6052 H6053 H6054 Projector lens For Freightliner Peterbilt International Mack 2PCS $69.99 per pair.

They were easy to install. Just removed the plastic trim. Removed the chrome retaining frame. Removed old light and installed new one. Reinstalled trim. The wire pin-out is already wired correctly for my application. (plug and play)

Here are some pictures:
 

Attachments

38
0
6
Location
Texas
Just a little upgrade today. Installed some LED headlights I purchased on AMAZON.com.

TURBO SII 86-95 Jeep Wrangler JK YJ CJ TJ MJ XJ Rectangular 7x6 Inch LED Headlights Bulb Sealed Beam H6014 H6052 H6053 H6054 Projector lens For Freightliner Peterbilt International Mack 2PCS $69.99 per pair.


They were easy to install. Just removed the plastic trim. Removed the chrome retaining frame. Removed old light and installed new one. Reinstalled trim. The wire pin-out is already wired correctly for my application. (plug and play)

Here are some pictures:

Did you find the LED Replacements brighter than the Sealed Beams to justify the different in price?

What is the exterior lens cover made of? Glass or Plastic?

Thanks for sharing your experience with these!
 
Top