• Steel Soldiers now has a few new forums, read more about it at: New Munitions Forums!

  • Microsoft MSN, Live, Hotmail, Outlook email users may not be receiving emails. We are working to resolve this issue. Please add support@steelsoldiers.com to your trusted contacts.

Goldneagle's M116A1 Generator Trailer restore and modification thread

goldneagle

Well-known member
4,512
1,014
113
Location
Slidell, LA
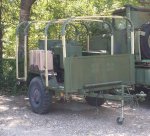
105 generator trailer bows are 62" high in the middle when installed. My 116 bows seem to have disappeared at the club compound, so they probably got sent to the scrapper by the OCD neat freaks.
I got a shipment of used 5 ton truck bow corners Tuesday. I will use them with some pressure treated 5/4" lumber as staves and bows. I needed the height of the stock bows so I could cut the staves to the correct height to match them.
 

goldneagle

Well-known member
4,512
1,014
113
Location
Slidell, LA
Been out of commission for 2 weeks to to a skin infection. Nothing got done around here during that time. The new cargo cover has been sitting in my living room since it arrived almost 2 weeks ago.

Finally yesterday i started to work on my bow set. I purchased some 5/4 x 6 pressure treated wood. I ripped the wood in 2-1/2" strips. After cutting (8) 52" long pieces I trimmed the bottom 6" by removing 1/4" x 6" off each side so that the bottom was 2" wide. (that is the width of the stave pockets in the trailer) This is actually better than the original design since the staves have a built in stop now. (easier to line up the hole for the 3/8" pin)

I then cut 4 lengths of 55" for the top bows. Because the bow corners are not 90 degree the staves are not parallel when inserted into the bow corners. To solve that problem I built the complete U shape bow assemblies and bolted them together using 1/4" x 2" stove bolts.

Once assembled I inserted the one stave into the pocket on the right side of the trailer, drilled a 3/8" hole and inserted the pin through the pocket. With that side secured I applied pressure on both bow corners in order to insert the 2nd stave into the pocket on the left side of the trailer.

I then drilled a 3/8" hole through the pocket and installed the pin like I did on the other side. The pressure forced the top bow board to bend upward.

I repeated the same method with the other 3 bows. Now all 4 bows are under pressure and are bending the top wood bow upward. I hope that through constant pressure the top wood bow will continue to bend in order to relieve the pressure. If I see too much bowing of the stave I will add some rope and stick to pull the side back in.

(you run the rope in a loop and put the stick in the middle. Then you use the board to twist the rope tighter and tighter so it pulls the 2 end towards each other until parallel. Then the stick is rested against the top bow to keep it from spinning the other way.)

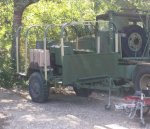
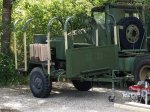
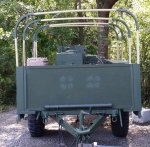
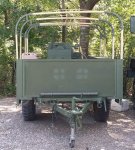
Here are some pictures of what i did so far:
 

Attachments

goldneagle

Well-known member
4,512
1,014
113
Location
Slidell, LA
Today I added a 2 x 2 pressure treated board on top of the bows I installed. It runs front to back in the center of the bows. I also installed some 1/4" lattice strips on top of the bows. I used 1/4" stove bolts to secure all the lumber.

Here are the pictures of the finished bows.
 

Attachments

goldneagle

Well-known member
4,512
1,014
113
Location
Slidell, LA
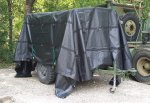
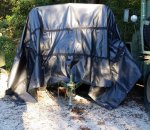
Today I installed 3 metal straps on the water cans to secure them. I then unfolded the new black tarp over the bows.

The tarp is slightly too long to the sides and too long front and back. I will need to fold it under to make it fit better. I plan to measure it while it is in place so I know how much i have to fold on each side.

I plan to fold it under and glue the folds with contact cement. We will stretch it out and fold in on my neighbor's concrete driveway.

I am hoping I can make if fit nicely without have to cut it down.

Here is a picture of it before the folding process.
 

Attachments

goldneagle

Well-known member
4,512
1,014
113
Location
Slidell, LA
Now that I have some spare wheels for the trailer it is time to fabricate a spare tire mount.

I purchased a used spare tire mount from eBay a while back. I finally decided to put it into use.

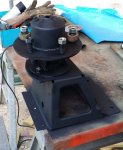
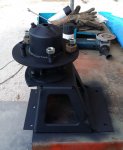
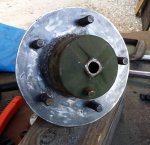
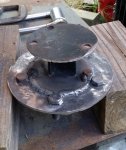
Yesterday I used my plasma cutter to cut a 9-1/2" diameter round plate out of 1/4" plate steel.

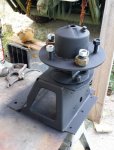
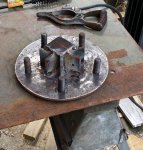
Today I ground the edge of the plate smooth. After marking the 5 lug holes on the plate I drilled (5) 5/8" holes into the plate and welded (5) 5/8" grade 8 bolts to the plate. (These bolts will hold the rim in place.)

I cut a used fuel filter canister filter housing to use as a center hub for the tire carrier. I cut about 2" from the length of the cylinder.

I cut some 1/4" flat bar and welded it in a star pattern in the center of the steel plate. I am using it to reinforce the cut fuel filter canister that I will weld to the center of the plate. The canister will act as a hub to help support the rim and allow alignment with the studs I installed.

I slipped the canister over the 1/4" star pattern reinforcement and welded it into place.

I cut 3 bolts off the used spare tire carrier and welded it to the back of the round plate I fabricated.

After cleaning up the welds I primed and painted the tire carrier flat black.
 

Attachments

goldneagle

Well-known member
4,512
1,014
113
Location
Slidell, LA
As you noticed I love re-purposing filter canisters. They make great cup holder for the trucks as well. I also used them as the center cylinder for the welding wire storage spools on my welding cart.
 

goldneagle

Well-known member
4,512
1,014
113
Location
Slidell, LA
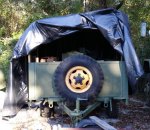
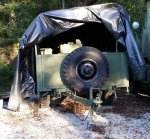
We had some real nice weather today -so it was time to install the spare tire carrier. I attached the spare mount to the wheel and propped it in place to mark the mounting bolt holes in the 3/4" plywood front wall.


Spare_Mount_1.jpg

I used (3) 1/2" bolts and (2) 5/16" bolts to mount the spare tire carrier.

Spare_Mount_1b.jpgSpare_Mount_1a.jpg

Had to relocated the ground rod storage tube seen in the above photos to the other side of the plywood partition.

Wheel fit as designed! Used Rust Reformer on wheel and them painted all flat black.

Spare_Mount_1c.jpgSpare_Mount_1d.jpg

Covered with tarp. I will be cutting the tarp to fir the trailer better. I ordered some 3/4" OD by 3/16" ID stainless steel washers that I will rivet to help hold the folds of the tarp.

Spare_Mount_1e.jpg
 

TrailLifeBill

Member
Steel Soldiers Supporter
178
4
18
Location
Brunswick, GA
I don't belive the tongue weight should exceed 500LBS but 10% minimum sounds right. You've got to have enough tongue weight to keep the trailer tracking correctly. If it's too light it'll start fish tailing. It can get real violent real quick with no good way to stop it.

Some of the guys that work with me found it out the hard way less than a month ago. They drove a Bobcat on a too light of a trailer and then didn't drive it on far enough to get enough tongue weight. They didn't make it to far out of town, gave no warning. Blowed 2 tires, and put the trailer in the ditch. They didn't even have it tied down. They were very lucky, kept it all right side up and no one else around to get hit.
EEK - I'm about to pick up my first M116a3 this weekend - and I planned on towing it home. How is the weight distribution on a bare-bones unloaded trailer?? Do I need to take a couple hundred pounds of weight?? Am towing it about 80 miles home.
 

Ford Mechanic

Active member
1,805
6
38
Location
Edenton, NC
EEK - I'm about to pick up my first M116a3 this weekend - and I planned on towing it home. How is the weight distribution on a bare-bones unloaded trailer?? Do I need to take a couple hundred pounds of weight?? Am towing it about 80 miles home.
Empty should be great, just don't toss 2 spares just inside the tailgate with it empty. Push them to the front.

Sent from my SM-G900V using Tapatalk
 
Top
AdBlock Detected

We get it, advertisements are annoying!

Sure, ad-blocking software does a great job at blocking ads, but it also blocks useful features of our website like our supporting vendors. Their ads help keep Steel Soldiers going. Please consider disabling your ad blockers for the site. Thanks!

I've Disabled AdBlock
No Thanks