• Steel Soldiers now has a few new forums, read more about it at: New Munitions Forums!

  • Microsoft MSN, Live, Hotmail, Outlook email users may not be receiving emails. We are working to resolve this issue. Please add support@steelsoldiers.com to your trusted contacts.

GovPlanet Humvee Arrival and Inspection

Coug

Well-known member
Steel Soldiers Supporter
3,003
4,420
113
Location
Olympia/WA
It’s odd because when I first got the truck, I drained a bunch of old gunk out of there through it with the truck running, didn’t shut off. This was before swapping the filter and IP.

This time when I did it, bone dry and not even a drip.

Does the drop in pressure going into the IP when sumping it usually kill the engine? Do you ever touch the water separator at all or just leave it?
the filter is after the lift pump but before the injection pump.

Injection pump has enough suction to pull fuel from the tank, so you can still drive even with a failed lift pump.

As soon as you open the drain valve you let air into the system, and the injection pump doesn't have enough pumping ability to clear out the air, so truck won't run until the lift pump is replaced.

If the lift pump is working properly, you will get a steady flow of fuel out of the drain.


It's just a basic warning of "don't touch the drain if you aren't in a place to deal with a failed lift pump" because if you drive normally you don't always know when the lift pump has failed.
 

jake20

Well-known member
433
846
93
Location
Illinois
the filter is after the lift pump but before the injection pump.

Injection pump has enough suction to pull fuel from the tank, so you can still drive even with a failed lift pump.

As soon as you open the drain valve you let air into the system, and the injection pump doesn't have enough pumping ability to clear out the air, so truck won't run until the lift pump is replaced.

If the lift pump is working properly, you will get a steady flow of fuel out of the drain.


It's just a basic warning of "don't touch the drain if you aren't in a place to deal with a failed lift pump" because if you drive normally you don't always know when the lift pump has failed.

Ah I see what you mean, yep that’s a good tip. Thank you both. My deuce has had a dead lift pump for a while too, takes a while to start if it loses prime.
 

INFChief

Well-known member
722
1,348
93
Location
New York
Well this is funny, I took it for a drive around the industrial park, noticed some power surging when it was cold. Then it went away after a few minutes.

I get back to my parking lot, decide to sump the fuel in case there were any contaminants/water in the filter housing, truck dies as soon as I pull the sump lever, absolutely no fuel came out either… I was low on fuel so I added 5 gallons in case it got low enough to not reach the pickup in the tank. No luck, won’t start again, no fuel coming out of the sump drain either. No leaks in general around the entire truck.

I figured one of 2 things:

1: Fuel line clogged before the filter
2: Mechanical fuel pump dead


Luckily I was already planning on changing the fuel pump given the age on the existing one, along with some tiny drips I saw several weeks back, so I already had the parts ready to go. I swap the pump and the truck starts up instantly after a few cranks.

In terms of observations between the new and old pump, the black plunger on the new one was much stiffer than the old one. Nothing much else looked different.

I guess when I initially opened the sump, it lost whatever air pressure was keeping fuel flowing to the IP and caused it to die.

Fun stuff, pics attached
Someone really slobbered the RTV on that gasket last time!
 

jake20

Well-known member
433
846
93
Location
Illinois
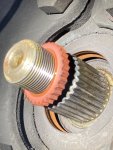
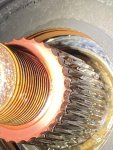
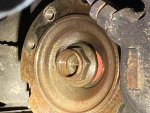
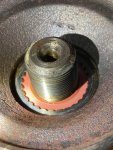
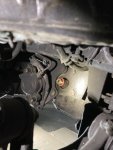
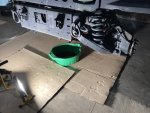
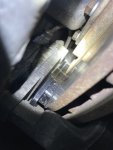
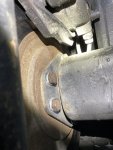
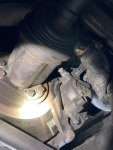
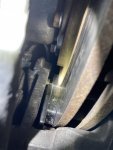
Noticed that my front right brake caliper had become loose during an inspection, so here I am now:

- Front right caliper loose
- I noticed the half shaft was wet and smelled of gear oil after removing it
- Decided to yank both sides of the differential completely and just replace the star seals along with properly re-torquing the caliper bolts + red loctite


Going to order new pads as well since It’s already all apart.


Definitely always something going on with these lol
 

Attachments

jake20

Well-known member
433
846
93
Location
Illinois
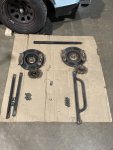
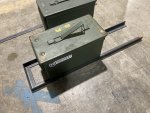
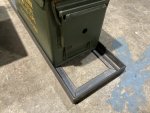
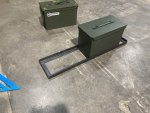
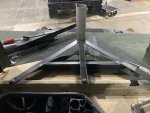
Embarked on a quick little side project while I wait for brake pads and diff seals. Also re-torqued the caliper mount bolts to 140ft lbs with the diff flanges off this time and used red loctite.

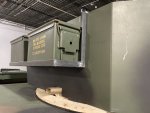
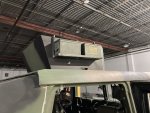
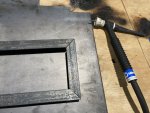
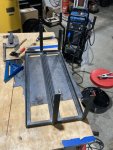
Made myself one of two ammo can holders that will be on each side of my coupla, figure it’d bulk up the look a bit and give a pretty good amount of storage space for the top.

Sidenote/questions:

- Has anyone ever replaced the differential output seals (not the star seals) with the diff still in the truck? Doesn’t seem like anything blocks them from coming out besides it just being a somewhat cramped work area

- I’ve seen notes in several places to chamfer the new brake pads before installing them, otherwise they can shatter/make noise apparently. Any tips or background info on that?

Also calling Rapco tomorrow to discuss paint things, hopefully can get that ball rolling and have the truck in its final colors soon.
 

Attachments

Coug

Well-known member
Steel Soldiers Supporter
3,003
4,420
113
Location
Olympia/WA
Embarked on a quick little side project while I wait for brake pads and diff seals. Also re-torqued the caliper mount bolts to 140ft lbs with the diff flanges off this time and used red loctite.

Made myself one of two ammo can holders that will be on each side of my coupla, figure it’d bulk up the look a bit and give a pretty good amount of storage space for the top.

Sidenote/questions:

- Has anyone ever replaced the differential output seals (not the star seals) with the diff still in the truck? Doesn’t seem like anything blocks them from coming out besides it just being a somewhat cramped work area

- I’ve seen notes in several places to chamfer the new brake pads before installing them, otherwise they can shatter/make noise apparently. Any tips or background info on that?

Also calling Rapco tomorrow to discuss paint things, hopefully can get that ball rolling and have the truck in its final colors soon.
The earlier trucks (A0/A1) the diff mounting bracket is in the way of the seals. First time you replace the seal with the diff out, you grind back enough metal from the brackets so as to not interfere with doing it in the future.
Later trucks it can be done with the diffs in the truck no problem.

Rapco has great customer service/response, so you'll probably end up having a decently long conversation about what you want to know.
 

jake20

Well-known member
433
846
93
Location
Illinois
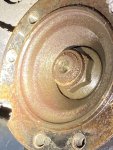
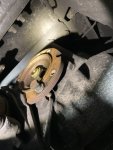
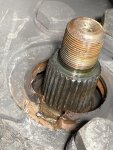
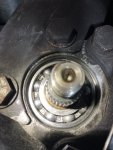
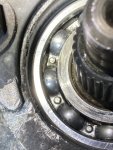
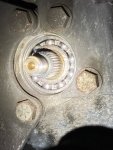
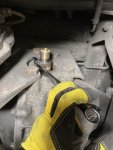
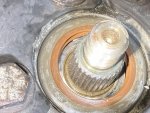
On today’s episode of how not to use your tools, I present: Removing The Old Axle Seals

The only way to really get these out was to start with a small wrench wedged behind the seal (13mm) and work up to a 17mm whilst hammering the other side of the wrench to pry everything out.

I’m sure there are better tools or ways to do this but I completely mangled the first seal trying to remove it before ending up on the wrench method.

A 2” socket worked great for hammering the new ones in as well, though I spent way too much time on the second seal and slightly deformed the outer shape of the seal with a punch. Going to re-assemble it all and see if such a deformity will work or cause leaks, the flange seems to fit pretty snug in the rubber regardless.

Waiting on the new flange lock nuts to come in and it’ll all go back together.

Also fabbed up the ammo can holder for the other side of the coupla. Some minor adjustments left and off to painting they go.

Also spoke to Rapco regarding paint, will probably do a separate thread regarding my painting adventures when I get to it. Lots of good info from them great customer service.
 

Attachments

osteo16

Well-known member
Steel Soldiers Supporter
587
588
93
Location
Evansville, IN
Ah I see what you mean, yep that’s a good tip. Thank you both. My deuce has had a dead lift pump for a while too, takes a while to start if it loses prime.
Fix It !! Steel soldiers deserve better !!!!

EDIT... Sorry. you said HAD... I assume you fixed ....
 

jake20

Well-known member
433
846
93
Location
Illinois
Fix It !!
Lol I’ve got all the parts ready to go, new lines, new fittings, new spin on filter adapters, just missing a new pump from Fass. Been putting it off too long :p

Definitely got a backlog of projects, at least my 1043 is almost where I want it hehe

Got an 1151 in the works I’ll likely start a build thread on soon as well
 

jake20

Well-known member
433
846
93
Location
Illinois
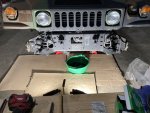
Aaaand we’re back to a functional state with the components in the front of the truck:

- caliper to diff mounting bolts re-torqued with red loctite
- diff output seals replaced
- star seals replaced
- flange lock nuts replaced
- brake pads replaced
- new nord lock washers + loctite on halfshaft bolts
- diff drained and re-filled
- hubs drained and re-filled


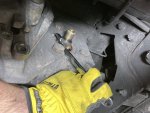
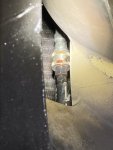
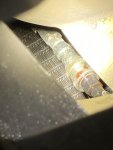
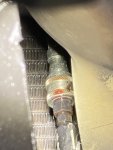
And for the next item in the maintenance list - my Quick Disconnect for the fan clutch has a small drip. Anyone ever replace this without pulling the radiator stack? I’ve got small hands for what it’s worth lol
 

Attachments

HoveringHMMWV

Well-known member
Steel Soldiers Supporter
492
1,156
93
Location
AL
Yes. Not fun but can be done. Mine was rusted and leaked. This is the replacement that i ordered and has worked fine since.

IMG_6617.jpg

Post #: 5,924

Also, this helps while trying to seat the quick disconnect.
 
Last edited:

Coug

Well-known member
Steel Soldiers Supporter
3,003
4,420
113
Location
Olympia/WA
Aaaand we’re back to a functional state with the components in the front of the truck:

- caliper to diff mounting bolts re-torqued with red loctite
- diff output seals replaced
- star seals replaced
- flange lock nuts replaced
- brake pads replaced
- new nord lock washers + loctite on halfshaft bolts
- diff drained and re-filled
- hubs drained and re-filled


And for the next item in the maintenance list - my Quick Disconnect for the fan clutch has a small drip. Anyone ever replace this without pulling the radiator stack? I’ve got small hands for what it’s worth lol
I managed to replace both sides of the fitting with standard hydraulic coupler by reaching through the fan blades. It took a while, and was uncomfortable, but doable.
 

jake20

Well-known member
433
846
93
Location
Illinois
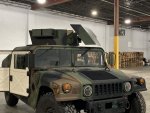
Anyone ever run a steel chicken shield on a 10 series turret ring/bearing assembly? I welded up a pintle mount to install my shield, but I quickly realized that the turret assembly becomes too front heavy once the shield is installed.

The turret still turns fine without any binding, but the shield will 100% bounce around too much while driving down the road. Was thinking of grabbing a sheet of aluminum and just fabricating a new shield with a slightly shorter arm as well.

It does stick out a little further than I think the original pintle would make it, but it could also be my shield. If I make my own shield, it’ll definitely have a shorter arm by a few inches.

Slightly disappointing because this was going to look really cool lol
 

Attachments

Mullaney

Well-known member
Steel Soldiers Supporter
Supporting Vendor
7,774
19,893
113
Location
Charlotte NC
Anyone ever run a steel chicken shield on a 10 series turret ring/bearing assembly? I welded up a pintle mount to install my shield, but I quickly realized that the turret assembly becomes too front heavy once the shield is installed.
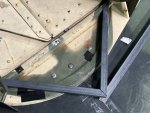
The turret still turns fine without any binding, but the shield will 100% bounce around too much while driving down the road. Was thinking of grabbing a sheet of aluminum and just fabricating a new shield with a slightly shorter arm as well.
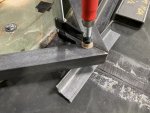
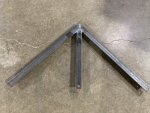
It does stick out a little further than I think the original pintle would make it, but it could also be my shield. If I make my own shield, it’ll definitely have a shorter arm by a few inches.

Slightly disappointing because this was going to look really cool lol
.
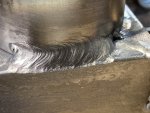
Nice welds too!
Good looking project.
 
Top
AdBlock Detected

We get it, advertisements are annoying!

Sure, ad-blocking software does a great job at blocking ads, but it also blocks useful features of our website like our supporting vendors. Their ads help keep Steel Soldiers going. Please consider disabling your ad blockers for the site. Thanks!

I've Disabled AdBlock
No Thanks