• Steel Soldiers now has a few new forums, read more about it at: New Munitions Forums!

  • Microsoft MSN, Live, Hotmail, Outlook email users may not be receiving emails. We are working to resolve this issue. Please add support@steelsoldiers.com to your trusted contacts.

Heater

73X

New member
311
9
0
Location
Farmington Hills, MI
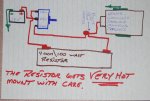
Here is a quick hand drawn schematic. I am very sorry for the poor quality but it is all I can do at the moment I hope it helps. David if you have any questions give me a call. Good luck.
 

Attachments

qbubba51

New member
31
0
0
Location
Milwaukee wisconsin
Just got my heater today. Have a question regarding the wiring. I know I need a power source so I am think of come off the master switch, from there I am in the dark. Where do i put that power? to the swithc to the resistor? I have one wire on the fan motor itself so how do I wire the switch? I am the nuts and bolts guy not the electrical guy. Any help would help me out.
 

73X

New member
311
9
0
Location
Farmington Hills, MI
Just got my heater today. Have a question regarding the wiring. I know I need a power source so I am think of come off the master switch, from there I am in the dark. Where do i put that power? to the swithc to the resistor? I have one wire on the fan motor itself so how do I wire the switch? I am the nuts and bolts guy not the electrical guy. Any help would help me out.
If you have any questions about anything at all please feel free to call me. Just PM me for the number. Ron
 

qbubba51

New member
31
0
0
Location
Milwaukee wisconsin
Ron,

I plan on installing the heater next weekend. Looking at the photos provided, the three way switch shows 4 wires, is one a ground if so why would I need to ground the switch?
Did you also rotate the blower vent? I looks different than mine?

Also I found a place here in Milwaukee for the resistor, I talk to the guy and he has a 4 ohm 400 watt rersistor says it will disapate the heat better. He also said if i bring the truck over the resistor is free.

So i save $10.00 dollars, who knows maybe he will throw in mounting hardware too.

Thanks for answering my questions.

Pat
 

agood1

Member
69
0
6
Location
Woodstock, Ga
The only reason you would connect a ground to the switch would be if it was a lighted switch. Otherwise there should only be 3 wires, the center pole is for 12V+ the other two are the outputs. One goes directly to the fan motor, the other goes thru the resistor and to the fan motor. I tied the resistor wire back to the switch and connected it to the same pole that the high speed connection is on. That way I only needed run one wire to the motor itself.

I clocked the outlet on my fan housing, because it was not pointed in the direction I needed it. Simple to do.
 

agood1

Member
69
0
6
Location
Woodstock, Ga
Just got my heater today. Have a question regarding the wiring. I know I need a power source so I am think of come off the master switch, from there I am in the dark. Where do i put that power? to the swithc to the resistor? I have one wire on the fan motor itself so how do I wire the switch? I am the nuts and bolts guy not the electrical guy. Any help would help me out.
I pulled a separate fused wire directly from the batteries, so not to molest any of the original factory wiring.
 

73X

New member
311
9
0
Location
Farmington Hills, MI
The only reason you would connect a ground to the switch would be if it was a lighted switch. Otherwise there should only be 3 wires, the center pole is for 12V+ the other two are the outputs. One goes directly to the fan motor, the other goes thru the resistor and to the fan motor. I tied the resistor wire back to the switch and connected it to the same pole that the high speed connection is on. That way I only needed run one wire to the motor itself.

I clocked the outlet on my fan housing, because it was not pointed in the direction I needed it. Simple to do.
I could not have said it better, thank you agood1 for responding when I couldn't.
 

73X

New member
311
9
0
Location
Farmington Hills, MI
Just a side note, between the block heater and the arctic cover I fired the truck right up after sitting for a few days in below 32 degree weather and had good heat in less than 10 min.
Drove approximately 8 miles round trip warm and happy.
 

qbubba51

New member
31
0
0
Location
Milwaukee wisconsin
Thanks again to all who helped, Will be doing surgery on the truck this coming Saturday. Would do it sooner but I am using the truck to view all the christmas lights on my side of town. So far I have about 10 people who are willing to ride in the back.
 

DUG

Senior Chief/Moderator
Super Moderator
Steel Soldiers Supporter
2,799
73
48
Location
Mesquite, NV
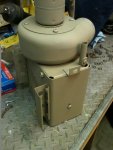
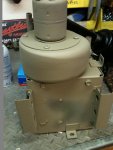
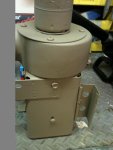
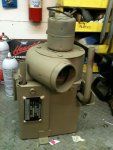
Here is my version of the same heater. Since I don't own a welder I had to take it apart and bolt my mounts on. It was a tight fit getting the heater core to clear the bolt heads, but it worked. I'll be using the same three position switch, but instead of a resistor I'll connect 24 volts to one side and 12 volts from my fuse box to the other. That will give me high and low speeds.
 

Attachments

DUG

Senior Chief/Moderator
Super Moderator
Steel Soldiers Supporter
2,799
73
48
Location
Mesquite, NV
why don't you just use a three pos 24v heater switch like they used to use in the 50's and 60's
Because a three position toggle is cheaper. The heater is 6 inches from my 12 volt fuse box. Easier and cheaper.
 
718
9
18
Location
Springfield Or
Be careful using zip ties on a resistor that large they create a lot of heat. Mine saw 115 degrees Fahrenheit earlier today.
If at all possible the resister should be mounted in the air stream. Even if it is suspended in the output duct. Even the hot air will lower the resister temp and it will last longer
 

DUG

Senior Chief/Moderator
Super Moderator
Steel Soldiers Supporter
2,799
73
48
Location
Mesquite, NV
We hooked the electrical up on the heater. Two speeds, no special switches or resistors. I tapped into 24 volts under the hood at the circuit breaker as DogHead suggested using the last Y connector from Kenny's generous shipment of goodies. We used the proper connectors from Eric's surplus and soldered them on with my new soldering gun. This wire was run to one side of a three way switch (middle is off). Then we ran another wire from the other side of the switch to the 12 volt fuse box. We now have high and low speeds.

We need to get the hoses hooked up, but since we have dogs I like to be very careful with anti freeze. I'll have to lay plastic sheeting and get some bigger drip pans before I pull the plugs for the elbow connectors and ball valves. Instead of drilling massive holes in the firewall I'll use bulkhead connectors.
 
Top
AdBlock Detected

We get it, advertisements are annoying!

Sure, ad-blocking software does a great job at blocking ads, but it also blocks useful features of our website like our supporting vendors. Their ads help keep Steel Soldiers going. Please consider disabling your ad blockers for the site. Thanks!

I've Disabled AdBlock
No Thanks