• Steel Soldiers now has a few new forums, read more about it at: New Munitions Forums!

  • Microsoft MSN, Live, Hotmail, Outlook email users may not be receiving emails. We are working to resolve this issue. Please add support@steelsoldiers.com to your trusted contacts.

HMMWV Ball Joints

Economist

Member
Steel Soldiers Supporter
117
1
16
Location
Arizona
Over the weekend, I noticed that both front CV boots had split open. So, while I was installing the new axles I had sitting on the shelf, I thought it would be a good time to put in the new lower ball joints. My M998 had the original, non-serviceable, lower ball joints. The old ball joints had no grease, at all, remaining.

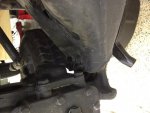
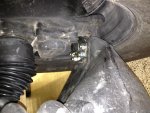
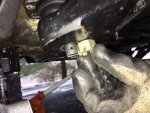
When I went to install the new lowers, I drilled out the control arms for the slightly larger new HD MOOG ball joints. I knew this would be necessary and it was fairly easy. (Just drill out the 2 outside holds to a suitable size to allow the new 7/16th bolts). So, to my question. The TM's indicate that when replacing the lower ball joint, note the orientation of the bolts and install in the same manner. Unfortunately, they do not say what the "same manner" means. The existing ball joint mounting bolts all came up from below (see attached photo). So, I installed the first one this way (see attached photo). I do not see any clearance issue, but I cannot cycle all the way through the suspension travel.

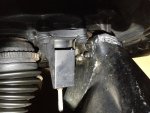
I went and check on my H1. It has the 2 outer bolts going in from the top down and the 2 lowers, from the bottom up (see attached photo).

I am making a big deal out of nothing or should I go back and change the first, newly installed lower?

Thanks.
 
Last edited:

jwaller

Active member
3,724
19
38
Location
Columbia, SC
bolts up. looks good to me. thats the way I installed mine. also remember to install the C shape reinforcing plates if you got um.
 

Economist

Member
Steel Soldiers Supporter
117
1
16
Location
Arizona
I have reinforcement plates, but I thought they were only for the top control arms. Did you install on the lowers as well?
 

86humv

Well-known member
Steel Soldiers Supporter
1,699
500
113
Location
Texas
They only go on the top, and later A arms have them already welded on.
 

Economist

Member
Steel Soldiers Supporter
117
1
16
Location
Arizona
Thanks. I did not see how one could add plates to the lowers. My lower ball joints were in really bad shape, so they came to the top of the list. I will have to address the uppers this summer. I appreciate the reply.

-Economist.
 

Economist

Member
Steel Soldiers Supporter
117
1
16
Location
Arizona
bolts up. looks good to me. thats the way I installed mine. also remember to install the C shape reinforcing plates if you got um.
I am now a bit more educated on this topic and wanted to report back in. When you go from the non-serviceable to the new serviceable (and larger bolt) ball joints, you must install the 2 outer bolts from the top down into the ball joint. Failure to do so will allow the bottom of the geared hub to come into contact with the nut that is on the bolt. The effect is to restrict the turning radius - nominally. More importantly, in a bind, the geared hub will likely sheer off the bolt.

I did the driver's side of mine, all bolts up. I did the passenger side like my H1, outside bolts on the lowers going down. Then, when I was installing the UORVA ball joints on my H1 this last week, the issue became very clear to me. I need to go back and fix the driver's side on my M998.

Hope this saves someone else from the extra work.

Kind Regards,
-Economist.
 

Army Kid

Banned
47
0
0
Location
SW
I am now a bit more educated on this topic and wanted to report back in. When you go from the non-serviceable to the new serviceable (and larger bolt) ball joints, you must install the 2 outer bolts from the top down into the ball joint. Failure to do so will allow the bottom of the geared hub to come into contact with the nut that is on the bolt. The effect is to restrict the turning radius - nominally. More importantly, in a bind, the geared hub will likely sheer off the bolt.

I did the driver's side of mine, all bolts up. I did the passenger side like my H1, outside bolts on the lowers going down. Then, when I was installing the UORVA ball joints on my H1 this last week, the issue became very clear to me. I need to go back and fix the driver's side on my M998.

Hope this saves someone else from the extra work.

Kind Regards,
-Economist.

Good info & thanks for showing me on your H1, will be good knowledge when I go to do mine. If I can get it to cold start 1st ... (thx again for lending me the PCB, I'll keep you posted & get it back to you)
 

trooper632

Member
533
3
18
Location
Utopia, TX
How hard is it to replace the axle half shafts, I have one front and one rear that needs to be replaced due to boot split, looked on youtube couldn't find anything, also noticed that rear geared has started to leak so need to fix that also.
 

gcbennet

Member
221
7
18
Location
Trenton, ON
The half-shafts are very easy to replace. The TM is quite detailed in the process including complete tear-down and rebuild to facilitate boot replacement. The rear shafts require the brake linkage to be unhooked first so it's also a good opportunity to properly rig the park brake.
 

chickenbutt

Member
64
2
8
Location
New Jersey
Lower ball joint part#?

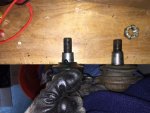
This is an old thread, but it appears to be the right place to post my lower ball joint woes on my 1993 M998. Looked up in the TM and found it is part number 6006645. Did a little shopping around and found one that listed that part# for $40 on fleabay. It's the newer style for A1 and A2's (I assume) and it has the larger 7/16 dia bolts that required me to drill out the lower control arm. I torqued the castle nut to about 70 lbs and still could not see the hole for the cotter pin. Tightened the heck out of it and still could not make it to the cotter pin hole. So took it back off a did a comparison with the old one.
I didn't know there were any differences in the hub knuckles from older to newer. Did I screw myself by drilling out my lower control arm for the beefier bolts? Hopefully I can get the correct ball joint and hopefully, if it doesn't have the larger holes, I can drill them out for the slightly larger 7/16" bolts!!

6006645(1).jpg6006645(2).jpg
 

chickenbutt

Member
64
2
8
Location
New Jersey
This is an old thread, but it appears to be the right place to post my lower ball joint woes on my 1993 M998. Looked up in the TM and found it is part number 6006645. Did a little shopping around and found one that listed that part# for $40 on fleabay. It's the newer style for A1 and A2's (I assume) and it has the larger 7/16 dia bolts that required me to drill out the lower control arm. I torqued the castle nut to about 70 lbs and still could not see the hole for the cotter pin. Tightened the heck out of it and still could not make it to the cotter pin hole. So took it back off a did a comparison with the old one.
I didn't know there were any differences in the hub knuckles from older to newer. Did I screw myself by drilling out my lower control arm for the beefier bolts? Hopefully I can get the correct ball joint and hopefully, if it doesn't have the larger holes, I can drill them out for the slightly larger 7/16" bolts!!
So it turns out that ball joint that I got was not for Basic, A1 or A2 because (according to the Parts TM) the geared hub knuckle is the same for all of them. It had a larger dia. taper and must have been for something newer.
I got the correct ball joint and it went right in, aside from struggling with the bolt heads that you can not get a socket on because they are so close.
 

ca111

New member
8
0
1
Location
CA
Today I installed new lower ball joints, I had the old one with the small 3/8" screws mounted.
I bought some 7/16" screws and drilled out the bigger holes.

But the heads (17mm) of the screws are bigger compared to the 5/8" screws. What is the correct head size?

Thanks! :)
 
Last edited:

chickenbutt

Member
64
2
8
Location
New Jersey
Today I installed new lower ball joints, I had the old one with the small 5/8" screws mounted.
I bought some 7/16" screws and drilled out the bigger holes.

But the heads (17mm) of the screws are bigger compared to the 5/8" screws. What is the correct head size?

Thanks! :)
With the new larger bolts, I think the nut was 11/16" and the bold head was 5/8". They are right up against the rubber boot, so you can't get a socket on them. I had to use an open end wrench on the edge of them and ended up getting a pinhole in the boot :cry: I think the old hardware heads were smaller, I seem to remember using a 9/16" socket.
I highly recommend the hardware kit. The only place I could find it was hummerpartsguy here http://www.hummerpartsguy.com/KIT-BALL-JOINT-MOUNTING-HARDWARE-LOWER_p_24898.html
The nuts are locking, but I put locktite on as well.
 

Action

Well-known member
3,576
1,557
113
Location
East Tennessee
Today I installed new lower ball joints, I had the old one with the small 5/8" screws mounted.
I bought some 7/16" screws and drilled out the bigger holes.

But the heads (17mm) of the screws are bigger compared to the 5/8" screws. What is the correct head size?

Thanks! :)
Did you mean that the old ones were 3/8"?
 

ca111

New member
8
0
1
Location
CA
Of course, sorry!
I changed from 3/8" to 7/16" and now the heads of the screws are so big that it is very difficult to work on them.
 

Mquirin

Member
40
5
8
Location
Houston, Tx
I'm about to tackle this project (replace upper and lower ball joints) on my M998. Do I need to lock down the spring? Not sure if it will shoot off or not. Also, should I remove the half-shaft from the geared hub, or can it stay in? I've seen some pics online of it removed but the TM doesn't say to do it.

I've changed some of the half-shafts, which were very simple to do. How would you rate this project from a difficulty level?
 
Top