• Steel Soldiers now has a few new forums, read more about it at: New Munitions Forums!

  • Microsoft MSN, Live, Hotmail, Outlook email users may not be receiving emails. We are working to resolve this issue. Please add support@steelsoldiers.com to your trusted contacts.

How not to install a Duramax in a M998

Mogman

Moderator
Staff member
Moderator
Steel Soldiers Supporter
6,948
9,607
113
Location
Papalote, TX
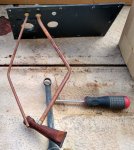
The last piece of tubing I needed to install the fuel tank came in today, I drilled out the 1/4" return and spare plug and tapped them for 3/8, so now I have two 3/8" suction lines with sediment filters and one 3/8 fuel return line, the 6.6L has a 3/8 return so I decided rather than choke it down to convert it, I am hoping a single 3/8' suction line will be enough, should be, then I can use the second suction line to feed the MEP-831A on the shelter.
The drive shaft came in today from Driveshaft Specialist in San Antonio, I have to say as much as we talked back and forth for a month or so about this it came in well over $100 north of what was quoted at $485.00 but of course they would always say that the quote was an "estimate" Oh well it's just money
three.jpg
driveshaft.jpg
Also the pickup tubes were on BO from AMG (after making an inquiry about them) with a wait period of "several weeks"
So I ordered them from one of the other HMMWV retailers on the 13th, when I inquired on Monday (the 4th) I was told they were on back-order from AMG, DUH! so they have the same inventory system and giveadamn as AMG, fortunately for me I also ordered a couple off of Fleabay at the same time and they came in NO PROBLEM, gotta say much happier with them than the so called "specialty shops"
 
Last edited:

Mogman

Moderator
Staff member
Moderator
Steel Soldiers Supporter
6,948
9,607
113
Location
Papalote, TX
Got the fuel tank installed today what a PITA that is, this is what I found when I dissembled the tank, not sure what the thinking here was but I believe one would be afoot before the gauge reached E!
Original.jpg
 

Mogman

Moderator
Staff member
Moderator
Steel Soldiers Supporter
6,948
9,607
113
Location
Papalote, TX
During the mock-up it was pretty clear there was going to be clearance issues between the fill tube and the body mount so before installing the body I did some "clearance" work to that body mount, the fill pipe must be cut anyway to install the 1/2" return line "T" from the AirDog pump, gunna take a couple days off cuz it's damn cold down here...
IMG_20210108_113936499.jpg
 

Mogman

Moderator
Staff member
Moderator
Steel Soldiers Supporter
6,948
9,607
113
Location
Papalote, TX
I got the details worked out for the fuel fill pipe, the clearance work I did to the body mount was just enough to make it all fit OK, the 1/2" fuel return line from the AirDog runs on top of the right frame and Tees into the fill pipe.
AirDog return.jpg
detail.jpg
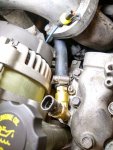
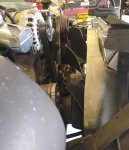
I also got the upper heater hose sorted out, the original hose that came up from the oil cooler just above the oil filter and ran across the back of the turbo was not going to clear the doghouse so I took a tip from the hot rodders and put the computer temp sender on top of a 3/8" NPT tee and ran the heater hose over the top of the engine, you can also see the smaller temp sending unit that I drilled and tapped for 1/8" NPT for the dashboard gauge next to the thermostat housing, the blue wire is a "W" tap added to the 160 amp alternator for the tachometer.
Heater hose.jpg

The LBZ oil fill pipe really helped lower the profile of the LMM.
EDIT, this is actually a LB7/early LLY fill pipe
lower profile.jpg
 
Last edited:
Mogman

Moderator
Staff member
Moderator
Steel Soldiers Supporter
6,948
9,607
113
Location
Papalote, TX
Well my weekend was pretty full with ranch duties but I did manage to install the main battery switch (there will be two as there is two completely different systems, one being 24V)
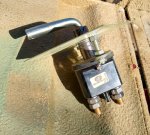
So there are battery switches and then there are battery switches, for the last couple decades I have been using these Hella units on all my diesel equipment 12 and 24V, some like the 977 CAT pull much more current than the Humvee ever thought of...
These are rated at 2500A (5 sec) and make and or break 250A and even though several have excessive exposure I have not had a failure.
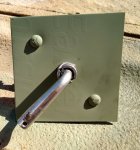
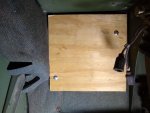
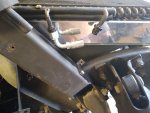
So I removed the slave connector and installed the Hella switch, I install them from the rear so I do not have to worry about sharp edges on the 5X5" plate I fabricated from an old aluminum sign.
IMG_20210131_134640585_HDR.jpgIMG_20210131_134648100_HDR.jpgIMG_20210131_141809344.jpg
So all the commander has to do is reach down and pull up on the lever.

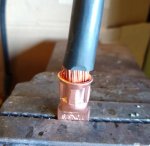
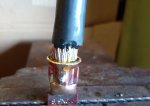
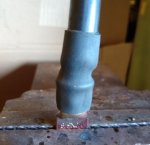
IMHO there is only one way to correctly install a ring connector, whether it is a 4/0 battery cable of an 18GA wire to a fuel gauge, first itis crimped, then it is soldered then it is sealed with jelled heat shrink.
IMG_20210131_155140838.jpgIMG_20210131_155351740.jpgIMG_20210131_155516978.jpg
 
Last edited:
Mogman

Moderator
Staff member
Moderator
Steel Soldiers Supporter
6,948
9,607
113
Location
Papalote, TX
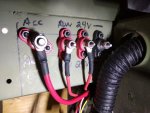
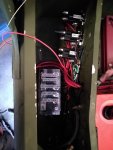
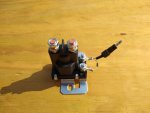
Finished the base electrical, every base circuit in the truck is protected by mega fuses, all but the main starter lead of course, there is 4, 100A relays that control all the switched power, 12V ACC, 24V ACC, 12V RUN and 12V start, each relay draws only 0.8A so the most the ignition switch will ever see is 2.4A and I have power terminal drops behind the dash (I am modifying the dash having a removable panel on the left side of the steering wheel where the original light switch and ignition switch were located so these are accessible)
power drops.jpg Power terminals behind dash
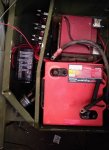
fuse_relays.jpg Mega fuse panel and 12V run, 12V and 24V ACC relays, these are really easy to get to as all one has to do is pop the passenger seat.
backing board.jpg I need to mount three fuse panels to the forward kick panel, borrowing from my telecom days I installed a piece of 1/2" marine plywood, this only required drilling one hole that was not already in the truck and the insulation does not need to be removed, the fuse panels will be mounted with wood screws.
wiring.jpgAs always I try to keep the wiring as neat as possible, notice the asphalt loom, it is a PITA but worth it in the end, I REALLY do not like plastic loom, 1000 years from now somebody might dig this truck up and all might be gone but the loom will still be there...
Relay.JPG
diodes.jpgALL relays and other devices that can produce counter electromotive force get this treatment, actually ether one of the diodes will do the job, the "shunt" diode is popular in the telecom and SCADA worlds and the "isolation diode (6A)" is popular with the military, I actually saw a PS magazine article about fitting the isolation diodes to the injection pump solenoid and horn circuit on the HMMWV but cannot find it at the moment, could be responsible for some of the "mysterious" EESS box failures, this will also reduce pitting on the ignition switch contacts.
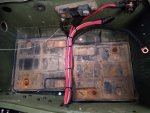
Batteries.jpg The smaller 24V battery will be replaced by two Odyssey 12V batteries
 
Last edited:
Mogman

Moderator
Staff member
Moderator
Steel Soldiers Supporter
6,948
9,607
113
Location
Papalote, TX
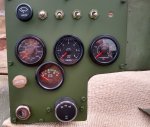
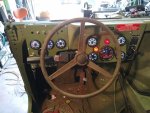
Well I finished the dash, so now I think I have enough information, and even though IMHO real trucks run analog gauges (can you believe there is now an entire generation that cannot read an analog CLOCK!) I will also be running an EDGE Insight that will be monitoring a pot load of engine/transmission data with alarm points set in it, I was not able to locate a matching 270 deg. 24V voltmeter
DASH.jpg DASH2.jpg
I am also starting on the stack
STACK.jpg
 
Last edited:
Mogman

Moderator
Staff member
Moderator
Steel Soldiers Supporter
6,948
9,607
113
Location
Papalote, TX
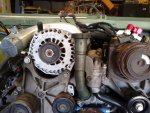
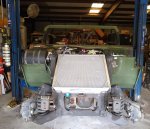
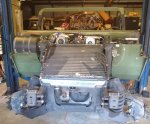
Well the cooling stack started to go together this week, the aluminum radiator and cooling system for the engine is completely plumbed up but for installing the new heater control valve which I will install when the dash frame goes back in, I ended up using an early (2001) Duramax fan and a Hayden severe duty fan clutch for the same year GM Kodiak, I cut the fan down to 21" so it would clear the lower radiator line, I had to trim back the top of the shroud because the fan is higher on the Duramax, I have seen a couple of conversions doing this and claim no heating problems, we will see. I actually purchased the factory bracket for the second alternator but the 65A Bosch alternator chosen has a different pattern than the OEM alternator, close but no... So I am using this bracket until I can take the time to mod the factory bracket to fit,
Stack.jpg
EDIT, this setup cools very well!!
Fan.jpg
I rotated the trans/engine cooler 180 deg so I can use the engine cooler for the transmission and the transmission cooler for the power steering/power brake/winch cooler because the engine has a built in oil cooler and the engine cooler is twice the size as the original trans cooler and the original trans cooler is much bigger than the original steering cooler, this will have some interesting hose routing but I use Hydraulax tough from discount hydraulic hose that is 10 times the abrasion resistance that regular hose and fits the original replaceable fittings the Gov. uses, (the 1/2" fits the engine cooling lines and the 3/8" fits the power steering lines and with a working pressures of 5000 and 5585lb I don't think there would be any danger of a busted hose) I have been using this hose on the farm now for about 15 years and am a believer for sure.
cooler.jpg

So we are getting close, finish the trans plumbing, re-install the brake booster and plumb up the steering/brake system and finish the electrical and we will be ready to do a smoke test!!
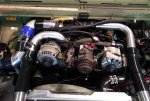
Well I almost forgot about the intercooler, wish I could....
 
Last edited:
Mogman

Moderator
Staff member
Moderator
Steel Soldiers Supporter
6,948
9,607
113
Location
Papalote, TX
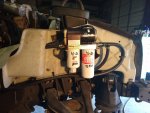
I finished the fuel system today, mounted the Air Dog , got it plumbed up and dumped 5 Gal. of diesel in the tank and after purging the system made the final fuel connection to the engine, I will need to watch the clearance on the secondary filter from the suspension I might need to install a shorter filter.
According to the Air dog instructions this 165GPH is to be used on "highly modified" Duramax engines and came with the donor truck so again I am reminded I have no idea what mods have been made other than the injection pump, turbo and injectors, it came with DSP-5 tuning and that cannot be "read" from the ECM, it can only be downloaded to the ECM, so I am likely going to dump a stock tune into the ECM before driving it.
The Duramax does not have a lift pump from the factory it uses the common rail injection pump and a Micky Mouse hand primer to fill the replacement filter etc. With the Air Dog all you have to do is wait a few seconds in the run position then hit start.
SO the smoke test is not too far off at this point, no drips runs or errors noted in the fuel system today.
Air Dog.jpg
I also connected the fuel gauge and it registered 1/16 tank, low for 5 gal, which should be 1/5 tank, the low fuel warning light is also lit so one would have to really be trying to run it out of fuel.

Edit the stock LMM is rated at 365HP, not sure where I got the 435HP figure
 
Last edited:

Mogman

Moderator
Staff member
Moderator
Steel Soldiers Supporter
6,948
9,607
113
Location
Papalote, TX
The electrical is 99% finished, just a few loose ends like the DLC connector that goes under the dash, I started to fill the cooling system and had a leak on the pipe that goes between the water pump and thermostat housing, meaning I had to remove the belt, the fan ass. and the fan pulley ass. which was pleasantly easy enough with everything but the intercooler in place, so the intercooler (all the parts have arrived) and a couple minor other things and we will be ready for a smoke test.
IMG_20210414_173133828.jpg
You can see he electronic accelerator nests quite well where it belongs, of the three lights on the main dash the far left (amber) is the brake and parking brake warning light, turns out the equalizer on the brakes is in "alarm" so we will have to look into that, the center (red) is low oil pressure/over temp alarm, backs up the analog gauges, the right lamp (amber) is the MIL
I cannot find the air control cable, mystified why is was not with the temp control cable, also miss-placed the fan switch and resistor, they will show up.....
 
Last edited:

Mogman

Moderator
Staff member
Moderator
Steel Soldiers Supporter
6,948
9,607
113
Location
Papalote, TX
Could not take it anymore so I fired it up without the intercooler installed, purrs like a kitten, I still have some issues, found one of the fuel return fittings on one of the injectors is busted, no big deal already extracted the broken piece from the injector, I cannot read the ECM/TCM, working with the guy whom built the stand alone harness on that issue, the cut down fan and fan clutch seems to be making copious amounts of air... and the turbo whine on top of the deep throaty exhaust tone (no muffler) is pretty cool. this engine has a high performance Cheetah turbo so I would expect it to be a little louder than stock, still does not hold a candle to my M35A2

EDIT, this thing actually screams like a Banshee, puts the M35A2 to shame
 
Last edited:

TOBASH

Father, Surgeon, Cantankerous Grouch
Steel Soldiers Supporter
Supporting Vendor
3,587
3,498
113
Location
Brooklyn, NY
So what TM’s will you need to use now? :LOL:

Sounds like you will have a very enjoyable rig when you’re done.

TOBASH
 
Last edited:

Mogman

Moderator
Staff member
Moderator
Steel Soldiers Supporter
6,948
9,607
113
Location
Papalote, TX
Getting close... waiting to install the intake clamps until the return lines are replaced, it is not obvious but this is what 50lb of crap in a 5lb bag looks like, turns out the problem with reading the ECM/TCM was because the serial data goes through the glow plug controller, no need for glow plugs on a direct injected diesel in Texas so I made some wiring mods and now we can read/write to 2 of the 3 computers/controllers on the truck, the transfer case controller only reports if the transfer case is in low range to the ECM for speedo correction, otherwise is a dumb box. BAG.jpg....
 
Last edited:

Mogman

Moderator
Staff member
Moderator
Steel Soldiers Supporter
6,948
9,607
113
Location
Papalote, TX
Man this thing is tossing allot of codes, this is going to take a while to sort out.
 

TOBASH

Father, Surgeon, Cantankerous Grouch
Steel Soldiers Supporter
Supporting Vendor
3,587
3,498
113
Location
Brooklyn, NY
It’s got two alternators. I guess one powers the professor’s time machine. Needs like 80 gagigawatts of power.
 
Last edited:

loosegravel

Just a retired mechanic who's having fun!
504
892
93
Location
Enumclaw, Washington
Man this thing is tossing allot of codes, this is going to take a while to sort out.
Dude, I don't need to tell you this, but you've taken on one hell of a task. I've been reading your threads on this project. My hat is off to you for even attempting it. You're on the down-hill stretch. Don't give up now! I just finished installing a 2004 6.0L Vortech engine with a 4L80 transmission into a 1980 Camaro that came with a 6 cylinder. I made my own custom harness thanks to a guy in Branson Missouri who put all of the necessary information out there for all to see on YouTube and LT1swap.com. I bought into HP tuners to set up the PCM correctly, deleting this and that. The end result is fun, but it's a labor of love as they say. Keep up the good work, and thanks for sharing your experiences!
 
Top
AdBlock Detected

We get it, advertisements are annoying!

Sure, ad-blocking software does a great job at blocking ads, but it also blocks useful features of our website like our supporting vendors. Their ads help keep Steel Soldiers going. Please consider disabling your ad blockers for the site. Thanks!

I've Disabled AdBlock
No Thanks