mmurphy001
New member
- 9
- 18
- 3
- Location
- Thor, Iowa
I tried this and it worked as designed but the wait to start light was unclear. The diagrams show both the “original” and a secondary WTS light/24v led connected. Without an “extra” WTS LED my box worked the glow plugs and everything else perfectly but the WTS light did not work. So I decided to explain a bit of what I did to get it working just in case anybody else hit this snag. I did skim all the comments but did not see anything about it.
To get the connection for the push button outside the PCB I reused the e-brake wire (67). (There's a letter behind it but I don't recall what it was).
I cut it out of the loom a few inches past the box. (the e-brake light still works) I hooked that and the (571) wire from my WTS light which happened to be LED. This took a bit since the WTS light won’t come out unless you pull the entire dash out a few inches. You connect the ground side of the secondary solenoid (or Glow Plug Relay in my mind) to Dash Body Harness Pin C find the 67 wire on the plug side and snip it and add a few inches of wire to it and connect it to a snipped 571 wire from the WTS light. The other side of the push button goes to ground.
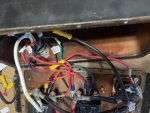
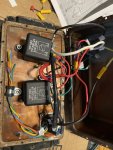
I’ve included a few pics, a couple of the inside of the box and the WTS light/push button.
A few notes:
Finally, Thanks to everyone who contributed to this post. My HMMWV now starts on glow plugs and I believe with this mod it will work fine for a long time to come.


To get the connection for the push button outside the PCB I reused the e-brake wire (67). (There's a letter behind it but I don't recall what it was).
I cut it out of the loom a few inches past the box. (the e-brake light still works) I hooked that and the (571) wire from my WTS light which happened to be LED. This took a bit since the WTS light won’t come out unless you pull the entire dash out a few inches. You connect the ground side of the secondary solenoid (or Glow Plug Relay in my mind) to Dash Body Harness Pin C find the 67 wire on the plug side and snip it and add a few inches of wire to it and connect it to a snipped 571 wire from the WTS light. The other side of the push button goes to ground.
I’ve included a few pics, a couple of the inside of the box and the WTS light/push button.
A few notes:
- My PCB box was riveted together, if yours is completely drill out all rivets before attempting to separate the halves the rivet stubs are a bear to get out.
- I spent (wasted) a lot of time trying it to “save” as much as I could out of the old box. Don’t bother, gut it and start fresh.
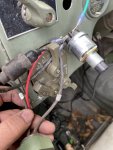
- Behind the dash on the firewall is a bar that comes close to the dash right where I wanted to install the button and probably would have drilled a hole first if I had not pulled the dash and found it interfered. I ended up horizontal with the start switch which worked out fine. You can see the hole next to the start switch in the picture. The WTS light is in my hand in the picture showing the two wire numbers.
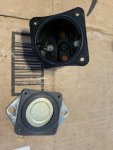
- One last note, my PCB had three solenoids in it. Nothing was burned up but my WTS light just flashed briefly and the plugs never got hot. What I did find is one of the solenoids was a “dummy” one put there just for the terminals or it was defective because it was empty, no guts in it at all. I’m curious if anyone has found dummy solenoids in theirs or mine was just defective.
Finally, Thanks to everyone who contributed to this post. My HMMWV now starts on glow plugs and I believe with this mod it will work fine for a long time to come.


