• Steel Soldiers now has a few new forums, read more about it at: New Munitions Forums!

  • Microsoft MSN, Live, Hotmail, Outlook email users may not be receiving emails. We are working to resolve this issue. Please add support@steelsoldiers.com to your trusted contacts.

How to: Disassembly of the GMC air compressor

Gunfreak25

Well-known member
1,561
620
113
Location
Yuma, AZ
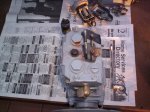
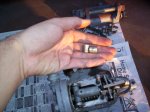
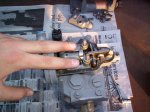
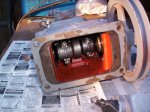
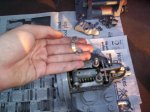
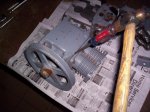
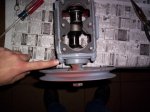
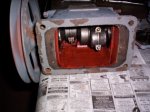
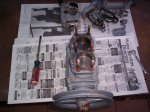
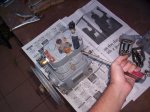
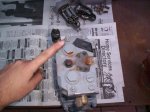
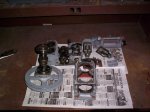
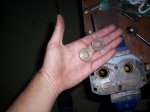
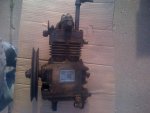
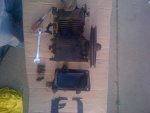
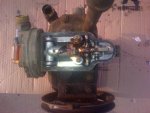
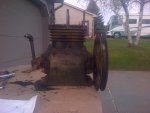
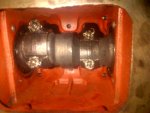
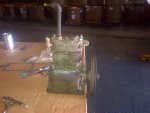
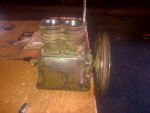
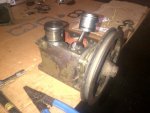
As before, each paragraph corresponds with each picture below. From left to right.

I disassembled, cleaned and reasembled this compressor last year since it came to me seized up from sitting for so many years outside. A hone job and a little rust removal had it back in action, the bottom end and crankshaft roller bearings looked like new. Now that the M211 has a solid 6.2 in it, I thought I would take the time to disassemble this compressor again to make sure it is in tip top shape before going on the 6.2. The compressor will received pressurized oil from the plugged port above the oil cooler lines. I am using the stock M211 in tank fuel pump, and made a blockoff plate to cover up the old hole in the block for the mechanical lift pump. This plate is tapped for a fitting as well, and is where the compressor will drain the engine oil back into the 6.2's oil pan. This also means the oil is run through the 6.2's oil filter before being reintroduced into the oiling system.

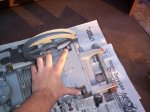
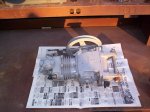
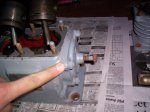
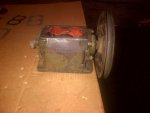
Here is our GMC air pump

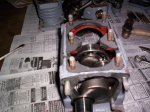
Start by removing the 4 oil pan bolts.

This is what the bottom end looks like.

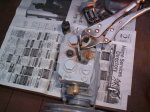
Next remove the air governor by removing the 2 locknuts on top.

Next remove these 2 nuts holding down the metal band.

Remove the band.

Remove the bushings.

Governor removed. Further disassembly is not needed. If it's gummed up, spray it out with brake parts cleaner.

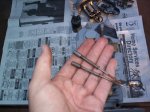
Next remove the two push rods/springs.

The compressor uses studs, not bolts. A bolt applies a twisting force, which means overtime it will stretch depending on how much load it's subject to (engine head bolts for example). Head bolts are TTY (torque to yield) and as such they must be thrown away after each use. Studs are superior for this type of work as they provide a much stronger, more reliable clamping force. A bolt uses the threads to apply clamping force, on a stud the nut is what does all the clamping. Studs are re useable, too! Studs are always installed finger tight only. No need to use vice grips. If they don't install easily, clean your threads with a tap!
 

Attachments

Last edited:
Gunfreak25

Well-known member
1,561
620
113
Location
Yuma, AZ
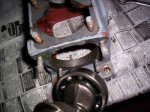
Next remove the 6 nuts securing the head to the cylinder body.

Pry the head off with a screwdriver.

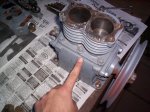
Head removed. No, don't do what I did and put your hand over the cylinder while turning the crank really fast. It sucked my hand down so hard it almost made a circular cut on my palm. :beer:

Next remove the 6 nuts securing the cylinder body to the main block.

Tap tap tap....

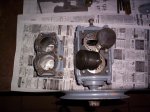
Head removed. NOW REMEMBER THIS. SINCE YOU WILL BE REUSING YOUR PISTONS AND LIKELY THE RINGS AND BEARING SHELLS, MAKE A NOTE ABOUT PARTS ORIENTATION. EVERYTHING MUST GO BACK THE WAY IT CAME APART.

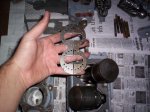
These are the oil splash guards. Put them back the same way they came out for uniformity's sake. The cylinder walls on the GMC compressor are splash lubed by the crankshaft splashing oil onto these perforated plates. When the piston skirt reaches the bottom of it's stroke, it will touch this plate and distribute any oil on it into the cylinder walls. Only the crankshaft is lubricated by pressurized oil. The pistons have oil rings on them with deep grooves which collect this oil to keep things lubricated properly as well.

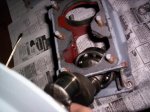
Next remove the right bearing cap by removing the 4 nuts.

Go ahead and remove the cotter pins and castle nuts securing the bearing caps to the connecting rods. REMEMBER ORIENTATION! SCREW THE CAP/NUTS BACK ONTO THE ROD ONCE IT'S REMOVED FROM THE BLOCK.

Now remove the left bearing cap by removing the last 4 nuts.
 

Attachments

Last edited:
Gunfreak25

Well-known member
1,561
620
113
Location
Yuma, AZ
Now the crankshaft can be pulled out. Note the semi circle cutout which aids in removal of the crankshaft.

You will have to play with it a bit, but this picture should help show the orientation of the crankshaft for removal.

Like so.....

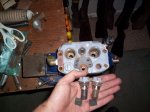
Next take the compressor head to vice and very sturdy table. The large bolts ontop are torqued to over 100 ft lbs and are a BEAR to remove. The bolts each house a spring and small square valve. You will want to clean anything valve related very well to aid in good compression.

Flip the head over and use a 3/8" drive ratchet to remove these square plugs from the bottom of the head. You can also see the reed valves which are staked in place. If the compressor was not building pressure properly this is often the reason why, rust may collect around the valves making for poor compression.

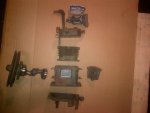
That completes the teardown of a GMC air compressor. Total time spent on disassembly was right at 1 hour with camera work. If your doing this to regain some compression, all you need to do is deglaze the cylinders a bit with a simple brake hone and polish the valves up as best you can. These are built extremely well and are the same exact compressors used on the GMC Furturliners in the 1940's and 50's. Breakdowns very rare but they occasionally need a little TLC, especially if they've been sitting outdoors for 20 years!
 

Attachments

Last edited:
Gunfreak25

Well-known member
1,561
620
113
Location
Yuma, AZ
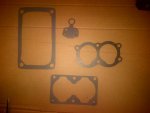
If anyone needs stencils of the compressor gaskets, they will be sent to your mailbox free of charge.
 
Last edited:
Gunfreak25

Well-known member
1,561
620
113
Location
Yuma, AZ
Sweet! Brake Systems Inc still stocks rings, bearings and other parts for this compressor model. The GMC compressor is model N-4119-W. He said the parts book he found it in was old and very dusty. :lol:
 

Gunfreak25

Well-known member
1,561
620
113
Location
Yuma, AZ
Talk about compressors! A few day's ago I just received my mini air brush compressor kit in the mail so I can start spraying gunstock finishes for my customers. I have already torn into it for my own "beef up" mods to make it last as long as possible. Sourced replacement "oiless" piston rings. Quiet as **** and a well built unit for $100.

A day before that I finally got a York 210 in the mail complete with Kilby NPT fittings. It's going on the 6.2 to power the brakes instead of the GMC unit. The York is torn down for a new clutch bearing and new gaskets, seals, oil mod, crankcase vent and a strip down/repaint.

Then tomorrow I am going to check out a 30 gallon belt driven vertical shop compressor so I can start playing with air tool's.

Then in a few minutes I am going to get the pics posted of the wiper motor servicing.
Then I have to finish tapping the 6.2 fuel bowl filter for custom fittings and installing some fuel lines.

Idle hands are the devils workshop. :beer:
 

drlogistics

Member
109
0
16
Location
Lapeer, MI
air compressor rebuild

Here are some pics of my air compressor rebuild. Following gunfreaks advice I cleaned up everything and honed the cylinders to help gain some compression. And I used his scans of the gaskets to make new ones. All I have left to do is some fresh paint.
 

Attachments

drlogistics

Member
109
0
16
Location
Lapeer, MI
I forgot to mention. I used a spade drill bit (wood bit) to make the bolt holes. Worked great. And a lot faster than trying to cut them out.
 

drlogistics

Member
109
0
16
Location
Lapeer, MI
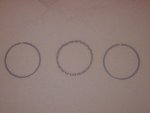
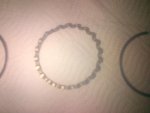
I put new piston rings on my air compressor and I'm having a very hard time getting them back in the cylinders. Before I grab the sledge hammer and start swinging I figured I'd ask for some advice. Made sure they are the correct size rings. Honed out the cylinders. And coated the cylinder walls with oil. Still no luck. Any ideas????
 

Gunfreak25

Well-known member
1,561
620
113
Location
Yuma, AZ
Run a piece of sand paper around the very bottom edge of the cylinders. It should already be beveled for ease of piston installation though. They could be bigger!
 

drlogistics

Member
109
0
16
Location
Lapeer, MI
Piston ring update

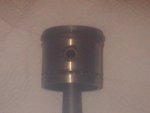
I am still having problems getting my pistons back in the cylinders. I have pin-pointed the problem. It is the new oil rings. I got the new ring set from Brake Systems Inc. (Thanks Gunfreak) I called them and gave them the air compressor model number. They also needed to know the bore size. I told them it was 2 inches. I hope that is right. The new oil rings are a 3 piece unit. 2 rails and an expander ring. I cannot get the pistons into the cylinders when I put both rails and the expander on the piston. But if I remove 1 of the rails the piston goes in just fine. I called Brake Systems Inc. and they suggested that I double check the bore size. I do not have a bore gauge so I just used a pair of calipers. I came up with 2 inches again. Can anyone tell me if that is correct? Also, what do you guys think about just using 1 of the rail rings? Any advice is appreciated. Thanks guys.
 

Attachments

Mastertech

Member
55
0
6
Location
Puyallup WA.
is there anywhere close you can rent or
borrow a set of bore gauges and mics and double check the bore size.
and how much end gap do the compression rings have? that will give you a
clue as to were you are with the bore size and ring set size.
Is
2" a standard bore for those? just a thought
 

drlogistics

Member
109
0
16
Location
Lapeer, MI
Thanks Gunfreak. You're putting a York compressor on yours, right? Any chance you'd be willing to part with the oil rings from your old compressor?
 

Gunfreak25

Well-known member
1,561
620
113
Location
Yuma, AZ
I would be more than happy to give them to you, but one was broken and I actually "micro welded" and shaped it back together. You actually have to look pretty hard to see it was ever broken.

I would reuse your old rings. They do not aid in compression in any way shape or form, their job is just to help distribute oil around the cylinder walls and IMO are really not subject to "wear and replace" like compression rings.
 

klmartin62

New member
18
0
0
Location
Camp Wood, Texas
Sometimes the expander ring is hard to compress when new. I would not reuse old oil rings because the set helps to hold the piston straight in the cylinder. try taking a large hose clamp (pinion type) and using it to compress the oil rings prior to installation.

Another thing, did you use a ring groove cleaner on the piston before installing the rings? If not, there could be carbon built up under the rings that won't let them compress far enough.

If grooves are clean, tighten hose clamp until rings are flush with sides of piston, remove clamp and install piston fairly quickly. If problem persists, install cylinder and use a ring compressor to install piston from the top, being careful not to scratch crank.

On gaskets, I have several pieces of steel tubing that have been ground to a sharp taper that I use with a hammer to cut out bolt holes. Just a thought to save a little time. You can also tap them out with a small ball pien hammer. Anyway,m God bless and good luck.

Leon
 

jzettek

New member
24
3
3
Location
Middleburg, Fl
hi first let me say thanks for you very informative post on the compressor i plan on tearing mine down very soon and would be interested in those gasket templates please. ill let you know how it gos thanks again jim.
 
Top