• Steel Soldiers now has a few new forums, read more about it at: New Munitions Forums!

  • Microsoft MSN, Live, Hotmail, Outlook email users may not be receiving emails. We are working to resolve this issue. Please add support@steelsoldiers.com to your trusted contacts.

how to remove rear drum?

m35a

New member
19
13
3
Location
indianapolis Indiana
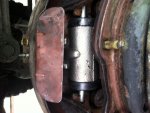
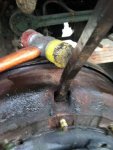
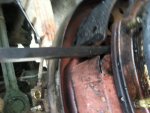
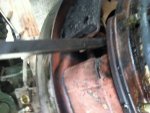
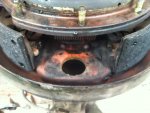
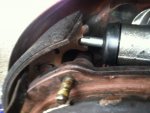
Well, I just had the same problem with my A2, the TMs and everybody else said I had to remove and axle, I also spent alot of time reading prior posts to see if any tricks were out there. I don't know everybodys set up and I know there is a wide range of differances. I just changed my wheel cylinders without removing axles or any other other big maintenance. I jacked the entire backend of the truck so all the wheels were off the ground. To get my drum off I set the brake shoes all the way down via the adjustments on the backside of the brakes/housing. After removing the bolts that hold the drum on I took a prybar and placed it in the square hole of the brake drum. I then took a hard plastic surface hammer and beat it against the prybar (outwards) and rotated the drum. Once the drum was somewhat in a bind I took a sledge hammer and hit the face of the drum opposite the square hole and it came off with ease. After disconnected and removing the bolts and line to the master cylinder I took a prybar and wedged it between the brake shoe and the axle housing and moved the shoe outwards and was able to remove the mastercylinder and reinstall a new one. I was super easy and I didn't have a mess or extra work to do. I still have one left to do, if anybody would like I can take pictures of the process and post them.
 

welldigger

Active member
2,602
15
38
Location
Benton LA
Well, I just had the same problem with my A2, the TMs and everybody else said I had to remove and axle, I also spent alot of time reading prior posts to see if any tricks were out there. I don't know everybodys set up and I know there is a wide range of differances. I just changed my wheel cylinders without removing axles or any other other big maintenance. I jacked the entire backend of the truck so all the wheels were off the ground. To get my drum off I set the brake shoes all the way down via the adjustments on the backside of the brakes/housing. After removing the bolts that hold the drum on I took a prybar and placed it in the square hole of the brake drum. I then took a hard plastic surface hammer and beat it against the prybar (outwards) and rotated the drum. Once the drum was somewhat in a bind I took a sledge hammer and hit the face of the drum opposite the square hole and it came off with ease. After disconnected and removing the bolts and line to the master cylinder I took a prybar and wedged it between the brake shoe and the axle housing and moved the shoe outwards and was able to remove the mastercylinder and reinstall a new one. I was super easy and I didn't have a mess or extra work to do. I still have one left to do, if anybody would like I can take pictures of the process and post them.
I'm kinda lost as to how you removed the drum without pulling an axle shaft and removing the spindle nut?
 

sandcobra164

Well-known member
2,999
289
83
Location
Leesburg, GA
I'd love to see pics of that as well. I thought I got lucky when I got a pallet jack to remove the dual's and hub as a unit. If I can replace the wheel cylinder without having to take the wheels off the truck, it should be about a 15 minute job a corner. I think he did what most of us do, he just didn't articulate what he was trying to say very well. None of us pull an axle to do a brake job. We ALL pull an axle shaft and pull those 3" 8 sided nuts. I would like to see someone pull one that hasn't!!!!
 

Katahdin

Active member
1,303
24
38
Location
Scarborough, ME
I think the method m35a is describing involves UN-threading the 10 nuts that afixes the drum to the hub. Those of us that pull the axle shaft do not remove those 10 nuts, so the hub AND drum slide off as one piece.
 

doghead

4 Star General /Moderator
Staff member
Super Moderator
Steel Soldiers Supporter
26,246
1,177
113
Location
NY
As is the case most of the time, a look at the TM will get you answers(with a tiny bit of common sense).

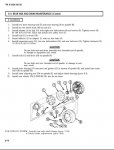
The bolts are safety wired together. So while technically you can get away with what the OP did, you probably should not count on it since the wire is not really good for holding the bolt during a full torque when tightening. Also, just the wire tension is keeping the bolts from pushing in like this.
 

Attachments

Last edited:

doghead

4 Star General /Moderator
Staff member
Super Moderator
Steel Soldiers Supporter
26,246
1,177
113
Location
NY
The reason he needed to beat on it was, the safety wire is pulling the heads of the bolts toward the center. This makes the threaded portion of the bolts spread out(in diameter).
 
Pretty slick how the gubberment had the rear axles set up to go dual or single at the flip of a hub. When I bobbed my deuce, I flipped the rear hubs after I changed out the rear suspension over to the leaf springs. I studied the "How to" section of XM381.com at length and read that a rear hub flip takes about 3 hours. That must be for "Soldier A" by himself doing all 4 rear hubs for super-singling because I got the first side done in 20 minutes and the second side done in 15. Before I scrapped out the tag axle, I scavenged the axle shafts, hubs/drums, and all brake hardware in case I need them, but if someone needs any of my spare parts, I could use a new (or good used) pair of windshields with inner frames if someone has a pair and wants to trade. Shoot me a PM if you're interested.
:driver:
 

welldigger

Active member
2,602
15
38
Location
Benton LA
As is the case most of the time, a look at the TM will get you answers(with a tiny bit of common sense).

The bolts are safety wired together. So while technically you can get away with what the OP did, you probably should not count on it since the wire is not really good for holding the bolt during a full torque when tightening. Also, just the wire tension is keeping the bolts from pushing in like this.
This is exactly why his post was confusing me. I concur that his method is probably not the best one to use. Besides, pulling the hub forces you to inspect bearings and seals.
 

m35a

New member
19
13
3
Location
indianapolis Indiana
No safety wire was harmed or involved in this method. When I had mine apart, I didn't see any safety wire what so ever. I never said the reason I needed to "beat" on the drum, but to eliminate the assumptions, it was due to the drum not coming off square. There is only one inspection hole on the drum to stick a pry bar into which causes the drum to tilt as its coming off, also there was a lot of paint/dirt that has accumulated and needs to be knocked off, thats why I had to "beat" or hit the drum with a hammer. I also assumed everybody knew I was talking about this method with the wheels off. Anyway, pics are next
 

gringeltaube

Staff Member
Super Moderator
Moderator
Steel Soldiers Supporter
6,983
2,518
113
Location
Montevideo/Uruguay
No safety wire was harmed or involved in this method. When I had mine apart, I didn't see any safety wire what so ever. .................
Correct: there is no safety wire provision on those 10 bolts/ nuts holding the drum to the adapter.
Not correct: that figure in post#25. That adapter (1) belongs to the front drum & hub assembly.


G.
 

Attachments

Last edited:

doghead

4 Star General /Moderator
Staff member
Super Moderator
Steel Soldiers Supporter
26,246
1,177
113
Location
NY
Are the bolts loose in the holes of the adapter, or are the studs?
 

m35a

New member
19
13
3
Location
indianapolis Indiana
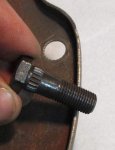
It does have a head, it's round though, kinda like a hilock fastner or regular wheel stud, there was no hex and the shaft is splined like the one in the picture you provided
 

w3azel

Member
229
0
16
Location
Waipahu/HI
I'm all excited to work on the truck and get things going. I read threads like this and think I need to do that to my truck, dang that's going to suck and break my back, UGH. The price of owning an awesome big truck.
 

Heath_h49008

New member
1,557
102
0
Location
Kalamazoo/Mich
That is interesting! A stud wouldn't have a head, so how is the deflector held in place?
Older model Deuces at least, all have what is pictured below....


G.
Some people consider those to be "studs," as in "Lug Studs," because they are retained by knurling.

I believe you are both talking about the same thing.
 

Kwaligura

Member
Steel Soldiers Supporter
98
1
8
Location
Adena, Ohio
Center punch the backing plate close to the edge. Drill a hole that you can thread 1/4" pipe plug later. Take the nuts off holding the drum on. Then use a hammer and punch to knock the drum loose. Rotate it a quarter turn with every whack. Comes off really easy. Do what you need to and thread hole for plug. Install plug and put the drum and nuts back on then adjust the shoes.
 
Top
AdBlock Detected

We get it, advertisements are annoying!

Sure, ad-blocking software does a great job at blocking ads, but it also blocks useful features of our website like our supporting vendors. Their ads help keep Steel Soldiers going. Please consider disabling your ad blockers for the site. Thanks!

I've Disabled AdBlock
No Thanks