- 2,677
- 8,648
- 113
- Location
- Alexandria, La
I had to change my transmission on the deuce and threatened to write this....
How to change a transmission.
First, let me say I am not a mechanic by trade. I am mechanically inclined, but by no means do I do this for a living. This is the way I did it, and I'm sure there are a million others ways. This was the easiest for me.
I also want to thank my friends JB & Mike Seeling and Dennis Lawbrey for their time and allowing me to pick their brains!
I put it in a step by stem format because I find that the easiest to follow.
OK, here we go:
Task: Changing a deuce transmission.
Approximate time 6-8 hours. I am making the assumption you have already diagnosed you need a new transmission and have it on hand.
Tools used:
One (1) VERY good friend.
Two (2) 7/8 Combination wrenches.
Two (2) 3\4 Combination wrenches
One (1) 5/8 Combination wrench
One (1) 11/16th Combination wrench
One (1) 9/16th Wrench and socket
One (1) 7/16th Wrench and socket
One (1) Wire come-a-long 5k lifting capacity
Two (2) short 3/8 chains
One (1)Metal pole approximately 10 feet long minimum ¼” thick sides.
Approx. one (1) gallon 90 weight gear oil.
One (1) 5 gallon bucket.
One (1) small hammer
One (1) Crow bar
Difficulty: Medium (because of the weights involved and stabbing the transmission in).
Step 1: Place your deuce on level ground and chock the wheels. Put your transmission AND transfer case in neutral.
Step 2: Using your 7/16th socket remove the transmission covers from the floor of the cab.
Step 3: With your 5/8th and 11/16th wrenches, remove your gear shifter.
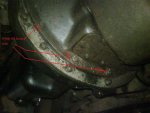
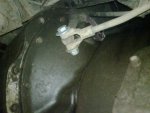
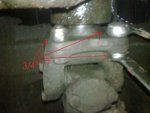
Step 4: From under the truck using your ¾ wrenches you will remove the output shaft on your transmission. This can be tricky. The bolts and nuts are ¾, but you can't get a socket on them due to the lack of clearance (See output shaft picture “A”). You will also run into a leverage problem. For the front part of the output shaft I ended up putting the end of one of my ¾ wrenches on top of the brake master cylinder and double wrenching the other ¾ with a 7/8th to get enough leverage. (See “Double Wrench Output Shaft Picture”), on the rear, I braced against the transfer case. Remove all 8 bolts and remove your output shaft. The reason you put your transmission and transfer case in neutral is because it will allow you to spin this shaft by hand to maneuver the bolts into the optimal position for removal. If your transmission is fubarred and will not do this, have your friend push the clutch to allow you to move it.
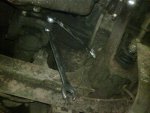
Step 5: Unhook your clutch linkage from the pivot of the transmission and your petal shaft. (See “Clutch Linkage” pic). Your clutch linkage probably has a pin in it instead of a bolt. If this is the case, put a screwdriver on the outside of the pin with the lip and tap with a hammer. It should pop out far enough for you to remove the linkage rod. DO NOT HIT IT TOO HARD! There is a spring returned ball bearing holding the pin in place and you can knock it out).
Step 7: Remove the 9/16th lower bell housing bolts. Our trucks have adapter plates on them. The bolts to remove are the inner bolts holding the housing, not the outer bolts holding the adapter plate. (See pic Bell Housing Adapter Plate Bottom).
Step 8: Using your 3/4” wrenches, remove the rear side of the front drive shaft and move it out of the way.
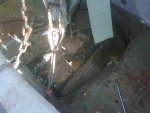
Step 9: From the cab, assemble your lifting gear. With your doors closed, place the metal pole across the doors of your truck. One chain will be used to hold your come-a-long to the pole and the other bolt to the top of the transmission in a top right to bottom left configuration. Make it tight as you have to have clearance to raise the transmission. (See Picture “Lifting Device”.)
Step 10: Remove the remaining bolts from the transmission housing.
Step 11: With a friend below raise the transmission and have him use the pry bar to move the transmission to the rear of the truck to unseat it. Be careful not to damage your clutch plate ans ensure he does not get under the transmission itself as this poses a crush hazard!
Step 12: Lower the transmission to the ground.
Step 13: Slide old transmission out and new transmission into place.
Step 14: Raise new transmission into place and seat.
Step 15: Reverse the steps 2 through 10 to install your new transmission.
Step 16: Remove the drain plug from the rear bottom of your transmission and allow it to drain completely into the bucket. Reinstall drain plug. Remove the fill plug from the drivers side and fill with 90w gear oil until it seeps. Reinstall the fill plug.
Step 17: Adjust your linkage until you have approximately 2” of play in your clutch.
Step 18: Double check all bolts etc for tightness, call it a day and buy your buddy a case of beer.
REMEMBER: SAFETY IS PARAMOUNT! USE PPE IF POSSIBLE AND DO NOT TAKE CHANCES! THESE TRUCKS CAN KILL OR SERIOUSLY INJURE YOU!
Attachments
-
59.4 KB Views: 284
-
67.6 KB Views: 276
-
74.9 KB Views: 290
-
62 KB Views: 305
-
50.4 KB Views: 283


