• Steel Soldiers now has a few new forums, read more about it at: New Munitions Forums!

  • Microsoft MSN, Live, Hotmail, Outlook email users may not be receiving emails. We are working to resolve this issue. Please add support@steelsoldiers.com to your trusted contacts.

Instrument panel mods

steelandcanvas

Well-known member
6,187
85
48
Location
Southwestern Idaho
I did the same things Runk did, and improved my the lighting of the gauges greatly. While I had gauge panel apart for cleaning and replacing a gauge, I blasted the back of the panel and painted it white. Doing this reflects alot of light back into the gauges. A very cheap trick.
 

sp00n

Active member
162
26
28
Location
Huntsville, AL
I don't have any covers, gaskets, or rear firing lights on the panel.

When its warm enough to paint I'll try the top cover method.


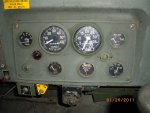
My panel looks like this-
 

Attachments

rrrr

Member
752
0
16
Location
Missouri
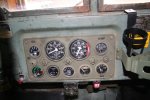
Well I finally got my panel done. Just need to wire in the parking brake light is all. Here it is !

I added an extra instrument light, parking brake light, pyro and boost gauges.

The instrument lighting for the pyro and boost gauge is done in series so its tied in with the instrument light switch. Works very well ! I added a 24 to 12v converter for the 12v power for the k type pyro probe and an accessory adapter. I'm very pleased with the outcome. Lots of work but worth it.
 

Attachments

Last edited:

M35A2-AZ

Well-known member
Steel Soldiers Supporter
3,221
392
83
Location
Tonopah, AZ
Well I finally got my panel done. Just need to wire in the parking brake light is all. Here it is !

I added an extra instrument light, parking brake light, pyro and boost gauges.

The instrument lighting for the pyro and boost gauge is done in series so its tied in with the instrument light switch. Works very well ! I added a 24 to 12v converter for the 12v power for the k type pyro probe and an accessory adapter. I'm very pleased with the outcome. Lots of work but worth it.

Looks great!!![thumbzup]
 

Seth_O

Member
625
7
18
Location
Sac CA
I like the idea of painting the back of the gauge panel. I installed brighter bulbs, and drilled small holes in the red plastic casing behind the covers, all the way around the circumfrence, one every 1/16" or so. That REALLY brightened things up.
 

Darwin T

Active member
1,185
10
38
Location
Port Arthur, Texas
you did great work. [thumbzup] there was a guy on here robr who was making instrument panels and wider transfer case air shift holder that was real nice. i think his post was something like "custom deuce parts". i think someone said he sold his truck and got out of the business. :cry:

i put clear green light covers on my instrument lights and this does not blind me, but does give me enough light to see in the cab at night. the high beam and low air pressure lights are red to get me attention. i just bought led replacement bulbs for my dash, but i have not installed them yet. they came in white, red, green and yellow, i bought the white because i had the color covers already and could place the bulbs in any slot that way.
 

Attachments

rrrr

Member
752
0
16
Location
Missouri
I did paint the back of my panel white in addition to adding another instrument light, it is now very bright at night !

You've got to have a cup holder !
 

rrrr

Member
752
0
16
Location
Missouri
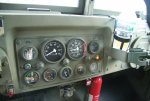
I changed out the high beam indicator for a modern type. The panel is now done. I'm very happy with the results. It was a lot of work but worth it.
 

Attachments

eagle4g63

Well-known member
1,544
34
48
Location
North/west Indiana
Ok, I have to ask. Did you cut and weld in new metal to get them in there or did you start with a panel from a different truck. The original deuce panel has the two bottom holes a little too close to fit a center one in there like you have. I have been really wanting to do the same thing you did with 5 gauges along the bottom just wasn't sure how I was going to go about it.
 

rrrr

Member
752
0
16
Location
Missouri
I got an extra stock deuce panel and cut and filled the instrument holes. I kept my old one just in case !
 

eagle4g63

Well-known member
1,544
34
48
Location
North/west Indiana
Cool, I did read you were keeping your original. Just wasn't sure about the hole spacing. Looks like I am going to have to do some welding!!! I even contemplated just starting from scratch, my buddy has a bead roller at the shop. I guess I have to figure out what would take less time!!


P.S. you did a great job with it!
 

srodocker

Well-known member
6,549
69
48
Location
Lacey, Washington
great pics guys cant wait to get mine worked on.

what are the sizes of the holes? im going to add another volt guage and boost hopefully
 
Last edited:

Welder Sam

New member
1,430
6
0
Location
Glendale, Arizona
What have some of you come up with for cluster lighting for night time excursions? The two red bulbs do an excellent job of blinding me and make it harder to see the gauges in the dark. My current solution is a roll of duct tape in the seat with a flashlight sitting atop of that pointed at the gauges. Not exactly high tech.
i use clear filter caps in mine. it does great! the ones from hmmwv panels are longer that ours by about 1/4" tho. i backspaced my sockets with 2 #8 nuts and longer screws on each side. still thinking of adding another in the center(i have at least 15 sockets and 20+ red caps of different styles)
 
Top
AdBlock Detected

We get it, advertisements are annoying!

Sure, ad-blocking software does a great job at blocking ads, but it also blocks useful features of our website like our supporting vendors. Their ads help keep Steel Soldiers going. Please consider disabling your ad blockers for the site. Thanks!

I've Disabled AdBlock
No Thanks