• Steel Soldiers now has a few new forums, read more about it at: New Munitions Forums!

  • Microsoft MSN, Live, Hotmail, Outlook email users may not be receiving emails. We are working to resolve this issue. Please add support@steelsoldiers.com to your trusted contacts.

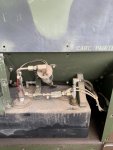
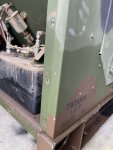
Is this a well nut leak , or ?

Leonardo82nd

Active member
Steel Soldiers Supporter
118
70
28
Location
Edinburg Texas
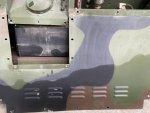
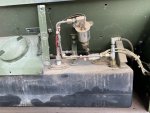
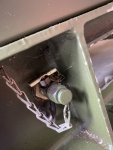
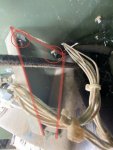
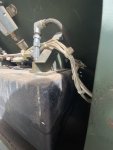
Is this a well nut leak or , is there an issue with the tank it self . The area around the well nut still had dust around it .
 

Attachments

Leonardo82nd

Active member
Steel Soldiers Supporter
118
70
28
Location
Edinburg Texas
The Well Nut that leaks is in the engine bay where the drain line is hooked up to the tank.
Based on your pics I'd say that's what's leaking, the fuel is running under the tank and wicking up the sides of the tank.
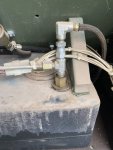
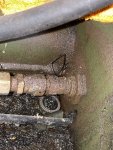
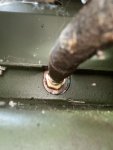
Ok great ! is this the well nut that we are talking about ? If so , is the easiest way to replace it from the inside of the engine bay
 

Attachments

Leonardo82nd

Active member
Steel Soldiers Supporter
118
70
28
Location
Edinburg Texas
That's not the well nut. The well nut is at the other end of that hose where it attaches to the backside of the fuel tank.
It's can be see here below the oil filter and the yellow butterfly valve for draining the crankcase.

Oodles of good info here ---> Ultimate Well Nut Info

View attachment 850139
Ok I see it ,I will check out that thread also .
so do i have to remove the inside panel to replace it or the entire tank? Is it the same type of well nut as the one inside the fuel tank area . I have a spare
 

Attachments

Leonardo82nd

Active member
Steel Soldiers Supporter
118
70
28
Location
Edinburg Texas
That's not the well nut. The well nut is at the other end of that hose where it attaches to the backside of the fuel tank.
It's can be see here below the oil filter and the yellow butterfly valve for draining the crankcase.

Oodles of good info here ---> Ultimate Well Nut Info

View attachment 850139
Ok I see it , so I’d have to remove the inside panel to replace it ? Is it the same type of well nut as the one inside the fuel tank area . I have a spare for that .
That's not the well nut. The well nut is at the other end of that hose where it attaches to the backside of the fuel tank.
It's can be see here below the oil filter and the yellow butterfly valve for draining the crankcase.

Oodles of good info here ---> Ultimate Well Nut Info

View attachment 850139
Ok I see here, he did it without removing much
http://www.steelsoldiers.com/showth...HOUT-tearing-apart-your-generator!&highlight=
 

Daybreak

2 Star Admiral
Steel Soldiers Supporter
1,522
771
113
Location
Va
Howdy,
The MEP-802A has 2 well nuts. 1 on top of the tank from your first posting, and inside by the 1/4 turn valve for oil draining.
The MEP-803A has 2 well nuts. 1 on top of the tank from your first posting, and outside which you show in post #3

All the junk collection appears to be from a oil change, filter change, and fuel filter changes. No one cleaned up the mess when it got down and around the battery boxes.

While you have the front panels off by the fuel tank. A few things to accomplish. Change out all the fuel returns lines. Replace all well nuts. Either with the original A3816 well nuts, or the brass bulkhead well nut. The top well nut could be a source for a leak if the fuel tank is topped off to the brim. You also have a rubber connection sleeve between the tank fill, and the tank itself which kinda breaks down over time.

start in this thread.
MEP-802A MEP-803A Filters and Parts | SteelSoldiers
the 2nd post has quick links to the things you seek.
 

jamawieb

Well-known member
1,437
556
113
Location
Ripley/TN
Ok I see it ,I will check out that thread also .
so do i have to remove the inside panel to replace it or the entire tank? Is it the same type of well nut as the one inside the fuel tank area . I have a spare
You dont need to remove the tank. Just push the tank over to center the hole in the panel and well nut. Then take the well nut out and put the new in. Your unit looks new, you may get lucky and just have to tighten it. DO NOT over tighten. It takes just a little pressure to seal the well nut.
 

Leonardo82nd

Active member
Steel Soldiers Supporter
118
70
28
Location
Edinburg Texas
You dont need to remove the tank. Just push the tank over to center the hole in the panel and well nut. Then take the well nut out and put the new in. Your unit looks new, you may get lucky and just have to tighten it. DO NOT over tighten. It takes just a little pressure to seal the well nut.
Ok thank you for that . one more clarification, so the tank will move a little (to the side or out?) without removing any additional hardware ?
 

Light in the Dark

Well-known member
Steel Soldiers Supporter
3,829
5,949
113
Location
MA
The tank has a little wiggle room, but there is a hold down pad from the radiator sheet metal, that if you had the rear cover pulled.. you could loosen to make your life easier.
 

jamawieb

Well-known member
1,437
556
113
Location
Ripley/TN
Ok thank you for that . one more clarification, so the tank will move a little (to the side or out?) without removing any additional hardware ?
Since you have the back cover off you should be able to slide it over just alittle to line up. There is a pressure hold down on top near the aux pump you may have to loosen but thats it.
 

Leonardo82nd

Active member
Steel Soldiers Supporter
118
70
28
Location
Edinburg Texas
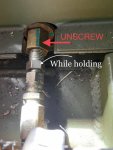
If you have trouble with the well nut spinning as you tighten it, I always file a small notch in the outer edge of the large copper colored washer, then you can use a screwdriver to hold it from spinning....
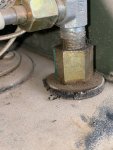
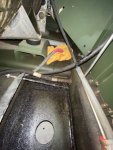
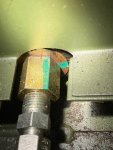
Is this the washer that you file a notch in ?
also , what does loosening this pad on top of the tank help with ? im confused about the “centering” directions.
 

Attachments

Ray70

Well-known member
2,595
5,914
113
Location
West greenwich/RI
Yes, that copper plated washer behind the well nut is what I cut the notch in.
Loosening the tank brackets will allow you to slide the tank over a little to help center the washer in the opening.
You can still change it even with it off-center, but it's easier if you can get it more centered so you aren't bumping against the sheetmetal as you remove it.
 
Top
AdBlock Detected

We get it, advertisements are annoying!

Sure, ad-blocking software does a great job at blocking ads, but it also blocks useful features of our website like our supporting vendors. Their ads help keep Steel Soldiers going. Please consider disabling your ad blockers for the site. Thanks!

I've Disabled AdBlock
No Thanks