• Steel Soldiers now has a few new forums, read more about it at: New Munitions Forums!

  • Microsoft MSN, Live, Hotmail, Outlook email users may not be receiving emails. We are working to resolve this issue. Please add support@steelsoldiers.com to your trusted contacts.

Jobsite Assault Vehicle

Strong50

Member
98
3
8
Location
Cape Girardeau MO
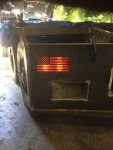
Today was productive. Got all the wiring done/extended for the break lights, running lights, and reverse lights. The break lights will still need some tweaking. You can notice the bulbs behind the acrylic. This was translucent Red Acrylic that I was told would disperse the light and illuminate equally, well they lied. It still looks good, but if someone has any ideas, please let me know. IMG_2295.jpgView attachment IMG_2296.MOV

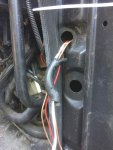
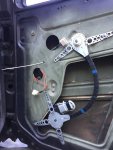
Imoved on to the power window set up. I bought a cheap two window kit off of Amazon and started installing it. Everything went smoothly, I was impressed. The toughest part is getting the wires through the door. I kind of wussed out and decided just to run the wires from window to window across the defroster by the windshield then down through the door following the running light wire on the doors. I cut the factory connectors off the window wires and fed them through the same plastic. This is a long shot, but would anyone have a lead on new plastic pieces that the wire goes through? Looks like mine have seen better days. Thank you


piece as the running light wire. IMG_2298.jpgIMG_2299.jpgI hooked it up to an old car battery and it goes up and down. I need to spray all the moving parts with silicone or WD40 and it will work just fine. There is plenty of room for the window to pass behind the window motor.
 
Last edited:

Strong50

Member
98
3
8
Location
Cape Girardeau MO
thank you. I'm hoping to get my center running light back from the laser cutter this week. I'm super excited to get it put on. I'll post pictures as soon as that happens.
 

Strong50

Member
98
3
8
Location
Cape Girardeau MO
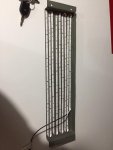
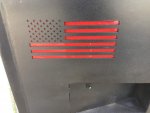
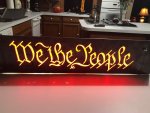
Sooo. I hated my break lights because there was little i could do to diffuse the light. So i decided to trial and error a couple different designs. Here is my center running light, it finally works right. I used some LED strip lights off the interweb and hooked it up to 12v power and it looks good. I'm going to weld it on underneath the gooseneck ball above the pintle. image3.jpgimage1.jpgimage2.jpg
 

yertnamreg

Member
92
21
8
Location
Houston TX
Those LED strips may or may not last outside on your truck. Have you tried sand blasting the acrylic? That ought to help with the diffusion. If that doesn't do the trick, you could apply a reflective foil on the back of the acrylic and try shining light through the edge of the material. This is how TV's and computers screens are lit.
 

Strong50

Member
98
3
8
Location
Cape Girardeau MO
Those LED strips may or may not last outside on your truck. Have you tried sand blasting the acrylic? That ought to help with the diffusion. If that doesn't do the trick, you could apply a reflective foil on the back of the acrylic and try shining light through the edge of the material. This is how TV's and computers screens are lit.
This LEDs were designed for use as underglow lights for cars and such, so I'm hoping to at lease get a couple years out of them.

I tried edgelighthing the acrylic, however the light did not transfer through to the middle as well i would have liked?

Could you please explain "sandblasting the acrylic" I don't think i could use my sandblaster on it. seems like i would tear it apart.
 

Strong50

Member
98
3
8
Location
Cape Girardeau MO
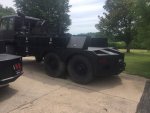
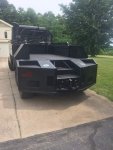
Finally done with the exterior of the Jobsite Assualt Vehicle. I need to paint the rear ended, but the rest has two coats of lizard skin. The Air assisted Pintle hitch pulled 41,000 LBS on our last equipment move. 8B3F3628-7820-4774-B6E5-A925843889CF.jpg 8B3F3628-7820-4774-B6E5-A925843889CF.jpgE6BE9F39-55F2-4D26-AF00-FF58D42AFBE1.jpgF964D5D5-FD1F-4E23-854B-73A34D493CBD.jpg0B49A67D-E651-4BEE-AF1B-0322D53AE8E3.jpg44AE6E9B-D099-4FDA-B606-2066221A7535.jpg
 

Strong50

Member
98
3
8
Location
Cape Girardeau MO
Looking good sir! Every conceivable hitch including a goose neck ball I believe... wait is there no 1 7/8ths on there? ;-)
Yes, the gooseneck ball is rated at 30K and sits at the same height as my pickups. The drop hitch is at the same height as my trucks too. I figure if I can hook up with them then i'd be able to kooh it up too. Kind of funny but I have a 8' hydraulic manlift trailer and pulled it with the m1088 and it looked really small
 

Strong50

Member
98
3
8
Location
Cape Girardeau MO
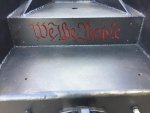
Got the rest of the bed painted over the weekend. Put in the break lights and running lights. Added the triangle tool boxes for standard and metric. Put in the transfer fuel tank, pump, and 24’ hose. I don’t have my seats yet, but a Milwaukee tool box works for now.

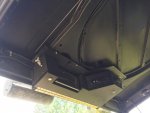
I have an issue now, a piece of metal fell over at the shop and hit the auxiliary cooler next to the spare tire and put a small hole in it. Does any one have any experience with repairing radiators? What did you use? Thank Quinn


FA1EF4B2-44DD-4AF5-AF54-099A998F9545.jpg284E76B8-4AAC-47D4-B4F2-FCB374F09C17.jpg59D2E277-565B-468E-8324-739CE62DCB0C.jpg
 

coachgeo

Well-known member
5,130
3,453
113
Location
North of Cincy OH
..... I have an issue now, a piece of metal fell over at the shop and hit the auxiliary cooler next to the spare tire and put a small hole in it. Does any one have any experience with repairing radiators? What did you use? .....
Just pull it and take ito a radiator shop. Not worth try a permanent field repair and springing a leak...... cooking that massively expensive twice over transmision.
 

Strong50

Member
98
3
8
Location
Cape Girardeau MO
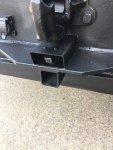
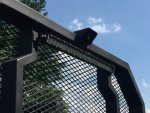
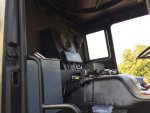
This afternoon was good. Installed both reverse cameras to the monitor in the over head console. The camera mounted to the headache rack is the rear view camera. The camera between the hitches kicks on in Reverse. 4A35B1BA-E929-4824-BBD6-1F76EC880465.jpg8CCA4851-AE61-4720-B873-3712DCF5C7F1.jpgF7C55E9C-EA77-40AF-B94F-1E2A07A235C1.jpg

Got the polycarbonate installed in the tail lights and the center running light.
0D695747-5D75-4467-AC71-687DDD5ACDFA.jpgD694D5D3-5191-435C-A5EC-9DB19EE268D9.jpg

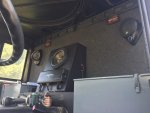
Then wired up the new 10” sub and box and new 6.5” component speakers. It will be nice when everything is done.
C00A5ED3-2FEF-451C-81C5-E171675A7AB8.jpg7C9ECAA0-5925-4AB0-85AB-BD472ACDEC33.jpg
 
Top
AdBlock Detected

We get it, advertisements are annoying!

Sure, ad-blocking software does a great job at blocking ads, but it also blocks useful features of our website like our supporting vendors. Their ads help keep Steel Soldiers going. Please consider disabling your ad blockers for the site. Thanks!

I've Disabled AdBlock
No Thanks