goldneagle
Well-known member
- 4,540
- 1,073
- 113
- Location
- Slidell, LA
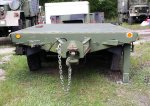
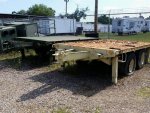
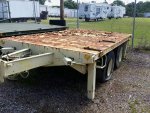
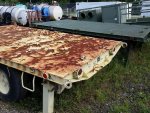
Juan and I purchased 2 XM1073 trailers from GSA last month. When we went to recover the trailer we found out that the rear stabilizer jacks were damaged. Both jacks had the retainer pin assembly sheared off. The retainer pin assemblies were nowhere to be found. We had to secure the jack in the up position with some chains we had with us. Here is a picture of the trailer after recovery:

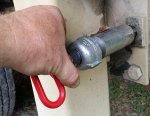
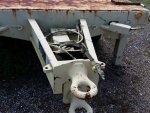
I promised Juan i would repair the 2 jacks by fabricating replacement pin assemblies. I used one of the front assembly as a model for the replacement assemblies. Here is a close up of the pin assembly as it should look:

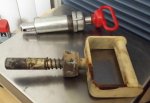
Here is a picture of the pin assembly disassembled from the tube:

Since the shaft on the original pin assembly was machined down to accept the spring I had to modify the design for off the shelf parts. Instead of machining down the 1" hitch pin I bought , in order to match the original assembly, I opted to go one size bigger and add to the 1" hitch pin. By adding a 1" diameter gas pipe to the 1" hitch pin i could make a similar assembly. Here are pictures of the raw materials:
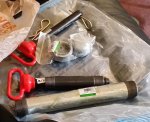

What I did was drill out a 1" hole in a gas pipe 1-1/4" cap. I slipped the cap on to the 1" hitch pin. I them installed the compression spring on the 1" hitch pin. I then cut a piece of 1" gas pipe into 2 lengths. I installed the 1" gas pipe piece over the 1" hitch pin with the cut end first. Here is a picture of partial assembly:


Once I get the 1" gas pipe in the right position I will weld it to the 1" hitch pin. Then it will function like the original assembly (just a bit fatter)
I then cut 2 pieces of 1-1/4" galvanized gas pipe into (2) 4-1/2" lengths with one ended still thread. I then slid the 1-1/4" pipe pieces over the 1" gas pipe already installed on the hitch pin. Here is a picture after i installed the pipe:

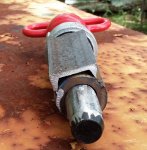
Here is how the pin assembly looks after the cap is screwed on to the 1-1/4" gas pipe:
I still have to install a grease zert and an end cap with 1" hole drilled into it. The end cap will be made from 1/8" steel plate cut and welded to the end of the 1-1/4" gas pipe. It will have a 1" hole in the center.

I promised Juan i would repair the 2 jacks by fabricating replacement pin assemblies. I used one of the front assembly as a model for the replacement assemblies. Here is a close up of the pin assembly as it should look:

Here is a picture of the pin assembly disassembled from the tube:

Since the shaft on the original pin assembly was machined down to accept the spring I had to modify the design for off the shelf parts. Instead of machining down the 1" hitch pin I bought , in order to match the original assembly, I opted to go one size bigger and add to the 1" hitch pin. By adding a 1" diameter gas pipe to the 1" hitch pin i could make a similar assembly. Here are pictures of the raw materials:


What I did was drill out a 1" hole in a gas pipe 1-1/4" cap. I slipped the cap on to the 1" hitch pin. I them installed the compression spring on the 1" hitch pin. I then cut a piece of 1" gas pipe into 2 lengths. I installed the 1" gas pipe piece over the 1" hitch pin with the cut end first. Here is a picture of partial assembly:


Once I get the 1" gas pipe in the right position I will weld it to the 1" hitch pin. Then it will function like the original assembly (just a bit fatter)
I then cut 2 pieces of 1-1/4" galvanized gas pipe into (2) 4-1/2" lengths with one ended still thread. I then slid the 1-1/4" pipe pieces over the 1" gas pipe already installed on the hitch pin. Here is a picture after i installed the pipe:

Here is how the pin assembly looks after the cap is screwed on to the 1-1/4" gas pipe:

I still have to install a grease zert and an end cap with 1" hole drilled into it. The end cap will be made from 1/8" steel plate cut and welded to the end of the 1-1/4" gas pipe. It will have a 1" hole in the center.


