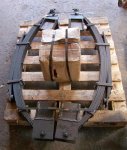
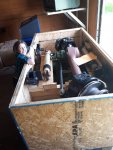
Yes, it is a "light duty" Freightliner suspension, rated for 40,000 pounds. The heavy duty is 46,000 pounds. I am swapping the air bags to ones from a bus to get the higher travel and hopefully a better ride. OEM was 5.2 inches of travel with a ride height of 2.67" and only external bump stops. The new bags have a compressed height of 6 inches with a built in bump stop and can fully extend to 15.5 inches. My axles are 5 1/2" O/D so I am hoping to be able to remove the frame mounted bump stops. So theoretically if I have things figured out right I should have a effective ride height of 5 - 6" above the stops; more then double the OEM and with a bag designed for comfort instead of load hauling.I saw that and asked myself.....a WHAAAT? A Colombia, then I googled it......That's a Freightliner suspension.
Sassy....Does that 9" air bag mean you'll be able to squat the back end down the full 9"?
-
Steel Soldiers now has a few new forums, read more about it at: New Munitions Forums!
letssleds M-135 Project
- Thread starter letssled
- Start date

More options
Who Replied?rustystud
Well-known member
- 9,361
- 3,262
- 113
- Location
- Woodinville, Washington
Actually bus air-bags are "cargo" bags. They really are not designed for comfort at all. That has more to do with the amount of air your using. The German MAN busses had a "special" valve (brake force regulator) that used ride height and brake force to control the air-bags volume. It was a complicated device that needed constant adjustment. I really hated having to deal with it and honestly I don't believe the ride was any better then any other bus we had. I do know that no bus since has that "device" on them.Yes, it is a "light duty" Freightliner suspension, rated for 40,000 pounds. The heavy duty is 46,000 pounds. I am swapping the air bags to ones from a bus to get the higher travel and hopefully a better ride. OEM was 5.2 inches of travel with a ride height of 2.67" and only external bump stops. The new bags have a compressed height of 6 inches with a built in bump stop and can fully extend to 15.5 inches. My axles are 5 1/2" O/D so I am hoping to be able to remove the frame mounted bump stops. So theoretically if I have things figured out right I should have a effective ride height of 5 - 6" above the stops; more then double the OEM and with a bag designed for comfort instead of load hauling.
Well, I have been bogged down with some small stuff, but none the less here is where I am at. Engine will be picked up later this week. Fender and grill spacers are modified and roughed in place. Building my mounting brackets and getting my rad, oil cooler, A/C condenser being built.
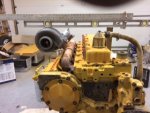
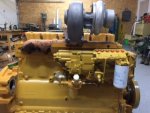
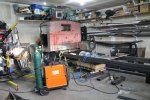
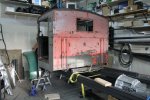
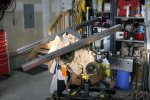
Picture:
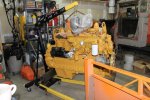
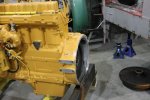
1 and 2: Here is my motor rebuilt. 300hp and 1100ft pounds of beast! line bored, new bearings, sleeves, pistons, pump and turbo. Also upgraded it to the rollar cam.
2 and 3: set the cab and fenders spacers on. Now need to position and line everything up.
5: Ended up have to throw out my old T1138 transfer case out, literally. What a hard lesson. Have a brand new T-600 now, was still in sealed bag!
6: Got a good deal on a new Alison 3200 RDS. Going to love the O/D speeds.
rustystud
Well-known member
- 9,361
- 3,262
- 113
- Location
- Woodinville, Washington
Well, I have been bogged down with some small stuff, but none the less here is where I am at. Engine will be picked up later this week. Fender and grill spacers are modified and roughed in place. Building my mounting brackets and getting my rad, oil cooler, A/C condenser being built.
View attachment 655191View attachment 655192View attachment 655193View attachment 655194View attachment 655195View attachment 655196
Picture:
1 and 2: Here is my motor rebuilt. 300hp and 1100ft pounds of beast! line bored, new bearings, sleeves, pistons, pump and turbo. Also upgraded it to the rollar cam.
2 and 3: set the cab and fenders spacers on. Now need to position and line everything up.
5: Ended up have to throw out my old T1138 transfer case out, literally. What a hard lesson. Have a brand new T-600 now, was still in sealed bag!
6: Got a good deal on a new Alison 3200 RDS. Going to love the O/D speeds.
WOW ! Your putting some serious money into this project ! A new Allison costs around $20,000.00 ! What kind of deal did you get ? I used to rebuild them and a typical rebuild would cost over $5,000.00 ! You have some deep pockets my friend !
US military surplus tranny.....I paid $4200 Canadian including delivery and customs; roughly $3000 US. It was brand new, still in the foil bag with desiccant and vac sealed. Only thing missing is the shifter and throttle positioning sensor. I was going to put in a MT 654, but this was to good of a deal to pass up.....Now I just have to get a custom flex plate. The RDS 3200 has never been mated to a 3306 before so I still have a few challenges, but I think this will be a good combination. I think the 35% OD is going to give me some good fuel mileage when empty at a quiet 1450 RPM, or 1650 RPM if I run in 5th gear.WOW ! Your putting some serious money into this project ! A new Allison costs around $20,000.00 ! What kind of deal did you get ? I used to rebuild them and a typical rebuild would cost over $5,000.00 ! You have some deep pockets my friend !
Last edited:
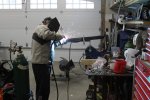
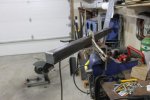
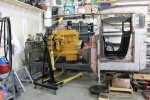
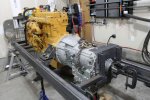
Finally got my engine rough mounted and working on the motor mounts. The original engine mounts were on the verge of failure, so I opted for some heavy angle iron .500" thick. My youngest son spends hours helping me and enjoys turning wrenches, can't complain there!

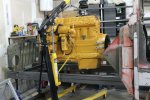
Picture 1 - Finally my engine is in my garage
Picture 2 - The new bellhousing requires a large spread and heavy angle for support.
Picture 3 - My number one helper
Picture 4 - My angle is cut into shape, 8x8x.500" so it is plenty beefy .
Picture 5 & 6 - welding the front crossmemmber.
Picture 7 & 8 dry sitting the engine in the now very cramped engine bay....
MERRY CHRISTMAS EVERYONE
snowtrac nome
Well-known member
- 1,674
- 140
- 63
- Location
- western alaska
3306 a lot of engine for that truck it will be a beast
rustystud
Well-known member
- 9,361
- 3,262
- 113
- Location
- Woodinville, Washington
Finally got my engine rough mounted and working on the motor mounts. The original engine mounts were on the verge of failure, so I opted for some heavy angle iron .500" thick. My youngest son spends hours helping me and enjoys turning wrenches, can't complain there!
View attachment 658932View attachment 658934View attachment 658933View attachment 658935View attachment 658936View attachment 658937View attachment 658939View attachment 658938
Picture 1 - Finally my engine is in my garage
Picture 2 - The new bellhousing requires a large spread and heavy angle for support.
Picture 3 - My number one helper
Picture 4 - My angle is cut into shape, 8x8x.500" so it is plenty beefy .
Picture 5 & 6 - welding the front crossmemmber.
Picture 7 & 8 dry sitting the engine in the now very cramped engine bay....
MERRY CHRISTMAS EVERYONE
All of our buses use a 5/8" thick angle iron for the side motor mounts. Never seen one break. They also use Polyurethane bushings that are sandwiched between the angle iron mounts and frame.
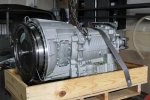
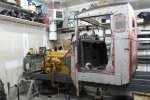
Well this is where I am at now. I beefed up my motor mounts. After Rustystud mentioned his mounts were 5/8, I fully gusseted mine. So they are 1/2" thick, but I don't expect to abuse my pavement queen. You can see the difference in the before and after. Everything is roughed into place now and is starting to look like a truck ![Thumbs Up [thumbzup] [thumbzup]](https://www.steelsoldiers.com/images/smilies/icon_smile_thumzup.gif) . I see the hood will need to be extended by 16" or so. The 3306 is a long engine.
. I see the hood will need to be extended by 16" or so. The 3306 is a long engine.
Pics 1,2 and 2 - Before and after gusseting.
Pics 3 and 4 - Show the Tranny going in and initial bolt up.
Pic 5 shows a very crude mock up.
Pics 1,2 and 2 - Before and after gusseting.
Pics 3 and 4 - Show the Tranny going in and initial bolt up.
Pic 5 shows a very crude mock up.


Another Ahab
Well-known member
- 18,058
- 4,726
- 113
- Location
- Alexandria, VA
That's nice looking work. ![Thumbs Up [thumbzup] [thumbzup]](https://www.steelsoldiers.com/images/smilies/icon_smile_thumzup.gif)
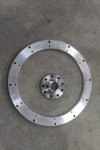
Well been bogged down with work, but I have the torque converter adapter finished and balanced as well as the stub shaft housing completed. To be sure, I had everything balanced to 3000 rpm. They had to remove 5 grams from the torque converter adapter plate the stub shaft housing was good. Now I just need to get my driveline brake and modify my transfer case and I am good to go.
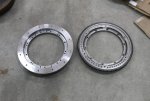
A end view of the torque converter adapters.
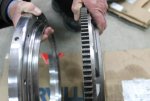
You can see the difference here with the OEM adapter on the right and my manufactured one on the left (you can see the balancing hole). I used the Cat flywheel and ring gear to simplify the starter and alignment issues.
Here is the bellhousing adapter and stub shaft housing.
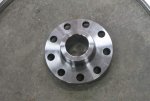
Stub shaft housing
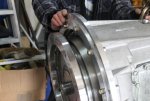
Everything bolted into place really neat and lined up no problem. Machine shop did great work!
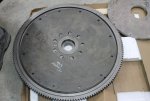
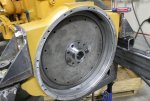
Here is the OEM Cat flywheel and flexplate. By going this route I saved myself a lot of work!
Everything fit nice and snug into the engine side as well.

A end view of the torque converter adapters.

You can see the difference here with the OEM adapter on the right and my manufactured one on the left (you can see the balancing hole). I used the Cat flywheel and ring gear to simplify the starter and alignment issues.

Here is the bellhousing adapter and stub shaft housing.

Stub shaft housing

Everything bolted into place really neat and lined up no problem. Machine shop did great work!

Here is the OEM Cat flywheel and flexplate. By going this route I saved myself a lot of work!

Everything fit nice and snug into the engine side as well.
Last edited:
- 3,959
- 2,888
- 83
- Location
- Edmonton, Canada
That is just crazy there sledder! I can't help but seeing the huge smile on the hands in pic 5. I just bet that along with the beatings you get, pops has the biggest smile on his face every time he touches it. Those sure look like your Dad's hands......when you get a project going. Being part of a classic project like that would have him beaming.
Have you decided on a metal coating yet? I'm looking at all that raw metal and thinking that the kids could mask up, wipe it down with reducer and hit it with brushes and Endura. I'm guessing it's a complete tear-down for coating mating surfaces so what is your plan for finishes?
Browse through the data and see if this is an option. http://www.endura.ca/index.html They are helping us out with many projects including providing paint for entire trains at the Railway Museum, bus and MV paint, tech support for modifying finishes and endless attempts at color matching. I'm not sure what kind of support we can get for your project but I do get the short, fat, old balding guy discount and it never hurts to ask.
Tanks for the update, beautiful work my friend.
Another Ahab
Well-known member
- 18,058
- 4,726
- 113
- Location
- Alexandria, VA
Browse through the data and see if this is an option. They are helping us out with many projects including providing paint for entire trains at the Railway Museum, bus and MV paint, tech support for modifying finishes and endless attempts at color matching. I'm not sure what kind of support we can get for your project but I do get the short, fat, old balding guy discount and it never hurts to ask.
As a matter of routine I always ask for the Day-of-the-Week discount (you know, Monday, Friday, or whatever it is that day). Every now and then I get something knocked off the cost.
But it never occurred to me to go for the personal discount, plowboy, like you point out here.
Thanks for that tip!

Last edited:
Mos68x
Active member
- 827
- 36
- 28
- Location
- Seligman,AZ
Very cool build! I look forward to seeing your updates along the way!
- 3,959
- 2,888
- 83
- Location
- Edmonton, Canada
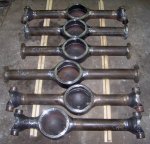
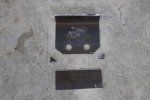
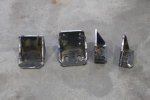
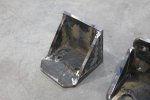
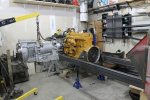
Did I smell Apple Crisp when I drove by on Friday? Just finishing up a project but will find some time to stop by soon. The ice will be ready for hockey by Tuesday night so gear up your team!Well still plucking away at my project. A few delays but moving forward. My axles are being fab'd up and put together and my Springs have been built. Looking forward to ASSEMBLING pieces, and setting the truck on it's wheels.
View attachment 719836
It's a little tough to tell size by the photo without a thousand dollar bill beside them. How big are those pieces? It would help if I knew what I was looking at too so.........what are they and where do you put 6 of them?
gentrysgarage
Active member
- 553
- 118
- 43
- Location
- Lost Angels, CA
..........what are they and where do you put 6 of them?
I'm curious also!
Those are for another customer. Not sure where they are going..
I'm curious also!
- 1,394
- 179
- 63
- Location
- Frisco Texas
Any updates?
- 112,638members
- 166,215threads
- 2,341,085posts
- 1,245online users

