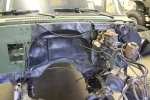
Three weeks later and all kinds of progress.
Door striker bolts replaced and all doors operate super smooth, easy and almost new car like.
All power lock solenoids tested and installed.
All power window motors tested, cleaned, lubed and installed with lubed up arms.
Insulation added to the factory rubber firewall covers and installed.
Window wiper linkage cleaned, lubed and installed.
Energy suspension motor mount inserts installed.
Tail light buckets cleaned, painted and installed with all lights working.
Door handles painted and installed.
The local locksmith should have my barn door lock rekeyed today to the CUCV code to match the CUCV cylinders I painted and put on the front doors.
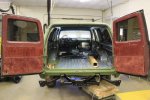
Drivers barn door panels insulated and installed with all the trim pieces in the new color.
Passenger side panel is ready but can't put it on until the lock cylinder is installed.
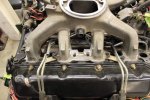
That is what got done. Most of the past few weeks has been spent on two things. The 5 remaining intake manifold bolt holes and the M1008 step bumper.
I don't have access to a mill but I thought it would be no problem with a die grinder or cut off wheel or sawzall, etc... to just cut down the tall middle intake manifold aluminum that isn't needed anymore. No, it is a problem. Full size electric sawzall just isn't accurate enough. Small air powered unit is too small to get all of it. Die grinder isn't accurate enough and a cut off blade can only get to about 30% of each cut. That left a hack saw blade. 3 of them are done with only 2 more to go. Maybe next week.
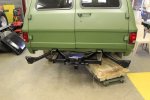
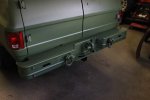
There are pictures here and on other sites of square body Suburbans/K5's/M1009 trucks with the military step bumper. There are several threads with pictures here of how somebody cut up either the frame or the bumper to make it fit. I wanted to cut the frame as little as possible. I also wanted the pintle hook to be just as strong as they are on a M1008. That means the bumper has to be solid to the frame and the pintle support brackets have to be installed. Otherwise, I should have just drilled 4 new holes and slapped a M1009 bumper on there in about an hour.
Lets cover the M1009 bumper first. There are 3 bolts that hold the bumper to the frame on each frame horn of the M1009. The holes are in a crescent shape. The Suburban uses 3 holes per frame horn as well. They are also in a crescent shape. Too bad the crescent shapes are opposite between the two trucks. The top ones are the same though so it is super easy to bolt them up, chalk up the area to be drilled and then drill them. That gets the bumper and shackle mounts installed. The bumper end supports I think are also bolt in. I never got that far.
I didn't get that far because to make the already weak M1009 pintle have even half of the support it does on the M1009 and have a receiver hitch on a Suburban. The 1" square tubing under the pintle mount has to go away. Unless I just wanted to pull around an empty M416 trailer, I didn't see an easy way to make it have any support. I would have just put the bumper on for the shackle mounts and used a receiver hitch slide in pintle hook with the license plate area for a license plate.
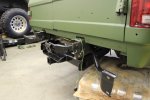
I wanted a full strength receiver hitch, full strength pintle, full strength shackles, possible swing away tire carrier in the future and the military bumper. M1008 step bumper it had to be. I decided to cut from the bumper side if cuts had to be made as much as possible. I have the bumper solidly mounted to the truck, shackle tubes solid to the frame and should have the pintle support brackets figured out in a few days. Once done, I will take it all apart to paint and get pictures then. I can say this. Only the outer bumper support brackets bolt on without modification. Everything else has to be cut or modified in some form.
I think I even have figured out the sequence to install all the parts. First the receiver, then the pintle support brackets, then the outer brackets to the frame, then the fuel tank, then the shackle tube support brackets lower bolts, then the shackle tubes to the bumper. Followed by the bumper to the truck which is the other end of the shackle mounts and upper part of the shackle support brackets. The pintle housing gets bolted to the pintle support brackets then the pintle goes in. Yeah, super easy and simple.
While doing all of that, I also put on a set of 35x 12.50 tires from another project of mine just to see how they fit. The rears fit the fenders great. I can't do the front fenders until we get the engine in the truck. Which we can't do until I modify a TH400-NP208 pedestal just a bit so it will bolt up to a 2wd 4L80E. Followed by drilling new cross member mount holes 1-1/2" back. Should be next week for that as well. Maybe the week after. Then I get to see how much I have to pull off the front fenders. Followed by another burst of green and black painting off all the remaining parts.


