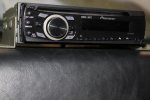
Finally have tunes in the plow truck![Thumbs Up [thumbzup] [thumbzup]](https://www.steelsoldiers.com/images/smilies/icon_smile_thumzup.gif)
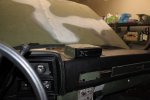
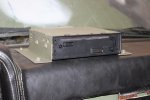
I did a fairly simple install by just mounting the radio on top of the dash, in my truck the swingfire heater switch takes up the area the civy radio would have mounted and I didn't want to start cutting up the dash to try to mount it flush. Painted it to make it look a little more like original equipment, I don't think it looks too bad, especially with the radio face off. It's low enough it doesn't interfere with the view out the windshield.
Installation steps:
1. Paint the radio body green or your choice of color, I used Krylon Camoflage flat green. I masked all the holes I could by removing plastic trim and sliding paper along the sides, then masked front back and any other holes with tape. I didn't want paint ruining any of the electronics. I didn't paint the bottom, after it dried I hand painted the edges and any areas that were masked off.
2. I used 1 1/2" aluminum angle to make a mount. I drilled holes to match the mounting holes on the side of the radio, and others to drill into the dash. Then those and the screw heads were spray painted also. Check the dash mounting to make sure you won't drill into any wire or components. The center of the dash is pretty clear, just remember a drill gets blocked by the windshield. So the easy to get to holes I used 1" self drilling sheet metal screws, for the ones close to the windshield I used short screws I could just get into the fiberglass core of the dash with a hand screwdriver. The mount keeps the radio off the dash by about 3/16th" so it has some ventilation on the bottom.
3. For the wiring I cut a 5/8" hole in the dash with an exacto knife, and popped a grommet in to make it look nice.
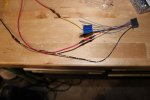
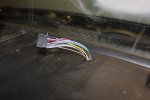
4. 16 ga wire was spliced to the radios harness, I made the lengths about 7 ft long and crimped with butt connector. Speaker wires were joined the same way but I made those longer because I put my speakers behine the seat.
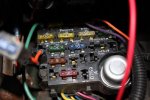
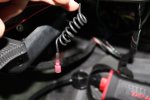
5. My radio required 3 connections, ground, constant 12v and ignition 12v. There was a ground with spade connector, up above the parking brake on the side wall. The constant 12 v was the fuse marked LPS-GPFU-A/C 30, just to the right of the blue HORN 15 fuse. The radio has a built in 10 amp fuse on the back so I did not use an in line fuse. For the ignition 12v I used the IGN plug in to the left of the green 30 fuse. The orange wire goes to my yellow strobe on the roof, I crimped the orange wire and the wire from the radio to spade connector to slide in there. Radio wiring was routed under the dash and taped/zip tied where necessary. Cut off any extra wire.
By the way, pigtailing is a trick I picked up from a boat wiring book. When you go to make a connection, wrap a few inches of wire around a pencil by your connection. This does 3 things: makes extra wire look neat, cuts down on vibration at your connections, and gives you extra wire if you ever have to redo a connection in the future.
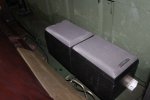
6. For speakers, I used a pair of old bookshelf speakers that fit perfectly behind the seat. I secured them together with extra 1 1/2" aluminum angle and a few wood screws, made speaker connections and then, used short sheet metal screws to hold them in place. I placed them just behind the drivers seat so there's still room for a toolbox on the passengers side. The speaker wiring was routed under the floor mat and back behind the seat.
That's about it, hardest part was making the brackets and then routing the wires.
Attachments
-
31 KB Views: 193
-
84.8 KB Views: 169
-
88 KB Views: 163
-
38.7 KB Views: 214
-
76.3 KB Views: 174
-
88.5 KB Views: 189
-
93.9 KB Views: 218
-
94.7 KB Views: 205
-
35.4 KB Views: 191


