• Steel Soldiers now has a few new forums, read more about it at: New Munitions Forums!

  • Microsoft MSN, Live, Hotmail, Outlook email users may not be receiving emails. We are working to resolve this issue. Please add support@steelsoldiers.com to your trusted contacts.

M1009 radiator replacement 432098; engine oil cooler lines don't fit

nudewheeler

New member
41
1
0
Location
Tucson, AZ
Howdy Folks -

Condensed story: Radiator had a small leak from previous owner, leak got worse, took radiator into radiator shop to evaluate it's condition. Report was most tubes where soldered to the header plate were leaking, both header plates required a rebuild, re-soldering most passages. Service was ~ $200, a new vista-pro copper/brass radiator $320. I chose the new radiator.

Picked up the special order murray 432098 radiator (which from my understanding is a re-badged vista-pro 432098) from Checker today, replaced all other components of cooling system, and fixing to place radiator in. Haha, this was obviously a 'returned' radiator. Most fins were smashed or bend, and filler neck was smashed unusable. Luckily caught another radiator shop before they closed and picked up a never been opened 'new' radiator and continued procedure.

Radiator shop sold me a 'ready-rad' 432098 radiator, that indeed had a vista-pro sticker on the box. This radiator was identical to the murray radiator from checker, less the damage. Anyways, radiator instructions indicated there was a 'hardware adapter kit' to help fit the radiator. The second radiator included a 4 part kit.

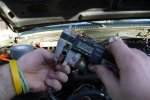
Anyways, put the radiator in, fastening everything up, and the last lines to connect were the engine oil cooler lines. Bonk, cooler lines don't fit inside of radiator. The just don't fit, the orifice in the radiator for the lines is too small. Took some measurements, here's what I found:

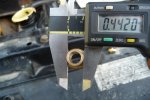
Engine oil cooler lines OD: .4580
new radiator cooler line orifice ID: .4510
original radiator cooler line orifice ID: ~.46

This is the recommended replacement radiator for blazers, suburbans, and the pickups with the 6.2. I am hoping to get some advice from other folks on the forum who may have encountered this same problem. Anyone successfully replaced original radiator with the 432098 copper/brass radiator? Any clever solutions to solve the cooler line problem?

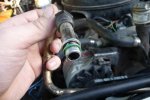
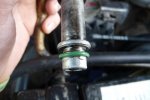
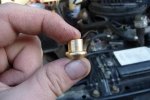
The 'hardware kit' contained 2 brass mushroom shaped adapters, and 2 o-rings.

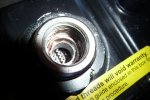
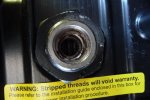
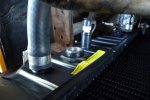
I'll toss some pictures up of the components. Yes, the o-ring is not seated for the purpose of photographing. No, this displaced o-ring is not the culprit preventing engine oil cooler line from fitting. Brass mushroom was part of 'adapter kit'.

Called the auto parts stores and found some oil cooler line adapters, but they don't seem to fit the bill. Oriley part number 251550 and 251660

Solutions:
  • One solution would be rebuild old radiator, but I'd really like to use the new radiator.
  • I'll have to call the radiator shop on monday, but possibly they could take the oil cooler fittings from original radiator or that entire heat exchanger and put that in new radiator.
  • Or, (preferred solution) some sort of cooler line adapter for the radiator or new cooler lines to properly fit into new radiator. Planning to contact vista-pro to inquire if included 'adapter kit' was complete

Has anyone solved this predicament?

Thanks in advance,

Steve
 

Attachments

GFB

Member
107
1
18
Location
Northwest IN
I think all those replacement radiators come from the same place. At least all the pictures for the radiator online at oreilly/carquest/advance/auto zone are the same. Mine was a bear to get the oil cooler lines in, but they eventually went. I was careful becuase I didn't want to cross thread the line nuts. It took a lot of wiggling and wallering to get them in enough for a couple threads to grab. Then the nuts did the rest of the job.
 

CROM

New member
180
0
0
Location
Des Moines, IA
I just put in a new Murray a few months back (PN 432098.) It did not come with any adapter kits or fittings. I put new gaskets on the cooler lines and installed. The lines went on a little tough...I really needed to push the line in as far as possible before I could start the thread on the line bolts. I think it went in a little tougher because of the new gaskets being a little thicker.

Also, are both of your rubber shims that the bottom of your radiatior rest on in the proper place? I found I was missing one (in its place was a gator-aide bottle cap) and the slight angle the radiator sat at made it impossible for my lines to get a straight shot into their holes and thus impossible to start the threads on the line bolts.

I wouldn't expect a .002 difference in the OD of the lines to be much of a problem...the original lines could read that much thicker because of gunk/oil/dirt in the threads. That looks like a nice digital micrometer...what are the calibration limits on it? +/- .00? That could be your measurement discrepency.

I'd make sure your lines are lined up just right and try to really push them in all the way before you try and start the threads...if you still have trouble, you may have gotten a wierd radiator...sucks, but it happens.
 
Last edited:

Midnight Rider

New member
530
3
0
Location
Sesser, IL
I'm in the same predicament. I bought a radiator from O'reilly's. Everything is connected up fine with the exception of the oil cooler lines.

Did you finally manage to get yours in?

I've got the same brass looking fittings that you had and I don't see how they are supposed to work.

I'd hate to try and force them in and break something. Then I'm stuck with a bad radiator. I can't afford to buy another.
 

Warthog

Moderator
Super Moderator
Steel Soldiers Supporter
13,774
232
63
Location
OKC, OK
The NAPA radiator has been used successfully many times. NR 2098. It crosses to your Murray number.

They may have fudged on the specs for the Murray brand.
 

top_prop

Member
243
8
18
Location
Suffolk, VA
Hoping to see how you work this out... my radiator on my newly purchased m1009 is weaping... and stop leak has only slowed the problem...

Please keep updating!
 

Midnight Rider

New member
530
3
0
Location
Sesser, IL
The NAPA radiator has been used successfully many times. NR 2098. It crosses to your Murray number.

They may have fudged on the specs for the Murray brand.
The Napa radiator was $140 more than the one I got from Oreillys.


Or put a oil cooler in front better then running through the radiator!!!!
That's another expense I can't afford at the moment. I actually owe my father about $320 for this radiator.


I guess I'll look at the fittings some more and see if they just don't need to be coaxed in a little harder to fit.
 

ryan77

Well-known member
2,584
56
48
Location
Cary IL
Ranchopper on here has 2 radiators out of parts blazer send him a pm and buy one of his used ones!!!!
 

Midnight Rider

New member
530
3
0
Location
Sesser, IL
I've got it installed.

Here's the skinny. The oil cooler lines were elongated enough that they wouldn't fit. Dad noticed this when he was looking at them earlier. He figured they had mushroomed slightly from being over-tightened.

We sanded and filed down the ends of the lines and they fit fine now.

The brass fittings in nudewheeler's 4th, 5th, and 6th pics are not needed for the 1009.

She's up and running now. Just gotta shake it down a little more to make sure everything's nice and tight.

Hopefully this will help out others trying to replace their radiators.
 
Last edited:

Midnight Rider

New member
530
3
0
Location
Sesser, IL
You might be able to get a radiator shop to repair yours. I tried that first, since it was the cheapest and easiest route. My radiator was too far gone though for that to work.
 

nudewheeler

New member
41
1
0
Location
Tucson, AZ
Glad to see you finally solved your predicament as well. This is my story for the solution that worked for me.

Oil cooler lines were too large in diameter, by 0.010 or so. Slept on this for a few nights decided what to do. One morning before work (it was chilly, well for Tucson standards, around 50 degrees) I decided to use my new heat gun to help get those lines in. My theory was to heat the orifice, and hope it expanded enough to slam the lines in there and fasten them down.
Well, that worked, but only kinda. After several iterations of heating the orifices and attempted to force the lines in, the aluminum lines heated up enough where they got soft, and during one shove they began to fit into the orifice and peel metal back from the aluminum line. Well this was interesting. Shove that sucker in there some more, thread the sleeve, and tighten it down. Worked, and now there is only contact tolerance between the line and the radiator. Perfect.

Upon trying this for the lower oil cooler line, it just didn't go as smooth. Managed to peel back a bit of metal, but this was larger than the top line. So, took out the dremel with a sanding wheel and brushed some aluminum off the aluminum lines.

THIS IS THE ANSWER: dremel with a sanding wheel and brushed some aluminum off the aluminum lines. Then, your lines should fit right in. Do this slowly, methodically, evenly. Don't create an oval for a round hole.

Anyways, after dremeling the lines a bit, the lower sleeve didn't feel right and would not seat into the cooler. Scheisse. Inspection revealed I buggered up the first thread on the aluminum sleeve.

Needed space to work, and wanted to make sure cooler lines were not bent and preserve the radiator. Disconnected cooler lines, removed radiator, and placed contents on blanket on ground.

Took an equilateral triangle jeweler's file and corrected the cooler line fastener thread. Start upstream with good thread, stick a point of the triangle file into the thread, ride the lower thread, and rotate sleeve. After 15 minutes and a beer, threads were back in good shape. Threaded lines on the radiator as it was front side down on my porch. Installed radiator, fastened cooler lines, and success.


What you should take away:
If lines are too large in diameter to fit into radiator, take some material off the lines to reduce diameter. I used a sanding wheel on a dremel.
If you done effed up the threads, carefully reconstruct them with a jeweler's file shaped as an equilateral triangle.
When you're working in a tight space, or an awkward position, remove parts (if possible) for a more ergonomic working position and placement if possible.

I hope this knowledge helps folks install the Murray 432098 radiator.
 

lavarok

Well-known member
1,119
33
48
Location
Fellsmere, FL
I think all those replacement radiators come from the same place. At least all the pictures for the radiator online at oreilly/carquest/advance/auto zone are the same. Mine was a bear to get the oil cooler lines in, but they eventually went. I was careful becuase I didn't want to cross thread the line nuts. It took a lot of wiggling and wallering to get them in enough for a couple threads to grab. Then the nuts did the rest of the job.
I just put in a new Murray a few months back (PN 432098.) It did not come with any adapter kits or fittings. I put new gaskets on the cooler lines and installed. The lines went on a little tough...I really needed to push the line in as far as possible before I could start the thread on the line bolts. I think it went in a little tougher because of the new gaskets being a little thicker.


I'd make sure your lines are lined up just right and try to really push them in all the way before you try and start the threads...if you still have trouble, you may have gotten a wierd radiator...sucks, but it happens.

I just installed a Proliance 432098 in one of my M1008s this past week. I had the same issue with the oil cooler lines.

After pushing them in as far as I could and then removing them, I noticed the metal shearing slightly at the tips. Just the outer most layer was affected.

Clearly the line was slightly larger than the hole and the metal was soft enough that by hand it started to "fit" itself. It had crossed my mind to sand the lines to remove some material, but I was worried the final fit may be affected. Ultimately, I pushed them back in by hand and was able to catch a few threads. I then slowly tightened them down. So far so good. It's only been a few days and I haven't really driven the truck, but I will be watching closely for oil leaks.

I think mushroomed tips due to over tightening as mentioned earlier in the thread is a real possibility.

Also, I did not use the two brass fittings and actually kept my old o-rings as they looked to be better quality than the new ones.

One last tip...when looking for auto parts check Amazon...I bought my replacement radiator for $231 with FREE shipping last month and just bought another one 5 minutes ago. Each time they listed "last one hurry and buy", so I did each time. I think they restock the one every few weeks, so check back frequently to try and save money. Right now its listed as $361 since I got the "last" one, but like I said I also bought the last one about 4 weeks back.
 

doghead

4 Star General /Moderator
Staff member
Super Moderator
Steel Soldiers Supporter
26,246
1,178
113
Location
NY
Did you try googling the part number listed in the -34P TM?
 

top_prop

Member
243
8
18
Location
Suffolk, VA
Great thread... I'm replacing the radiator on my Civie '87 R20 suburban with a 6.2... no trouble with the coolant lines, but its not sitting right and i can't get the drain valve to open or close due to the interfearance with the fan shroud. Thinking its because the rubber that the rad sits in on the bottom is too old. anyone got a line on where to get new rubber mounts from a local mainline parts shop? Part numbers etc? they are listed as #14 in the TM (see pic below).


After I finish the R20 the M1009 is next to get a new radiator... the stop leak has stopped stopping leaks :)

Tom

ETA I didn't realize the first post had hit the boards... I just deleted it... Thanks Doghead for the point to summit on the radiators rubber pads.... I was pulling up diagrams and about to google stuff. too... I just found them in my LMC truck book too: 32-0972 for $4.95... also ... the coolant level sensor (#16) is available at oriely's: BWD s8018
 

Attachments

Last edited:
Top
AdBlock Detected

We get it, advertisements are annoying!

Sure, ad-blocking software does a great job at blocking ads, but it also blocks useful features of our website like our supporting vendors. Their ads help keep Steel Soldiers going. Please consider disabling your ad blockers for the site. Thanks!

I've Disabled AdBlock
No Thanks