• Steel Soldiers now has a few new forums, read more about it at: New Munitions Forums!

  • Microsoft MSN, Live, Hotmail, Outlook email users may not be receiving emails. We are working to resolve this issue. Please add support@steelsoldiers.com to your trusted contacts.

M1010 Convoy Truck

antennaclimber

Moderator
Moderator
Steel Soldiers Supporter
1,368
950
113
Location
State College, PA
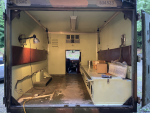
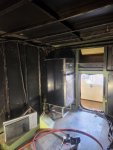
The heat and A/C for the back will be a roof mounted RV type unit. The back of the vehicle was gutted to make room for a new interior with beds, sink, shower etc. Things might be a bit tight, but we will make it work. I have a 12VDC to 120 VAC inverter to run it while we are traveling. At night we could use shore power or a generator is needed.

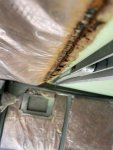
The cab will use the Vintage air heat and A/C. The bottom of the cab has been coated with the Lizard skin spray on ceramic insulation, the interior floor has 2 layers of insulation as well. So this should keep the cab warm or cool.
 

ballencd

Active member
201
78
28
Location
Columbus, NC
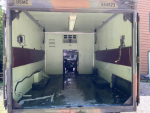
I'm not familiar with the Vintage Air kits. I have heard of them but wonder how well they fit and how hard they are to put in. What specific kit are you using? Are you going to use the factory compressor from the ambulance system or replace it? I am thinking a roof top heat pump for the back and separate cab A/C also. Have you started on the A/C install yet? Pictures of the firewall stuff would be great to see if you have them. Below is picture as of yesterday afternoon. IT took awhile to get the first bench out.
I've never been to State College but have two nieces that went to school there!

1716133590030.png
 

ballencd

Active member
201
78
28
Location
Columbus, NC
Antennaclimber, Did you have trouble getting the passenger box out of the back of your M1010? I think I have all the rivets drilled out including the 4 holding the heater exhaust flange under the box. The one in the rear corner behind the control panel/vent panel was tricky to find. Seems there is glue under the heater base which I have separated. The heater base is still hung on the duct heading up to the input vent. Do I need to disconnect the duct under the seat headed forward.....looks like there are a few screws under that. I will get it out but would like to not damage the bench as I want to channel it and re-use it but narrower. The heater is coming out for sure. I can't foresee a scenario where I need 30K btu/hour ever.
 

antennaclimber

Moderator
Moderator
Steel Soldiers Supporter
1,368
950
113
Location
State College, PA
Getting the passenger side out was very difficult. Much harder than the driver side. I decided that it was not going back in....Eventually with a sawzall, cutting wheels, battery recharging, BFH, hydraulic jack, pry bar and a few four letter words, I got it removed! Every time I thought I had all the rivets drilled out....more would show up. The heater was removed as well, not as bad as the passenger side bench.

I wish I had better advice for you, but it's difficult to get that side out intact.

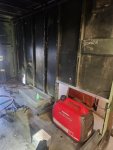
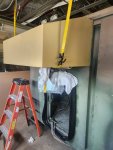
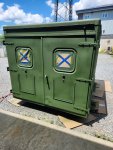
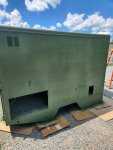
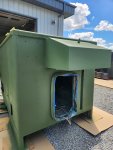
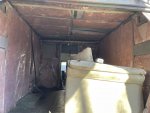
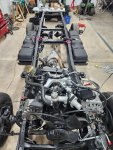
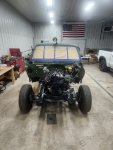
Fab crew is making some progress with the inside. Test fitting items inside to see how this will work out. Still have a long way to go!
 

Attachments

Last edited:

ballencd

Active member
201
78
28
Location
Columbus, NC
I got it. Thanks for the reply. I did eventually find several more rivets that I had missed and then it came out fairly easily. I think if I had found all the rivets to start with it would have been easier then the left one. A few of the screws under the duct were very difficult to get out and I eventually had to cut them. Yours looks like you are making progress. What are you going to use the box over the cab for? That's a good spot for the Gen Set. I wish they had put that hole in the box up at the front corner though. I think I'd like a bit more floor space in the back of the box. I'm thinking smaller heater and batteries in that spot but not there yet.

1716234656872.png
 

antennaclimber

Moderator
Moderator
Steel Soldiers Supporter
1,368
950
113
Location
State College, PA
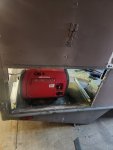
I thought about putting the generator where the original AC unit was. But getting to it for refueling and maintenance would be an issue. Decided to enlarge the original heater access door and install HD drawer slides so it can be slid out or removed to use it. The compartment will be vented and sealed off so the gasoline fumes will not be present inside. The box over the cab will be used for additional storage of misc items.
 

ballencd

Active member
201
78
28
Location
Columbus, NC
Did you keep the 24V system? I did. Sometimes I wonder if that was a good idea but I had a M1009 for about 18 years as a DD and it worked well so I swapped out the factory M1010 alternators and put in new 12V and rewired as the M1009. I am wanting to put civilian battery holders, one on each side, like my Suburban vs the big military holders. Lots more room in the engine compartment. One day I will upgrade to a 6.5 or Cummins and will need the room. Hoping for a 5 or 6 speed manual transmission one day but my days are getting shorter so I am not holding my breath. I was planning on building my Suburban into a camper but I think the M1010 will make a much better one. The Suburban is a 91 with a 350 gas , 700R4 with NP241 and 10 bolt axles. My first thought was to swap the drive train out of the M1010 and put it in the Suburban but my wife said....NO! I's still love to have a set of M1010 axles for the Suburban. One day.
 

antennaclimber

Moderator
Moderator
Steel Soldiers Supporter
1,368
950
113
Location
State College, PA
I thought about 24 VDC but it's simpler to keep it all 12 VDC. The original M1010 alternators were replaced by the previous owner to the standard CUCV configuration.

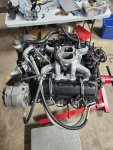
Once I get the engine back from the machine shop, I will start the process of getting the alternator and AC compressor mounted to it.
If time permits and if I find it possible, I may install two alternators, one to power the vehicle and one to power the equipment in the rear of the vehicle. Of course then I would want a way to connect the two systems together should one of the alternators fail. But for now, it will remain a single alternator system.

Having a 120 VAC generator that can be used while in transit would be helpful as well. This way the 120 VAC to 12 VDC battery charger can supply power to the entire vehicle while in motion. I wish I could find a diesel powered generator like my portable Honda unit, then I wouldn't need a gas can for the gen set.
 

ballencd

Active member
201
78
28
Location
Columbus, NC
I see what you thoughts are on that. I was thinking that I was going to be keeping the A/C and the heater (making 24V imperative) and was in a pinch to make it dependable to get it home so I opted to upgrade the charging system to a near "M1009" setup but I used (2) 160 A 12V alternators vs the factory 28V system. A lot of solar and RV stuff can be bought in 24V versions too. I'm thinking now that the 30K btu heater is way overkill and I have not done the research on the factory air in the back but it is probably overkill. Also and I've read that the back air is hard to get into the cab. When I make my final decision on the voltage I think I can easily swap to 12V with the change of a starter and some wires but I think I am a long way from that still.

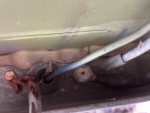
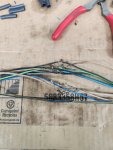
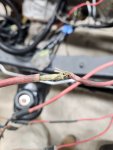
I have a question, or two.......There is a wire that comes through the floor in the ambulance box near the heater input vent that looks like it went to power the heater....???? Any idea on that? Also I found a blue wire.....not factory.....coming out of the rear corner, passenger side going into the harness for the heater....there is a cut wire left in the same location sticking out of the box so I think it is a repair but trying to figure out what it would be for. I'll attach a picture. It is on the left top of the heater door from the outside.

1716294205300.png

For some reason the editor turned the image. The rivet with the chain is on the top so 90 degrees clockwise. You can see the cut wire there.....Any idea where this goes? I guess I will find out when I pull the interior skin. Time will tell.
 

coachgeo

Well-known member
5,147
3,463
113
Location
North of Cincy OH
...

View attachment 923952

For some reason the editor turned the image. The rivet with the chain is on the top so 90 degrees clockwise. You can see the cut wire there.....Any idea where this goes? I guess I will find out when I pull the interior skin. Time will tell.
for future reference.. why image sideways?? Devices take pics only in one orientation.... device (phone, tablet etc.) saves image via whatever standard / type your settings are. (jpeg, png, what quality etc.. etc. ) - BUTT!! it tags a small code file to it . That code tells "devices"; (that know how to read the code), which direction was up when you took the photo. If you look at it on a device... that device has already flipped the image to make it view with top... at the top, "based on that code".

computers typically.... they dont read that code.. code just gets skipped over. Many/most discussion boards also skip the code if you move image from device right to the board .... sooooo this will end up with the picture laying on its side ..... if camera was on its side when photo taken.

To fix that you have to save file to computer. Open file with a limited/simple photo editor on computer: AKA- one that "does not read the code", thus does not auto flip the image,. That has fooled me before.... editor I had on computer would auto flip the image, totally leaving me thinking the image was WYSIWYG (what you see is what you get) with top of pic.... at the top. grrrr. It was not the case. Found out needed a dirt simple; limited in ability editor. One that skips the code, when it opens image; it leaves it sideways. Then you use edit features to flip the picture as it is suppose to be.... re-save it. Tadda.......now image file saves pic oriented as you want. No code needed/used and anyone else that opens it will get pic as WYSIWYG with the top.... at the top. This newly saved image is what you put in here.

there is some free websites that will flip them so you can then re-save them.. maybe some apps. ive not looked lately.
 
Last edited:

antennaclimber

Moderator
Moderator
Steel Soldiers Supporter
1,368
950
113
Location
State College, PA
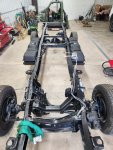
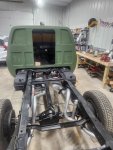
Little more progress over the weekend.

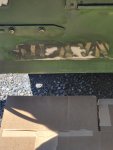
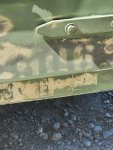
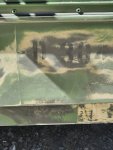
Found some unit markings on the rear of the box during the sanding job.
One coat of primer and the first coat of OD. Got the Black and Brown camo on, but didn't get pictures.
Planning on coating the roof inside with the Lizard Skin ceramic insulation this weekend.
 

Attachments

Top
AdBlock Detected

We get it, advertisements are annoying!

Sure, ad-blocking software does a great job at blocking ads, but it also blocks useful features of our website like our supporting vendors. Their ads help keep Steel Soldiers going. Please consider disabling your ad blockers for the site. Thanks!

I've Disabled AdBlock
No Thanks