• Steel Soldiers now has a few new forums, read more about it at: New Munitions Forums!

  • Microsoft MSN, Live, Hotmail, Outlook email users may not be receiving emails. We are working to resolve this issue. Please add support@steelsoldiers.com to your trusted contacts.

M1010 Meat Wagon to RV conversion

Skinny

Well-known member
2,132
492
83
Location
Portsmouth, NH
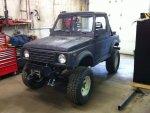
The purpose of this build is to take the M1010 and outfit it into an all terrain RV that can haul my Samurai and sleds or serve as an expedition platform for any type of non-hardcore offroading. Part of this like any other old truck build involves starting at one end and working your way to the other taking breaks only to refill the wallet and do that pesky thing that gets in the way called work.
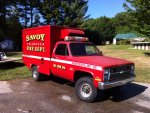
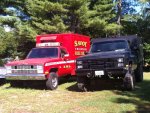
IMG_0989.jpgIMG_0996.jpgIMG_1100.jpg

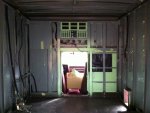
Please see other thread where I deconstruct the ambo box if you want to see what is under the skin.

http://www.steelsoldiers.com/showthread.php?146746-M1010-ambulance-box-build-reference
IMG_1060.jpgIMG_1097.jpgIMG_1106.jpgIMG_1110.jpgIMG_1136.jpg
 

Skinny

Well-known member
2,132
492
83
Location
Portsmouth, NH
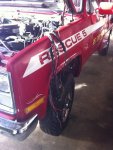
Most of my work up front will be converting the box over to a livable space along with the necessary mods to get the truck running under its own power. Right out of the gate I changed the starter relay, GP's, and GP solenoid. I am awaiting a new controller card but in the meantime the fuel system is functioning fine.

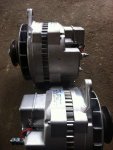
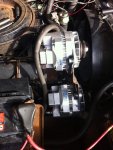
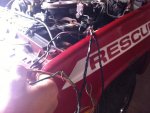
The charging system was DOA. Fire departments should not be able to touch their own vehicles...period. This is one more case in point of hackery. The bonus was finding a starter about to jump ship. I removed all of the starting and charging parts for a full refit. I'm going with a pair of new Leece Nevilee 160A 12v alternators wired in series just like the other CUCV trucks. It required a little bit of grinding on the cases to make them work with the adjusting bracket.

I removed the engine bay harness and stripped the DUVAC wiring out of it. I hate electrical loose ends. Plus a little bit of fresh electrical tape never hurt anyone. It appears someone's idea of a great repair included twisting my cold start advance wires and taping them together was good enough. The engine harness is back in and I'm hoping to have the starter back in with new bolts along with the alternator cables by the holiday weekend. New bolts in stock at the GM dealer $12 total...SCORE!

IMG_0991.jpgIMG_1168.jpgIMG_1169.jpgIMG_1170.jpgIMG_1171.jpg
 
Last edited:

chevymike

Well-known member
608
479
63
Location
San Diego, CA
"It required a little bit of grinding on the cases to make them work with the adjusting bracket."

Where did you grind on the Leece-Neville alternators? Pictures. I can't get my belts tight! What belts did you use?
What I did was to modify the adjusting bracket by fabbing/welding some extended adjusting slots. Worked out great.

Original
0120201133.jpg

Modified
0120201558.jpg
 

ballencd

Active member
224
90
28
Location
Columbus, NC
Did you use a second bracket to make two into one or did you just add some steel to the cut adjuster? I am considering taking the charging system to 12 VDC vs the 24VDC. Most of the kitchen and A/C stuff uses 12 VDC. I could leave the second alternator in there as a spare and just carry the belt if I needed it. Not made any decisions yet and there are too many to make from what I can tell. I'm not sure if it makes sense but seems if I can make everything the same voltage it might be easier in the long run but I do like the lower current and wires on a 24 VDC system.
 

chevymike

Well-known member
608
479
63
Location
San Diego, CA
Did you use a second bracket to make two into one or did you just add some steel to the cut adjuster? I am considering taking the charging system to 12 VDC vs the 24VDC. Most of the kitchen and A/C stuff uses 12 VDC. I could leave the second alternator in there as a spare and just carry the belt if I needed it. Not made any decisions yet and there are too many to make from what I can tell. I'm not sure if it makes sense but seems if I can make everything the same voltage it might be easier in the long run but I do like the lower current and wires on a 24 VDC system.

I used the existing bracket and made my own extensions to it. I suppose it would be easier if you had a second bracket but that was not an option for me. Currently mine is setup with the "Plan B" using two 12v alt but still keeping the 24v system. My plan (assuming I don't do the engine swap I am planning) is to convert fully to 12v. I already have the replacement 12v starter. I wanted to do this, as if I have a bad starter on the road, I am much more likely to find a 12v version at a parts store than a 24v version.
 

ballencd

Active member
224
90
28
Location
Columbus, NC
The starter issue is why I wanted to put a manual trans in mine but my wife said no to that, she wants to be able to drive the vehicle too and although she can drive a manual fine; the M1010 does not have "hill-hold" and she worries about city traffic on hills with a big box on the back. I am going to apply your bracket extension idea to mine. I had a hard time getting the belts on since they have to be short to get them tightened up and I barely have them tight enough to run without them flying off. With the brackets adapted I could use a slightly larger belt so it goes on easy and still get it tight......hopefully. I had to pry my belts on and off which is probably not very good for them. I'm still thinking on the 12 vs 24 question. It will mostly depend on what equipment I use for heat and A/C.
 

79Vette

Active member
Steel Soldiers Supporter
137
151
43
Location
Los Angeles/CA
The starter issue is why I wanted to put a manual trans in mine but my wife said no to that, she wants to be able to drive the vehicle too and although she can drive a manual fine; the M1010 does not have "hill-hold" and she worries about city traffic on hills with a big box on the back. I am going to apply your bracket extension idea to mine. I had a hard time getting the belts on since they have to be short to get them tightened up and I barely have them tight enough to run without them flying off. With the brackets adapted I could use a slightly larger belt so it goes on easy and still get it tight......hopefully. I had to pry my belts on and off which is probably not very good for them. I'm still thinking on the 12 vs 24 question. It will mostly depend on what equipment I use for heat and A/C.

I've done city traffic in a K5 with a 8000 lb trailer. With the low gear in an SM465 or other truck trans you will be fine.

If the wife doesn't want a manual that's one thing, and entirely up to you/her. But the truck doesn't need "hill hold" or whatever newfangled thing 🤣. That's what gears are for. Starting on a hill with a huge trailer in my manual CUCV or C30 civvy pickup is easier than starting on a hill in my 500 HP Corvette
 

ballencd

Active member
224
90
28
Location
Columbus, NC
I could not agree more but my wife gets 50% of the vote. I think I am looking for a 4L80 upgrade. I will eventually put the manual in my Suburban.
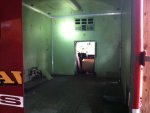
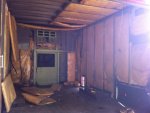
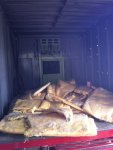
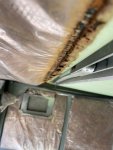
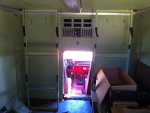
I did pull the interior out of the M1010 this week and am trying to decide what to do with the wiring. I hope to put a solar system in it and after seeing what is under the interior skin, I think I will mount the batteries in the front of the box behind the driver and mount the electronics on the plate just above that. Should be fairly easy to get the wiring in there from the panels on the roof too. I hope to put in power, stove, heat and hot water and A/C but time will tell how much gets done. The insulation was in pretty good shape but I think closed cell foam will almost double the R value. I did find some water damage and found water in the ceiling.....not much but too much. Lucky for me the PO kept it in a metal shed for the last 20 or so years. It had been getting in and rusting the support for the back of the hanging beds.
1738888824498.jpeg
 

chevymike

Well-known member
608
479
63
Location
San Diego, CA
Yeah, that support bar for the bed racks, was the only part that is steel in the box. Mine was rusted too but I removed it, since I wasn't going to be hanging anything from there.
 

ballencd

Active member
224
90
28
Location
Columbus, NC
How hard was it to remove???? I am thinking of cutting a section from the center of the roof and raising it so I can walk the length of the box without worrying about my head hitting something. I might be able to support the back on that steel and the front on the factory A/C support. Possible with a sheet of plastic on top for natural light...??? How is your camper coming along?
 

chevymike

Well-known member
608
479
63
Location
San Diego, CA
How hard was it to remove???? I am thinking of cutting a section from the center of the roof and raising it so I can walk the length of the box without worrying about my head hitting something. I might be able to support the back on that steel and the front on the factory A/C support. Possible with a sheet of plastic on top for natural light...??? How is your camper coming along?
It is much easier to cut all of the huck bolts along the edges (air chisel took me 5 minutes from the inside) and build a frame to raise it. Then I made corner pieces to weld onto the box, then I skinned the outside. That's what I did.

0813211427_HDR.jpg

0814211219a_HDR.jpg

0626211314.jpg

0919211540a.jpg
 

ballencd

Active member
224
90
28
Location
Columbus, NC
If only I had your aluminum fabrication skills! I do have a TIG welder but am terrible at aluminum. It came with a wire feed that I have not tried yet in the 2 years that I have had it....maybe I should try that. I only need about 2 -3" lift for me to fit in there and My wife is about 4 " shorter. Removing the light helped a lot and since I will have stuff on both sides it seemed easier to just pop the top up a few inches and then maybe put on a diffused plastic top for some light. Your method would make it easier to fit solar up there though.....I'm going to have to rethink this yet again. I'm still debating on the 12 vs 24 volt thing too. I hear you on the availability of needed parts on the road. I was thinking of carrying an extra alternator and I could throw in a starter but that starts to get heavy. I am hoping to boon dock often and we are planning doing quite a bit of traveling when were both retired so I thought the 24 v makes more sense in the efficiency of the system ( refrig/air/heat/water...etc) but it will make it more complex. Right now all I have to do is change out the starter and do a bit of wiring and it will be 12 v......come to think about it....I can jump start a 12 v starter off one the batteries if I have to replace one on the road in place of the 24 v starter as an emergency measure......?????
 

chevymike

Well-known member
608
479
63
Location
San Diego, CA
If you're only looking to do 2-3" total, you can do that with aluminum rectangle tubing. To fit the channel in the walls, you need 1.5" wide. In that size, they make 2", 3" and 4" tall tubing. You could just cut the huck bolts off, lift the roof, add in the rectangle tubing and rivet everything back together (with sealant of course). The only area you will need to deal with is the corners and that shouldn't be that hard.
 

ballencd

Active member
224
90
28
Location
Columbus, NC
I may do exactly that. Seems easier then sectioning the roof and would leave way more space for A/C and solar panels. Did you put a vent fan in yours? A/C? Whats brands? Inquiring Minds Want to Know!
 
Top
AdBlock Detected

We get it, advertisements are annoying!

Sure, ad-blocking software does a great job at blocking ads, but it also blocks useful features of our website like our supporting vendors. Their ads help keep Steel Soldiers going. Please consider disabling your ad blockers for the site. Thanks!

I've Disabled AdBlock
No Thanks