• Steel Soldiers now has a few new forums, read more about it at: New Munitions Forums!

  • Microsoft MSN, Live, Hotmail, Outlook email users may not be receiving emails. We are working to resolve this issue. Please add support@steelsoldiers.com to your trusted contacts.

M1102 Shop Trailer Build - Overland Project (as I go)

Overdrive

Active member
411
96
28
Location
Wentzville, Missouri
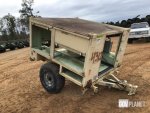
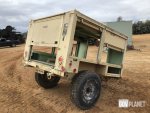
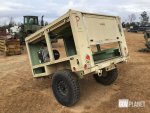
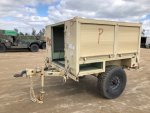
Here we go again! Found this little guy in Georgia and had a wacky idea to build a big brother version of my HSTRU camping trailer...

Looked really beat up but the basics are there including a from the factory spare tire carrier under the bed. I have already done quite a bit of work on it over the last month and a half so will be posting more pics and progress.

Recovery: took a truck bed full of recovery gear and parts. zero issues towing it home 800 miles from Georgia to Missouri. I had a full set of wheel bearings and seals, landing leg i almost threw away from a previous build, figured out which wheel bearing caps were needed, and borrowed a hitch from one of my spare M1102s. Not going into details on recovery but i did do bearing checks in increments as well as just threw a pair of mag towing lights on it and aired up the tires. Towed fine and made it safely home!

Stay tuned for build progress and lots of pics. This is not a restoration build but i hope i can keep the spirit of the trailer intact as i build it out.

OD

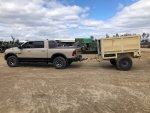
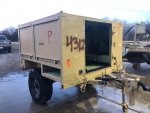
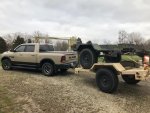
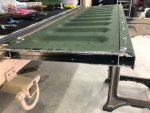
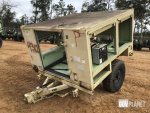
Here is how it looked originally. It was cannibalized with lots of parts missing.
2082714_3082_159_0001.jpg
2082714_3082_160_0001.jpg
2082714_3082_161_0001.jpg
2082714_3082_162_0001.jpg
 

Overdrive

Active member
411
96
28
Location
Wentzville, Missouri
Recovery pics

15 minutes after i got to the yard put on scrap tongue jack, borrowed hitch and borrowed bearing caps from one of my other trailers. I ordered new bearing caps but didn't put them on.

Cheap zip ties from HF used to hold the rolling doors down. Lots of components removed from the doors. Brackets for hand brakes removed, front light brackets gone... Doesn't look to bad just putting the hitch and jack on it!

Build1.jpeg

Hitched up and ready to roll.

Build2.jpeg

OD
 

Overdrive

Active member
411
96
28
Location
Wentzville, Missouri
Home and pressure washed... twice!

Build3.jpeg

Lots of parts removed and surplus prices are a little too pricey for my taste so i picked up a couple of 1102s out of PA. These are home safe as well. Same procedures in recovery no issues on 850 mile return from PA to Missouri.

Build8.jpeg
 

Overdrive

Active member
411
96
28
Location
Wentzville, Missouri
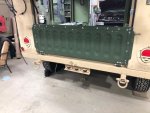
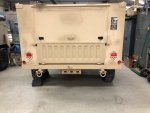
Tailgate

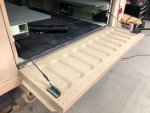
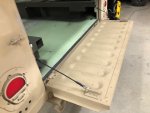
Hinges are same as 1102 stock tailgate however the opening is more narrow... Hmm, what to do. 1102 tailgate won't fit and i wasn't sure if the height would be a problem. Didn't want to build a gate from scratch so I picked up a surplus new tailgate off of eBay and took a chance on trying to modify it. Here are a couple of pics of the results.

Hinges had to be re-positioned on the tailgate. I took it apart (they are REALLY reinforced on the inside) and didn't need to shorten it but had to narrow it by around an inch total. I flipped the end caps from one side to the other to line up with the slide latches. Just used aluminum 1/4" rivets to put it back together and it works great!

The silly little slide latches for the tailgate are factory but look really funny. Might try to adapt the "normal" 1102 tailgate latches for this if i can find a pair.

Build5.jpeg

Build6.jpeg

All done.
Build7.jpeg
OD
 

Overdrive

Active member
411
96
28
Location
Wentzville, Missouri
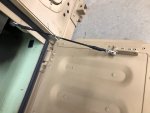
Tailgate cables...

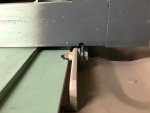
I was dreading messing with these cables. The trailer only had the inside brackets and bolts, no cables so i wasn't sure how this would go. I had to go thru two pairs of cables to find ones that would work. Finally found a pair on eBay that worked. They are for 07-03 Chevy Silverado GMC Sierra Hummer H3T. Around 16.6" hole to hole. I flipped the tailgate side brackets and drilled new holes for the cables as well as added an additional 1/4" rivet to the bracket for strength.

I had to notch the tailgate opening and the interior frame for everything to fit properly but i think it turned out OK.

Build11.jpeg
Build12.jpeg
build14.jpeg
build13.jpeg

OD
 

Overdrive

Active member
411
96
28
Location
Wentzville, Missouri
Lowered 2.5"

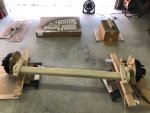
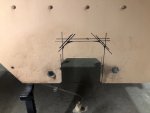
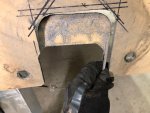
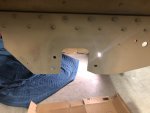
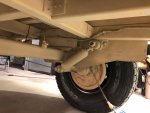
Used the Steel Soldiers "another way to lower an 1102" technique and lowered the trailer 2-1/2". This is the 4th 1102 i have lowered and it went fairly smoothly. This time i was doing an axle swap so i disconnected the brake lines completely. I moved the axle back 1/4" to center the tires a little and i am putting some weight in the back when finished. Used a jigsaw to cut out the centers for the axle.

There is still over 1.5" of travel left in the shocks after lowering and not moving the axle forward. Looking at the trailer and how close the lower shock mount is to the mount plate i believe this is more than enough travel on the shocks to not damage anything. The axle will hit its own mount in less than an inch. If you look on one of these axles you will see what i am referring to (not in the pics). I also verified that the new shocks i put on compress all the way down.

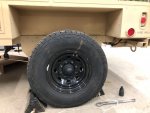
Tires are 265/75R16.

Already posted a couple of these pics in the "another way" thread.

Build9.jpeg
build18.jpeg
build19.jpeg
Build10.jpeg
build20.jpeg

Build15.jpeg
 

Overdrive

Active member
411
96
28
Location
Wentzville, Missouri
Heaters and light bracket...

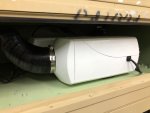
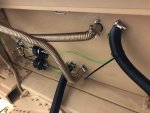
This project is going to have a roof top tent (RTT) that opens off the back of the trailer and will include a awning room under the tent that will enclose the back of the trailer. Based on that i installed two 5000 btu diesel heaters. One heats the inside of the trailer and the other has an outlet out the back of the trailer by the tailgate to hopefully heat the tented area as well as a 2nd output for inside. I have used a number of these heaters on different projects and they work well. Not as nice as the Propex propane furnace in the HSTRU trailer but going with the $100 each option instead of $800. I have torture tested these heaters in my shop and they hold up fairly well. Interestingly, the plastic version of these heaters works better than these aluminum housing ones. In my experience the aluminum holds too much heat inside and the bearings get hotter than the plastic version. I had these sitting around in the shop so in they went. I can change one out in about 30 min if needed.

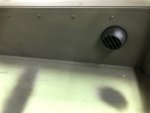
The driver side compartment is just big enough to install both heaters and ducting. In the pic with the rear heater outlet the duct from the front to the back is missing.
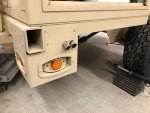
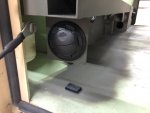
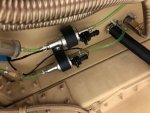
Pics of under the trailer showing the plumbing for fuel and exhaust is just a test fitting and not completed. i will protect the fuel lines and secure everything once everything is together and i verify things work the way i want them to. Two separate fuel tanks will supply each heater but i haven't worked out how i am going to mount them on the front of the trailer yet.

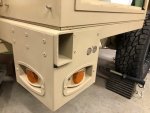
Light bracket was used from one of the parts trailers and holes cut for heater exhaust. I think i still have room to install the amber reflector somehow. the side bracket for the lights to rivet to was missing so i added a length of 2" aluminum angle all the way down the front side of the trailer. Plan is to work out some kind of vented/open cover for under the heater plumbing to protect things from road debris and major water. Not necessary but i am paranoid like that.

build22.jpeg
build24.jpeg
build25.jpeg
build29.jpeg
build30.jpeg
build26.jpeg
build28.jpeg

OD
 

Overdrive

Active member
411
96
28
Location
Wentzville, Missouri
Your project is looking awesome!

Would you mind sharing your source for the diesel heaters?

Scott
Scott,
Thanks! The heaters I purchase from eBay. I find a US seller and look over the pics of what is included. I have ordered from different sellers with good results. Most of them are around the $100 price range.

currently working on fabricating a roof rack, adding batteries, and deciding how I am going to handle water storage and plumbing.

OD
 

Overdrive

Active member
411
96
28
Location
Wentzville, Missouri
Roof Rack

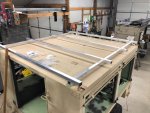
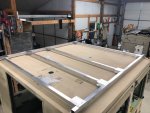
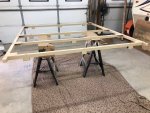
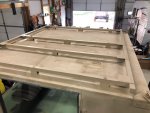
Finished up the roof rack. Made from 1/8" thick 1.5" aluminum square tube, 4" aluminum flat bar, and LOTS of 3/16" rivets. Same design as on my HSTRU trailer. I am putting a rooftop tent (RTT), 8' awning, shower awning, and solar panels on it. Went together well and seems pretty darn strong.

You can see the standoff spacers as well as the under roof reinforcements. It is bolted down and i applied RV lap sealant on the spacers where they touch the trailer roof. (not in pics)

Since the trailer box is almost a perfect square, 7'X7' i need to keep the awnings tucked in as much as possible on the sides so they don't overhang too much so the rack is 5" narrower than roof on each side.

That's my HSTRU trailer in the background.

OD

rack1.jpeg

rack2.jpeg

rack4.jpeg

rack3.jpeg

rack5.jpeg
 

Jambi8691

New member
2
0
1
Location
Toccoa, Georgia
Lowered 2.5"

Used the Steel Soldiers "another way to lower an 1102" technique and lowered the trailer 2-1/2". This is the 4th 1102 i have lowered and it went fairly smoothly. This time i was doing an axle swap so i disconnected the brake lines completely. I moved the axle back 1/4" to center the tires a little and i am putting some weight in the back when finished. Used a jigsaw to cut out the centers for the axle.

There is still over 1.5" of travel left in the shocks after lowering and not moving the axle forward. Looking at the trailer and how close the lower shock mount is to the mount plate i believe this is more than enough travel on the shocks to not damage anything. The axle will hit its own mount in less than an inch. If you look on one of these axles you will see what i am referring to (not in the pics). I also verified that the new shocks i put on compress all the way down.

Tires are 265/75R16.

Already posted a couple of these pics in the "another way" thread.

View attachment 796967
View attachment 796968
View attachment 796969
View attachment 796970
View attachment 796973

View attachment 796974
I know this is terribly late but, is there anyone that can explain this procedure?
 
Top