• Steel Soldiers now has a few new forums, read more about it at: New Munitions Forums!

  • Microsoft MSN, Live, Hotmail, Outlook email users may not be receiving emails. We are working to resolve this issue. Please add support@steelsoldiers.com to your trusted contacts.

M135 S and M Build

gentrysgarage

Active member
553
118
43
Location
Lost Angels, CA
Found this for you to digest till next weekend (My kid has his Eagle Scout project this weekend and next weekend I will be making a video of the rear axle removal and will measure both M135 and the M35 rims).
OK, here is my $0.02.

1. A stock M35 will work just fine with dual 11:00x20s bias ply tires in the rear. You WILL lose a little tire to bed clearance, so in extreme off road conditions you may end up with the tires rubbing the underside of the bed.

2. I doubt dual 11:00x20 radials will work, as stated above radials "squish" at the road contact surface which MAY cause the tires to contact each other, which is NOT a desireable condition.

3. Stock M35 rims are 7.5" wide, and can handle up to a 12:00x20 tire. This is stamped on the rims of my M35.

4. M135 rims have about 1" less backspace than a M35 rim (i.e., the mounting surface of the rim is 1" closer to the centerline of the tire than a M35 rim). You CANNOT single out your rears simply by using M135 rims on the rear.

5. To single out the rears, you MUST reverse the rear hubs. The front and rear hubs are the same part number, the front hubs are already flipped. By flipping the rear hubs, you then have the rim mounting surface the same distance from the centerline of the truck, both front and rear. Once you have flipped the rear hubs, it doesn't make much difference whether you use M35 or M135 rims, as long as you use the same front and rear. I would use M35 rims, as the M35 hubs are designed to center the tires between the inner and outer wheel bearings. M135 rims will move the centerline 1" outboard of the bearing centerline. Not much significance, but since you already have the M35 rims on your truck, you might as well use them. All that M135 rims will do at this point is give you about 2" wider track. Might make the singles in the rear a little more esthetically pleasing, but I wouldn't bother! With 11:00 or 12:00 singles in the rear, your tires will now be 5"-6" inboard of the outer edge of the bed, which makes the truck look a little odd. The M34 Eager Beaver was made with single 11:00x20s in the rear, but the bed was several inches narrower, so it looked "normal".
Also found this I wonder if the Budd part numbers show up on our rims:
" Starting with the wheels, the easy part was knowing that the 6 x 8.75" military and civilian bolt patterns were equals. Having now gone deeper, I find record of six wheels on which the military or civilian markets could have used an 11R20" radial or 11-20" bias ply tire. Two Accuride and four Budds.

The first Accuride is their #26357. It is 20" x 7.5", stud piloted, has 6.25" of positive offset, and has a "Military Standard" / "MIL STD" rim/ring design. It is listed as ORD 7389621 for the complete wheel and ring, ORD 7389620 for wheel w/o the ring, and ORD 7389061 for the ring alone.

The other Accuride is their number 27101-C. It is 20" x 7.5", hub piloted, has 6 5/16" positive offset, and has either the Firestone FL-2 or FL-3 two or three piece rim/ring sets.

The first of the Budds is their number R66280-8. It is 20" x 7.5", stud piloted, has 5 1/8" of positive offset, and has the "MIL STD" rim/ring. It alone in all these is listed as sold only to the military. Why is unclear. The "R" means radial tire approved.

The next is R69890-8 described as 20" x 7.5", stud piloted, and having 6.25" of positive offset. Again a MIL STD rim/ring.

Next is R66640-3, stud piloted, 20" x 7.5", 2.5" of positive offset, and having a Goodyear LB rim/ring.

Last is R93470-3, 20" x 7.5", hub piloted, having 3 9/16" of positive offset. It has a Goodyear LW rim/ring design.

Now for the 11" tires. Both radial and bias ply have an 8" "Design Rim Width". They are approved for use on flat base rims that are 7.5", 8.0", 8.5", and 8.50VM". Don't find what differentiates a "VM", but it doesn't matter. Both have a "Section Width" of 11.55", and "Growth Max Width In Service" of 12.47". They have "Minimum Dual Wheel Spacing" of 13.2".

Doubling the offset figure for each wheel must yield a figure equal to or greater than the dual wheel spacing figure for the tires. If your wheels were the 6.25" offset variety you could probably mount duals by adding a small spacer. But given your statements my guess is you found the 5 1/8" variety Budds. Which I fear means duals are not in the cards unless you change tires.

All this is from old print catalogs. Budd is gone, absorbed into the Hayes Lemmerz conglomerate with K-H and Motor Wheel. I'll look online at the Accuride catalogs to see if any newer versions exist. I would guess that the Accuride or Budd numbers will be stamped on your wheels to tell us what you have. If you find other numbers I'll dig deeper, or if I find online something different I'll edit. Stu"
 

Shrapnel

Just a Hoosier stuck out west!
Steel Soldiers Supporter
384
0
16
Location
Delta, UT
First off- congrats on your kid finishing up his Eagle rank! I never made it (made it to Life rank, then found cars, jobs, and girls). My oldest son is 7 and will be starting cub scouts soon.

Yes, I plan to flip the hubs and will be running singles. I was looking at the M135 wheels because they are a lot cheaper than doing MRAP wheels with adapters and I think I'll be happy enough with the "medium" sized tires that are OK for stock M35 or M135 wheels. However, they are not as cheap as the wheels I already have, so still on the fence about them. My truck has a short wheelbase (deuce tractor) and I think it would look awesome on 395's but I don't want to pay more for wheels, adapters, and tires than I paid for the truck!
 

gentrysgarage

Active member
553
118
43
Location
Lost Angels, CA
Editing Video 3! With the shorter days I am regulated to Saturday and 1/2 of Sunday to film did alot of work in "too dark to film" time that won't show up but axle removal is kinda boring/easy so you didn't miss much. Couldn't get the time lapse working this time, but will make the best of what I got!

Shrapnel, I didnt get the actual measurements but I did find my notes of my research. When I said:
Hi Shrapnel,
one 11NTD on M135 rim and one with the M35 wheel I think it was 1/2"-3/4" more inset on the m35 wheel
I was in the ballpark the difference from my notes (from countless hours of research I might add) is 6 3/16 offset (m35A2 and most other post WWII 6 lug Budd) minus 5 1/2 (M135 and I would almost bet M34 rim) equals 11/16" am not worried about the extra offset at this point. I will be using my truck as a truck, but don't anticipate loading it up to capacity (mostly building materials and part retrieval) I might try them on the front to help the turn radius in the future, but if I mount the B700 rotors on the outside its about the same.

I have a goal of keeping the weight down below 10,000#, (I will get a weight Cert before I get a bed on it to be safe!) So I will start a tally of what I remove and replace Baseline weight is 10,615 for the cab and Chassis M135.

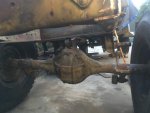
I will post some pics of the axle removal here later, but it looks like this now

IMG_0223.1.jpg

I will be getting coal for Christmas but the M135 has been lucky this year ,...mostly eBay

IMG_0230.jpg

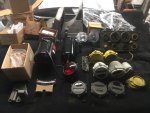
The Gamma Goat tailights were shy and hiding behind the gauge panel
I was going to make a game identifying all the parts for a chance at an XL gentrysgarage tee shirt, but it would be too hard even with the hint of the clear lens aren't for backup lights! If you want to try you have 1 week from today to submit via PM can be multiple winner (while supplies last...couldn't afford a large batch). Please let me know in this thread if you are playing and Ford Torino parts are not needed to be identified they jus photo-bombed!
 

Section8

Member
503
6
18
Location
Little Fort, B.C., Canada
What is your set back for your single axle? It sure isnt just dissected from the tandems. Looks like it is set back about a foot from where the front rear axle would be? Or rather you located it directly in the middle of where the tandams would be.
 

gentrysgarage

Active member
553
118
43
Location
Lost Angels, CA
I am keeping the rear axle in the stock location, with a 9' max bed I don't feel I will hurt the frame to much with loading that size bed up. I plan to keep the upper dogbone, but will be removing the bottom ones and "trimming" the boogie mount alittle....
 

gentrysgarage

Active member
553
118
43
Location
Lost Angels, CA
Just an update.

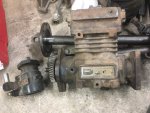
First of all I wish to thank GIDad for driving from Kingman AZ to Phoenix to pick up a Bendix 550 compressor and hydraulic pump and shipping it to me...could of sworn there were some SteelSoldiers closer....
So that was the last hard part to get...been trying literally for years to get this when this engine/trans combo was destined for the G-7123. I even paid 50.00 more than the wreaking yard quoted "we didn't make that deal" sorta thing (i have a text,that's not us,Is this your number?, yes but we would never agree to that....Arggh!)...at least its here!

The M135 diet plan is off to a great start with the rear axle and springs trimming the weight by 1178.5 pounds! M135 cab and chassis 10615#s-1178.5#s = 9436.5#s. Still need more cause it will have to have a bed and the weight of the PS system, I think the Cummins/FSO will be almost even to (maybe at most 150#s heavier) than the 302/hydromatic combo.

Also got a M35A3 jackshaft coming!

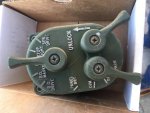
Help me to understand something...its been bugging me. Why can you buy a 3 lever headlight switch new for 62.95 and there are venders asking for almost 200.00 for used to junk switches? What am I not understanding? Is it a joke or something?

Lastly got frustrated with the movie editor for the Veteran's Day episode. I will probably make it simpler and just publish (It will
probably be rough around the seams ) the video anyway soon, as I have another episode planned!

 
Last edited:

m1010plowboy

Well-known member
Steel Soldiers Supporter
3,912
2,723
83
Location
Edmonton, Canada


Help me to understand something...its been bugging me. Why can you buy a 3 lever headlight switch new for 62.95 and there are venders asking for almost 200.00 for used to junk switches? What am I not understanding? Is it a joke or something?

Some guy is probably going around buying up all the G749 parts......the vendors are seeing a potential.....and inflate the prices.....I'm just kidding, you and I have no effect on the market prices.

What we need is a barn cleaning event and get the boys that have collected G749 parts over the years to pass their stuff to current owners. Can you imagine how many spark plugs, point sets, .....I better not start the list because it's long.........how many G749 parts got tossed out because no one wanted them. Even the latest preservationists over at Memphis.....I hear.....worked real hard to keep parts on the shelf, transmission repairs available, test stands at ready....but years with low purchases and declining interest.....well, stuff taking up shelf space has got to go.

Working with guys that have held parts for decades that either want to play the "American Picker" price negotiation game or just start with big numbers out of simple greed/ hoarding disease or other mental needs is not easy. They just keep getting older and will lose the opportunity to move their collections. They die, the estate either takes over or the kids fight over who gets stuck with cleaning up.....and green parts get tossed.

That's a part of the reason the G749 Preservation farm got started. Any parts and pieces that I find or get donated will be available for the next G749 that needs it. The farm stays in estate with the next family members, my son, nieces, nephews....... so the jokes on them and they get to fight over who's cleaning up my mess.....but the prices will be right.

When did you start editing movies?

How's the fire situation where you are?
 

gentrysgarage

Active member
553
118
43
Location
Lost Angels, CA
That's a part of the reason the G749 Preservation farm got started. Any parts and pieces that I find or get donated will be available for the next G749 that needs it. The farm stays in estate with the next family members, my son, nieces, nephews....... so the jokes on them and they get to fight over who's cleaning up my mess.....but the prices will be right.
LOL that's why the wife keeps me alive...she doesn't know how she would sell the house with all my TREASURE!

When did you start editing movies?
When I found out exactly how bad my HADD makes me look when I am trying to say something!

How's the fire situation where you are?
Was a couple of miles from me and the winds blew it north...if it blew south I would have been in trouble!
 

gentrysgarage

Active member
553
118
43
Location
Lost Angels, CA
Happy New Year Progress report.

First a pic of the a pic of the Bendix 550 Compressor and Power steering pump that GIDad drove from Kingman AZ to Phoenix for me..Thanks a hundred times sir!
IMG_0341.jpg
Also want to Thank theRooster2001 for the light switch he sold me at the RIGHT price!
IMG_0357.jpg
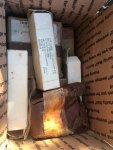
Got a care package from Mr. Tom Wolboldt!
IMG_0354.jpg

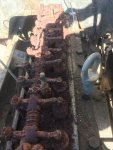
I asked for Santa to have my sons give me 2 days of work with me on the M135...and they came through! I let them loose in the engine compartment. They removed all the auxiliary attached parts of the engine..which was still locked. Got to the valve cover and this greeted us.
IMG_0392.jpg
Not very nice
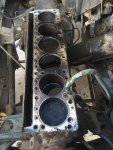
But they pulled the head and the bores weren't so bad..(already .020 last depot rebuild)
IMG_0394.jpg
Still locked up, pulled the side cover and all the lifters were rusted solid, I took over and managed to get all but 3 loose! And still locked up! Afraid I am going to break the harmonic balancer bolt..Have broken 2 BigBlock Chevys with still cranks before!
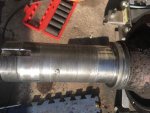
While the kids were in the front I was fighting the DPO's choice of gaskets (blue silicon instead of gaskets) on the rear axle. I guess they didn't feel the need to use grease...bearings where dry!
IMG_0393.jpg
Will have to find the my mics......
I did make a little progress on removing the spring guides on one side...should have been off YESTERDAY...but good progress either way!
 

rustystud

Well-known member
9,280
2,988
113
Location
Woodinville, Washington
Before you break the crankshaft bolt try and remove the pistons. You should be able to pound them out with a wood dowel from the bottom. I've done this many times in the past. Use lots of LPS or equivalent in the cylinders. Then see if the crank will move. It won't matter if you bugger up the pistons as you will be going oversize anyway.
 

gentrysgarage

Active member
553
118
43
Location
Lost Angels, CA
Repurposed Leveling Jack Stands and Cummins SAE 2 flywheel numbers

A little addendum to yesterdays post...

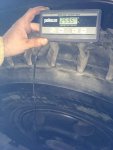
I am still in search of a weight of a 11r20 NTD tire mounted on a M135 rim...just for my weight obsession, but a G177 mounted on a M35 rim weighs 259.5 pounds

IMG_0397.jpg

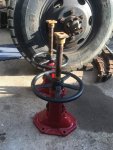
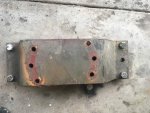
Also built my re purposed leveling stands

IMG_0384.jpg

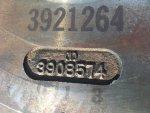
I know how hard it is to get any Cummins part numbers here is the casting and stamped number of a SAE 2 flywheel for a 6BTA

IMG_0382.jpg

Hi RustyStud,
I have done that before and the shape of the bores is in better shape than some I have done. At least they kept the engine running while it was submerged! I have soaked it in a PB Blaster/acetone mix since it arrived and I think it helped. Hoping once I free the 3 lifters it will rotate...using big channel locks and leverage yesterday...not moving/budging! But I am hopeful on saving the longblock and tranny.
 

rustystud

Well-known member
9,280
2,988
113
Location
Woodinville, Washington
A little addendum to yesterdays post...

I am still in search of a weight of a 11r20 NTD tire mounted on a M135 rim...just for my weight obsession, but a G177 mounted on a M35 rim weighs 259.5 pounds

View attachment 713999

Also built my re purposed leveling stands

View attachment 714000

I know how hard it is to get any Cummins part numbers here is the casting and stamped number of a SAE 2 flywheel for a 6BTA

View attachment 714002

Hi RustyStud,
I have done that before and the shape of the bores is in better shape than some I have done. At least they kept the engine running while it was submerged! I have soaked it in a PB Blaster/acetone mix since it arrived and I think it helped. Hoping once I free the 3 lifters it will rotate...using big channel locks and leverage yesterday...not moving/budging! But I am hopeful on saving the longblock and tranny.
If you decide not to use the old Hydra-Matic transmission, I would be interested in buying it. I also hope you can free-up that block ! It would be great if you could reuse the old pistons.
 

gentrysgarage

Active member
553
118
43
Location
Lost Angels, CA
If you decide not to use the old Hydra-Matic transmission, I would be interested in buying it. I also hope you can free-up that block ! It would be great if you could reuse the old pistons.

HiYa Rusty,
1944MB had already called first dibs on the tranny, I will put you in as second in line. I am hoping to use the 302 (with a standard transmission) in the G7123 once I have a frame/chassis (I would even consider using a WWII International frame if it wasn't so far away...Just kidding, LOL!) But it is on hold till the M135 is done.

Side note to those interested the War Supply Board had standardized the Timken and Eaton axle designs...Thus the trucks were to have standardized axles. International couldn't leave well enough alone and tweaked/beefed it a little. LOL!!! Old timers say some WWII era internals will change...but that's going on 50+ year old memories..nobody has proven it.

PS i found I had 4 lifters stuck, got 2 of them out yesterday while the boyz stared removing what was left of the interior wiring. Small progress is still progress!
 
Last edited:

gentrysgarage

Active member
553
118
43
Location
Lost Angels, CA
Well I took a serious look at the bores and came to the conclusion I would have to bore 2 cylinders at the least .010 at the most .020 more, so out came the steel shaft and the 7 pound sledge. I removed one more of the lifters and was able to raise the last one just enough to clear the cam....and....

the pounding began!

And we had movement a mm at a time so between the pounding, ruining a Harbor Freight pry bar (not a big loos) and 8 hours I got it to rotate 360*!!!!!!


YEAH BABY!!!!!!


So I removed the 723 torus bolts (OK 30 but it seemed like 723!LOL!). Now to figure out how to remove the engine and transmission on a slope! Put the overdrive gears in the transmission and drop it and the Cummins in.

Also got this from the Fed Ex guy today.

IMG_0414.jpg
 

gentrysgarage

Active member
553
118
43
Location
Lost Angels, CA
More progress 1.7.18

I realized yesterday that I am almost at the 6 month mark of having the M135 in my possession (July 25 it arrived). So filling the cylinders with the PB Blaster mix for almost 6 months just barely got it unstuck.

I also feel that the last 2 weeks have been the most productive also. It's probably due to something Big Daddy Roth said, and I paraphrase, "I build a pile yeah high and once it gets this high I start to build it till the pile goes down then I start the process again!" I borrowed his book so many times from my elementary school libary that the librarian forbade me from signing it out!

The kids got the cab stripped to the dash and that's as far as I want to go on that for now.

I in the meantime got tired of using the grinder on the spring guides, first used a sawsall with Diablo regular then carbide blades and they went dull way to quick with little progress i switched to the Porta Band.

IMG_0421.jpgIMG_0419.jpgIMG_0416.jpg

And it was slow (it was 3/4" thick afterall !) and I mangled one blade and killed two others but lot quicker and better progress than the sawsall and grinder!

Still trying to figure out how I am going to remove and replace the engine and trans on the slope. On my street it seems we have many more moms pushing baby buggies down my side of the street sidewalk (it is because of the M135 ...the kids LOVE IT!) than cars on the street so It has to be fast and safe....leaning towards a small platform with ramps on the sidewalk and renting an Aframe....But I am going to finish the rear suspension first so I have a little more time.....

Another thing that is occuping my brain is the clutch pedal assembly and the frame/cab mount interferance (I am adding power steering so the steering box is not going to be in the way but would have) ad i am kinda hung up on floor mounting the pedals.

As always comments, ideas and suggestions are much appreciated!
 

m1010plowboy

Well-known member
Steel Soldiers Supporter
3,912
2,723
83
Location
Edmonton, Canada
Did you ever get a weight on the 1100 20 tire?

They're heavy! Two of us did a tilt and lift onto the tailgate of my pick up and made it look easy so must be around that 200lb. weight.....maybe less.

Nice progress, sending you a PM so click on that orange flashing box at the top when you can.
 
Top
AdBlock Detected

We get it, advertisements are annoying!

Sure, ad-blocking software does a great job at blocking ads, but it also blocks useful features of our website like our supporting vendors. Their ads help keep Steel Soldiers going. Please consider disabling your ad blockers for the site. Thanks!

I've Disabled AdBlock
No Thanks