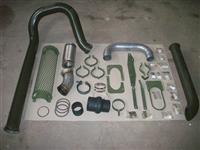
After getting all the parts, be sure to check any & all openings for obstructions, especially the turbo oil ports. Put a few drops of engine oil into the oil ports and rotate the turbo wheels, try to get a little lubricant on the moving parts before firing up the newly-turbocharged engine. Once everything is assembled and tightened down, before starting the engine, I keep the fuel turned OFF and crank the engine for 20-30 seconds twice, to try to get some oil flowing through the lines into turbo. After all is done & you've got a few test drives in, recheck all fasteners for proper torque, as the heating-cooling cycle of running the engine may result in something coming loose...better safe than sorry.
If your new exhaust manifold bolts/nuts (4 total) aren't included, they should be the same size as the old ones...also check for new gaskets/seals to be included.
One thing that concerned me on the turbo conversions I've done, is that the new flex downpipe will sit dangerously close to existing wiring on cab firewall....I like to relocate this wiring, and shield it with some older silicone hose & stainless-steel zip ties. The exhaust will be a PITA to install, leave all clamps loose until EVERYTHING is assembled in place (including J-pipe through fender, which you'll need to enlarge for it to fit), then tighten gradually together to ensure no binding & proper relief/fit.
As for the fender opening, either obtain a passenger-side fender from a parts truck or other source that already has the hole in it for the 3.5" exhaust, or SLOWLY enlarge the existing NA opening, checking for proper fit of J-pipe frequently. If you're lucky & already have the proper opening for the 3.5" J-pipe (never happened to me, I had to enlarge existing hole every time), then count your blessings. Make sure that your kits & purchases have the proper 2-piece metal pieces that bolt around J-pipe to cover the opening through it.
You will also have to trim the inner fender near the cab on the passenger side; it looks like the flex downpipe will fit without having to cut the fender, but in reality, it won't fit properly without trimming.
Make sure your purchases & kits include exhaust pipe retainers & clamps...I had to fabricate many of these on every conversion I've done, having the right ones really speeds things up.
On one Deuce of mine that came through GL at Hill AFB in Utah, the truck was converted to turbo while in military ownership; the fender was cut for relief in both places with a torch, and the hole through the fender was poorly done; it took me quite a bit of some creativity to cover it completely once I cleaned it up and re-installed J-pipe properly (and welded in a replacement section for rusted-out bottom).
FINAL NOTE: You WILL have to re-time the injection pump to its new setting on the flywheel (LDT-465-1C). On every one I've did, I've had to retard the timing slightly by moving the drive wheel one tooth, as the slots in the drive wheel didn't allow enough room to allow proper timing. The drive wheel is not pressed on, just work on it by wiggling & pulling, and it will eventually work its way free. Read through the various threads on the subject of the IP and removing/installing it, and you'll see how to properly time it to the flywheel (use the small pointer under the flat plate just next to the hydraulic head. It's not as difficult as it sounds (after all, if I can do it more than once, you shouldn't have a problem. Just be patient and triple-check EVERYTHING). Just make sure that the valves on cylinder #1 are CLOSED (Gimpyrobb has a great shortcut to avoid removing the valve covers while doing this).
And if you're also bypassing the FDC, you WILL need to turn down the fuel, using the screw & locknuts under the safety-wired tin cover on the FDC.
Something to consider is you might want to look into replacing/rebuilding components while you're this far into the project, if they haven't been done already: replace 3 O-rings on hydraulic head; replace 2 oil lines on bottom of IP (I replace with braided stainless steel oil lines every time if I find rubber lines); bypass FDC if not done already; change all 3 fuel filters; replace supply fuel line (on bottom of IP) and return fuel line; clean or replace air filter; and if you remove the hydraulic head to replace O-rings, replace the 3-leg button spring on the bottom of the plunger since you've already got it out. Removing the driver's side fender only takes a couple of hours, but makes all this work (especially changing the timing of IP to flywheel) MUCH EASIER!


